Sony SNC-DF40N User Guide - Page 29
Initialize Tab, System log Tab, Access log tab, Reboot, Factory default, Backup setting data - firmware
 |
View all Sony SNC-DF40N manuals
Add to My Manuals
Save this manual to your list of manuals |
Page 29 highlights
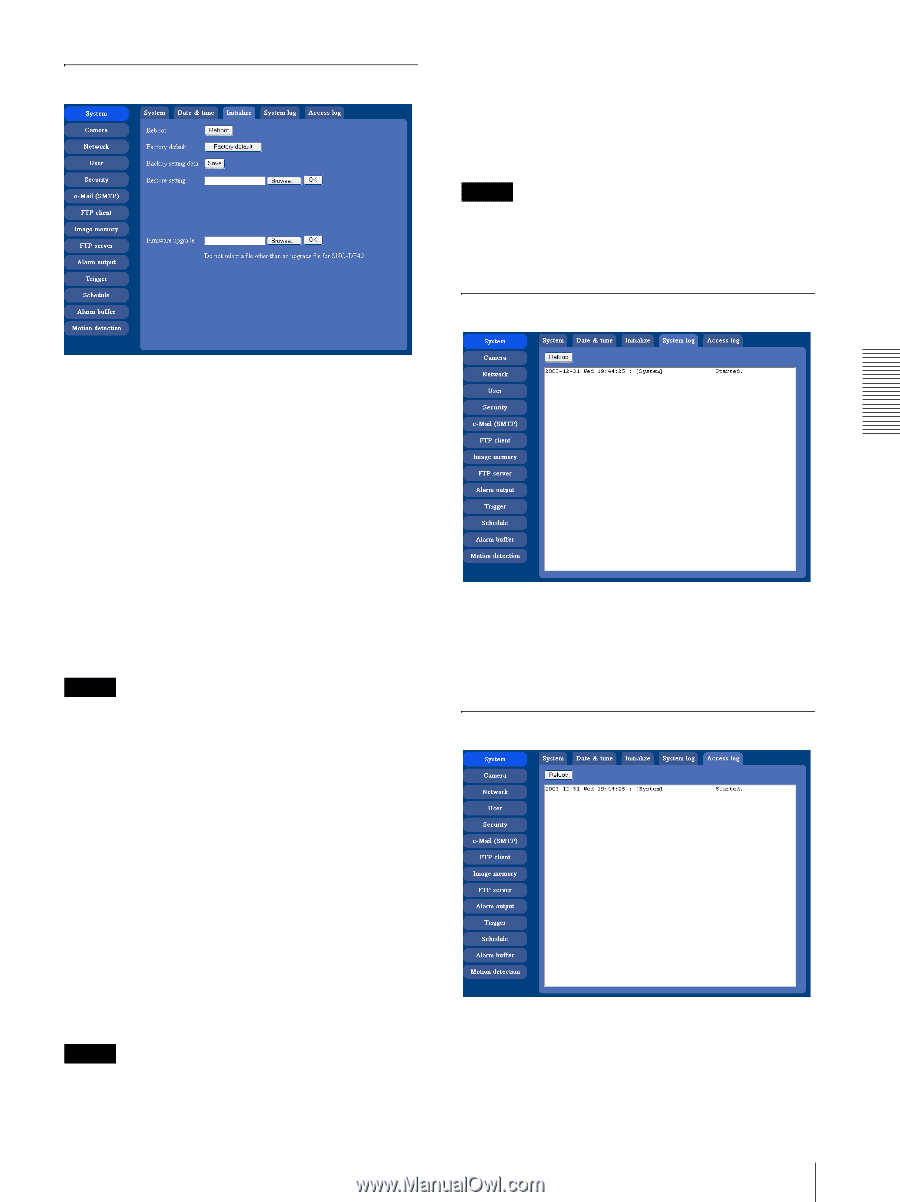
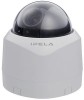
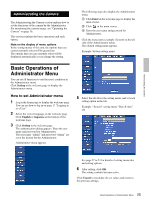
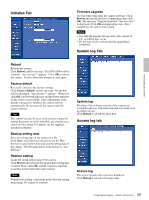
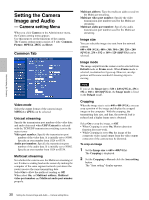
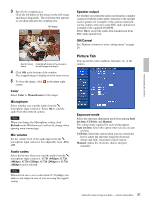
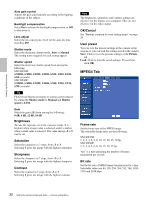
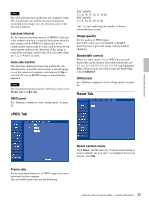
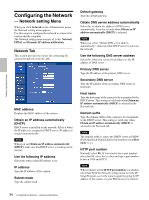
Initialize Tab Firmware upgrade Use this when upgrading the camera software. Click Browse and specify the file for upgrading, then click OK. The message "Upgrade firmware? Are you sure?" is displayed. Click OK and upgrading starts. After completion, the camera starts again. Notes • Use only the upgrade file special to this camera. If not, a problem may occur. • Do not turn off the camera until the upgrading is completed. System log Tab Administrating the Camera Reboot Reboots the camera. Click Reboot, and the message "The SNC-DF40 will be rebooted. Are you sure?" appears. Click OK to reboot the camera. It takes about two minutes to start again. Factory default Resets the camera to the factory settings. Click Factory default, and the message "Set up data will be initialized. Are you sure?" appears. When you click OK, the Network indicator and the Power indicator on the camera start to blink. After adjustments of the default settings have finished, the camera reboots automatically. Do not turn off the camera until the camera reboots. Tip The camera can also be reset to the factory settings by turning the power on of this unit while pressing the reset switch on the camera. For details, see the supplied Installation Manual. Backup setting data Saves the setting data of the camera in a file. Click Save, and follow the instructions on the Web browser to specify the folder and save the setting data of the camera. The file name preset at the factory is "sncdf40.cfg." Restore setting Loads the stored setting data of the camera. Click Browse and select the file in which the setting data is stored. Then, click OK, and the camera is adjusted according to the loaded data and restarted. Note With Restore setting, some items in the Network setting menu (page 34) cannot be restored. System log The data of the software activity of the camera are recorded in this log. It includes data that are useful when a problem occurs. Click Reload to reload the latest data. Access log tab Access log The access record of the camera is displayed. Click Reload to reload to the latest data. 29 Configuring the System - System setting menu
-
 1
1 -
2
-
3
-
4
-
5
-
6
-
7
-
8
-
9
-
10
-
11
-
12
-
13
-
14
-
15
-
16
-
17
-
18
-
19
-
20
-
21
-
22
-
23
-
 24
24 -
 25
25 -
 26
26 -
 27
27 -
 28
28 -
 29
29 -
 30
30 -
 31
31 -
 32
32 -
 33
33 -
 34
34 -
35
-
36
-
37
-
38
-
39
-
40
-
41
-
42
-
43
-
44
-
45
-
46
-
47
-
48
-
49
-
50
-
51
-
52
-
53
-
54
-
55
-
56
-
57
-
58
-
59
-
60
-
61
-
62
-
63
-
64
-
65
-
66
-
67
-
68
-
69
 |
 |