Sony SNC-DF40N User Guide - Page 57
Connecting the Camera to the Computer, Using the SNC audio upload tool, On Windows 2000
 |
View all Sony SNC-DF40N manuals
Add to My Manuals
Save this manual to your list of manuals |
Page 57 highlights
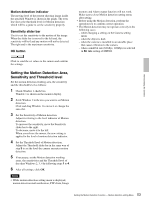
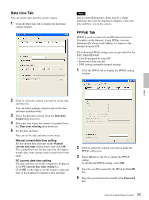
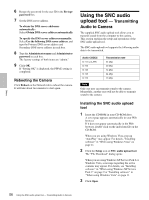
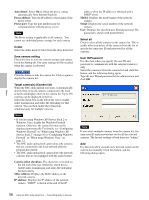
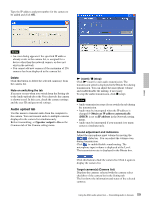
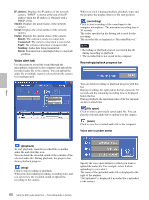
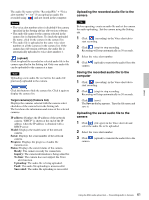
Others Note If you click "Save this program to disk" on the "File Download" dialog, you cannot install the tool correctly. Delete the downloaded file, and click the Setup icon again. 4 Install the SNC audio upload tool following the wizard displayed. If the Software License Agreement is displayed, read it carefully and accept the agreement to continue with the installation. Connecting the Camera to the Computer 1 Connect a speaker to the 5 (line output) jack on the camera. 2 Connect a microphone to the microphone input jack on the computer. Note If the microphone input jack of the computer is not set correctly, no sound is transmitted from the computer and nothing is output from the speaker connected to the camera. Set the microphone input jack from the control panel of Windows. On Windows 2000 1 Select Sounds and Multimedia from Control Panel. 2 Click Volume in the Sound Recording section on the Audio tab. The Recording Control window opens 3 Check Select in the Microphone section. On Windows XP 1 Select Sounds and Audio Device from Control Panel. 2 Click Volume in the Sound Recording section on the Audio tab. The Recording Control window opens. 3 Check Select in the Microphone section. On Windows Vista There are no settings regarding the microphone jack. If recording cannot be made, connect a microphone device to the computer and check that the recording device operates correctly, as follows. 1 Select Sound from Control Panel. 2 Open the Recording tab and check that Windows has recognized the hardware correctly. Using the SNC audio upload tool When you start the SNC audio upload tool, the Setting tab is displayed. Setting tab Use this menu to set the camera to transmit audio from a computer or upload an audio file. User Set the User ID and Password for the administrator. The factory setting of the User ID for the Administrator is "admin," and the Password is "admin." Single sign-on: Select On to use the same user ID and same password for all the cameras. Select Off to set the user ID and password individually for each camera. For the setting with Off, see "User ID/Password" on page 58. User ID: This item can be set when Single sign-on is set to On. The user ID specified here is applicable to all cameras. Password: This item can be set when Single sign-on is set to On. The administrator password specified here is applicable to all cameras. Proxy Check this box when you use a proxy server for communications. When it is not checked, direct communications with the camera is performed. 57 Using the SNC audio upload tool - Transmitting Audio to Camera
-
 1
1 -
2
-
3
-
4
-
5
-
6
-
7
-
8
-
9
-
10
-
11
-
12
-
13
-
14
-
15
-
16
-
17
-
18
-
19
-
20
-
21
-
22
-
23
-
24
-
25
-
26
-
27
-
28
-
29
-
30
-
31
-
32
-
33
-
34
-
35
-
36
-
37
-
38
-
39
-
40
-
41
-
42
-
43
-
44
-
45
-
46
-
47
-
48
-
49
-
50
-
51
-
 52
52 -
 53
53 -
 54
54 -
 55
55 -
 56
56 -
 57
57 -
 58
58 -
 59
59 -
 60
60 -
 61
61 -
 62
62 -
63
-
64
-
65
-
66
-
67
-
68
-
69
 |
 |