Sony SNC-DF40N User Guide - Page 56
Rebooting the Camera, Using the SNC audio upload tool - Transmitting Audio to Camera
 |
View all Sony SNC-DF40N manuals
Add to My Manuals
Save this manual to your list of manuals |
Page 56 highlights
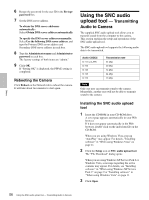
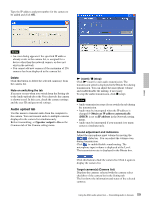
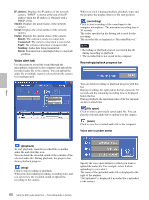
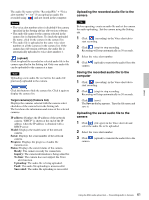
Others 6 Retype the password for the user ID in the Re-type password box. 7 Set the DNS server address. To obtain the DNS server addresses automatically: Select Obtain DNS server address automatically. To specify the DNS server addresses manually: Select Use the following DNS server address, and type the Primary DNS server address and Secondary DNS server address in each box. 8 Type the Administrator name and Administrator password in each box. The factory settings of both items are "admin." 9 Click OK. If "Setting OK" is displayed, the PPPoE setting is completed. Rebooting the Camera Click Reboot on the Network tab to reboot the camera. It will take about two minutes to start again. Using the SNC audio upload tool - Transmitting Audio to Camera The supplied SNC audio upload tool allows you to transmit sound from the computer to the camera. This section explains the setup and operations of the SNC audio upload tool. The SNC audio upload tool supports the following audio data to be transmitted. Audio CODEC G.711 (µ-LAW) G.726 G.726 G.726 G.726 Transmission rate 64 kbps 40 kbps 32 kbps 24 kbps 16 kbps Note Only one user can transmit sound to the camera. Meanwhile, another user will not be able to transmit sound to the camera. Installing the SNC audio upload tool 1 Insert the CD-ROM in your CD-ROM drive. A cover page appears automatically in your Web browser. If it does not appear automatically in the Web browser, double-click on the index.htm file on the CD-ROM. When you are using Windows Vista, pop-up "AutoPlay" may appear. For details, "Installing software" in "When using Windows Vista" on page 11. 2 Click the Setup icon of SNC audio upload tool. The "File Download" dialog opens. When you are using Windows XP Service Pack 2 or Windows Vista, a message regarding the active contents may appear. For details, see "Installing software" in "When using Windows XP Service Pack 2" on page 9 or "Installing software" in "When using Windows Vista" on page 11. 3 Click Open. 56 Using the SNC audio upload tool - Transmitting Audio to Camera
-
 1
1 -
2
-
3
-
4
-
5
-
6
-
7
-
8
-
9
-
10
-
11
-
12
-
13
-
14
-
15
-
16
-
17
-
18
-
19
-
20
-
21
-
22
-
23
-
24
-
25
-
26
-
27
-
28
-
29
-
30
-
31
-
32
-
33
-
34
-
35
-
36
-
37
-
38
-
39
-
40
-
41
-
42
-
43
-
44
-
45
-
46
-
47
-
48
-
49
-
50
-
 51
51 -
 52
52 -
 53
53 -
 54
54 -
 55
55 -
 56
56 -
 57
57 -
 58
58 -
 59
59 -
 60
60 -
 61
61 -
62
-
63
-
64
-
65
-
66
-
67
-
68
-
69
 |
 |