Stihl MS 311 User Manual - Page 76
the lever arrow points in
 |
View all Stihl MS 311 manuals
Add to My Manuals
Save this manual to your list of manuals |
Page 76 highlights
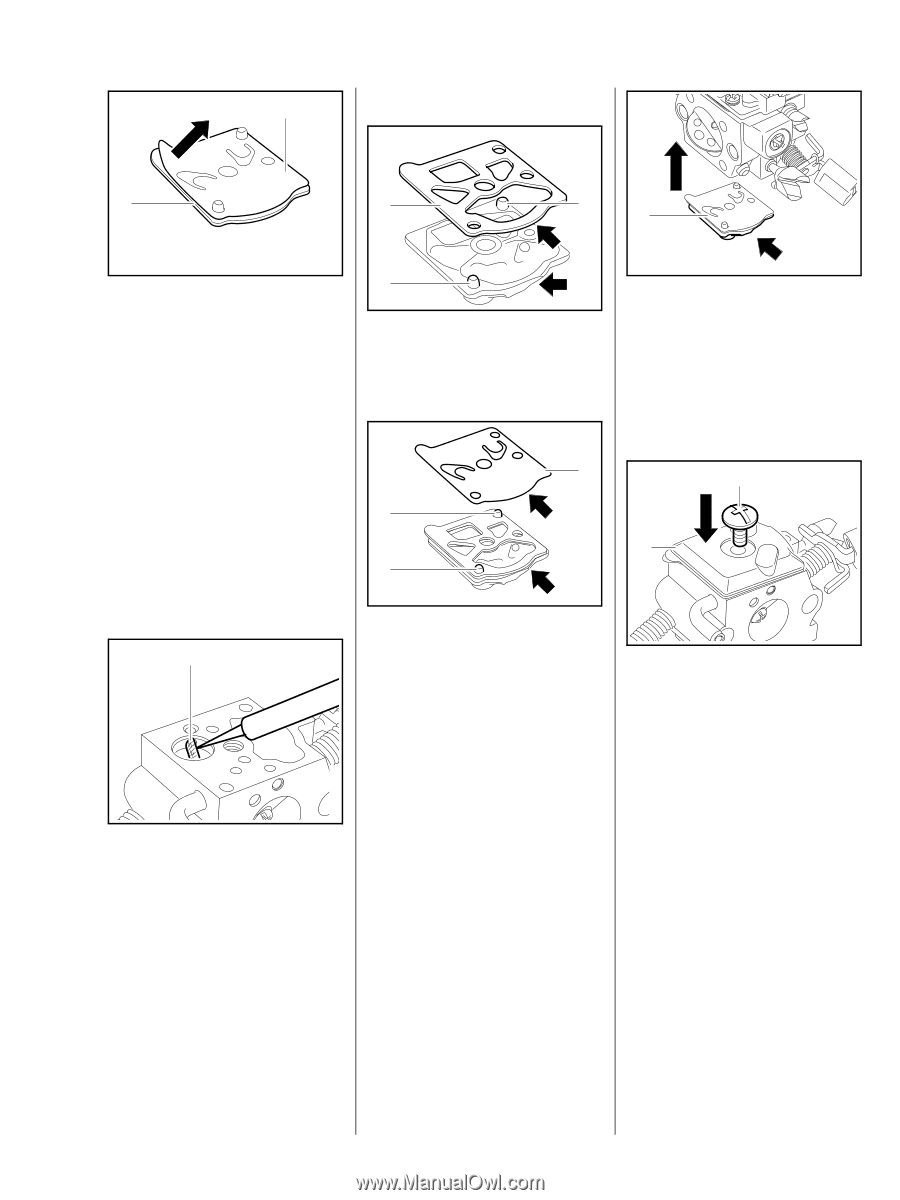
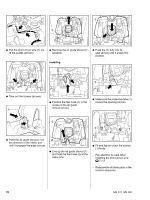
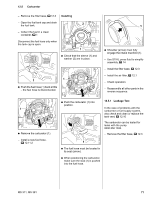
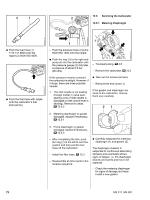
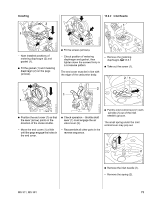
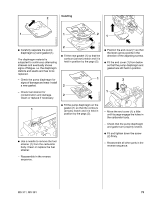
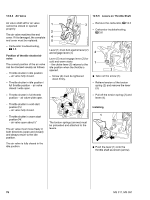
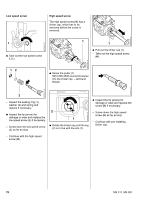
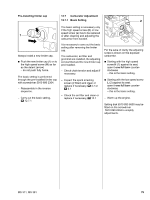
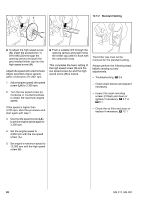
Installing 2 1 1 2 1 0001RA372 TG 4903RA262 TG 0001RA370 TG : Carefully separate the pump diaphragm (2) and gasket (1). The diaphragm material is subjected to continuous alternating stresses and eventually shows signs of fatigue. i.e. the diaphragm distorts and swells and has to be replaced. - Check the pump diaphragm for signs of damage and wear. Install a new gasket. - Check fuel strainer for contamination and damage. Clean or replace if necessary. 2 : Fit the new gasket (1) so that the contours (arrows) match and it is held in position by the pegs (2). 1 2 2 : Position the end cover (1) so that the lever (arrow) points in the direction of the adjusting screws. : Fit the end cover (1) from below so that the pump diaphragm and gasket are still held in position. 2 1 0001RA371 TG 0001RA373 TG : Fit the pump diaphragm on the 1 gasket (1) so that the contours (arrows) match and it is held in - Move the end cover (1) a little position by the pegs (2). until its pegs engage the holes in the carburetor body. : Use a needle to remove the fuel strainer (1) from the carburetor body. Clean or replace the fuel strainer. 0001RA369 TG - Check that the pump diaphragm and gasket are properly seated. : Fit and tighten down the screw (2) firmly. - Reassemble all other parts in the reverse sequence. - Reassemble in the reverse sequence. MS 311, MS 391 75
-
 1
1 -
2
-
3
-
4
-
5
-
6
-
7
-
8
-
9
-
10
-
11
-
12
-
13
-
14
-
15
-
16
-
17
-
18
-
19
-
20
-
21
-
22
-
23
-
24
-
25
-
26
-
27
-
28
-
29
-
30
-
31
-
32
-
33
-
34
-
35
-
36
-
37
-
38
-
39
-
40
-
41
-
42
-
43
-
44
-
45
-
46
-
47
-
48
-
49
-
50
-
51
-
52
-
53
-
54
-
55
-
56
-
57
-
58
-
59
-
60
-
61
-
62
-
63
-
64
-
65
-
66
-
67
-
68
-
69
-
70
-
 71
71 -
 72
72 -
 73
73 -
 74
74 -
 75
75 -
 76
76 -
 77
77 -
 78
78 -
 79
79 -
 80
80 -
 81
81 -
82
-
83
-
84
-
85
-
86
-
87
-
88
-
89
-
90
-
91
-
92
-
93
-
94
 |
 |