Yamaha PSR-8000 Owner's Manual - Page 36
Accompaniment Volume, Accompaniment Part Switching, Virtual Arranger
 |
View all Yamaha PSR-8000 manuals
Add to My Manuals
Save this manual to your list of manuals |
Page 36 highlights
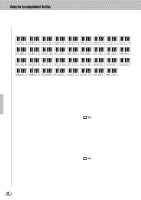
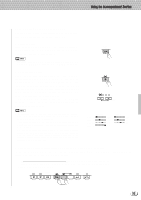
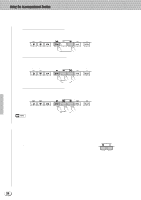
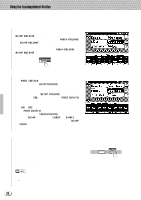
,,QQ,,QQ,,QQUsing t,,QQhe Acc,,QQompan,,QQiment S,,QQection,,QQ,,QQ,,QQ,,QQ,,QQ,,QQ,,QQ,,QQ,,QQ,,QQ,,QQ s Accompaniment Volume ...Use the various LCD dials in the MIXING CONSOLE [FADER] ACMP VOLUME display to set the best balance between the corresponding accompaniment parts. The MAIN VOLUME and ACMP VOLUME displays can be used to set the balance between the keyboard and accompaniment sound (use the [FADER] button to toggle between the MAIN VOLUME and ACMP VOLUME displays). PART s Accompaniment Part Switching ...The PART SWITCH buttons accessible via the MIXING CONSOLE [FADER] ACMP VOLUME display make it possible to individually mute accompaniment parts to create the blend and accompaniment "size" you want. With the MIXING CONSOLE [FADER] ACMP VOLUME display showing, press the LCD "SW." button to bring the PART SWITCH display to the front. Use the LCD dials to turn the corresponding accompaniment parts ON or OFF, as required. The PART SWITCH display accessed from the MIXING CONSOLE [FADER] MAIN VOLUME display additionally includes an ACMP parameter with LARGE and SMALL settings (use the [FADER] button to toggle between the ACMP and MAIN displays). These select different arrangement "sizes" (i.e. more or less parts turned on or off). s Virtual Arranger ... When the Virtual Arranger function is turned on, the AUTO ACCOMPANIMENT feature will play a more complex "arrangement" which provides livelier, more melodic accompaniment. Turn the Virtual Arranger on by pressing the [VIRTUAL ARRANGER] button so that its indicator lights. Press the [VIRTUAL ARRANGER] button again so that its indicator goes out to turn the function off. AUTO ACCOMPANIMENT • The Virtual Arranger is only effective when AUTO ACCOMPANIMENT is ON and the FULL KEYBOARD or MANUAL BASS fingering mode is not selected. • The Virtual Arranger will not work with custom styles. 36
-
 1
1 -
2
-
3
-
4
-
5
-
6
-
7
-
8
-
9
-
10
-
11
-
12
-
13
-
14
-
15
-
16
-
17
-
18
-
19
-
20
-
21
-
22
-
23
-
24
-
25
-
26
-
27
-
28
-
29
-
30
-
 31
31 -
 32
32 -
 33
33 -
 34
34 -
 35
35 -
 36
36 -
 37
37 -
 38
38 -
 39
39 -
 40
40 -
 41
41 -
42
-
43
-
44
-
45
-
46
-
47
-
48
-
49
-
50
-
51
-
52
-
53
-
54
-
55
-
56
-
57
-
58
-
59
-
60
-
61
-
62
-
63
-
64
-
65
-
66
-
67
-
68
-
69
-
70
-
71
-
72
-
73
-
74
-
75
-
76
-
77
-
78
-
79
-
80
-
81
-
82
-
83
-
84
-
85
-
86
-
87
-
88
-
89
-
90
-
91
-
92
-
93
-
94
-
95
-
96
-
97
-
98
-
99
-
100
-
101
-
102
-
103
-
104
-
105
-
106
-
107
-
108
-
109
-
110
-
111
-
112
-
113
-
114
-
115
-
116
-
117
-
118
-
119
-
120
-
121
-
122
-
123
-
124
-
125
-
126
-
127
-
128
-
129
-
130
-
131
-
132
-
133
-
134
-
135
-
136
-
137
-
138
-
139
-
140
-
141
-
142
-
143
-
144
-
145
-
146
-
147
-
148
-
149
-
150
-
151
-
152
-
153
-
154
-
155
-
156
-
157
-
158
-
159
-
160
-
161
-
162
-
163
-
164
-
165
-
166
-
167
-
168
-
169
-
170
-
171
-
172
-
173
-
174
-
175
-
176
-
177
-
178
-
179
-
180
-
181
-
182
-
183
-
184
-
185
-
186
-
187
-
188
-
189
-
190
-
191
-
192
-
193
-
194
-
195
-
196
-
197
-
198
-
199
-
200
-
201
-
202
-
203
-
204
-
205
-
206
 |
 |
