Yamaha RXV765 Owner's Manual - Page 29
Muting audio output temporarily (MUTE), Adjusting high/low frequency sound (tone control) - remote control
 |
UPC - 027108933542
View all Yamaha RXV765 manuals
Add to My Manuals
Save this manual to your list of manuals |
Page 29 highlights
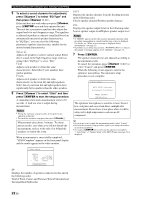
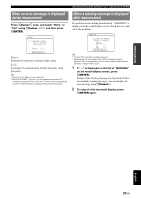
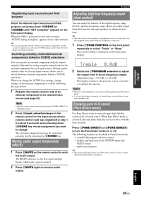
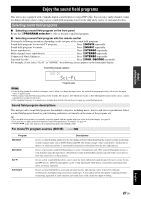
INTRODUCTION PREPARATION BASIC OPERATION Playback Registering input source/sound field program Adjusting high/low frequency sound (tone control) Select the desired input source/sound field program, and press down MSCENE (or iSCENE) until "SET Complete" appears on the front panel display. When the OSD is displayed on the video monitor, "SCENE Setting Complete" appears on the video monitor. y • If you are using the remote control for an external component, set that external component too whenever SCENE setting is performed. For more details, see the next section. Switching remotely controlled external components linked to SCENE selections You can adjust the balance of the high frequency range (Treble) and low frequency range (Bass) of sounds output from the front left and right speakers to obtain desired tone. y • The tone control of the speakers or headphones can be set separately. Set the headphone tone control with the headphones connected. 1 Press NTONE CONTROL on the front panel repeatedly to select "Treble" or "Bass." The current setting is displayed on the front panel display. You can operate an external component with the remote control of this unit by setting a remote control code for the external component for each input source. Setting remote control codes for desired input sources allows you to switch between external components linked to SCENE selections. When you change the SCENE key settings, change settings of the external component as well by following the steps below. 1 Register the remote control code of an external component to the desired input source (see page 62). Treble 0.0dB 2 Rotate the OPROGRAM selector to adjust the output level in those frequency ranges. Adjustable range: -10.0 dB to +10.0 dB The display returns to the previous screen soon after you release the selector. Notes • The tone control settings are not effective during playback in Pure Direct mode. • If you set the balance extremely off, sounds may not match those from other channels well. Note • Remote control codes cannot be registered to TUNER, SIRIUS, or XM input sources. 2 Press eInput selection keys on the remote control for the input source whose remote control code was registered in step 1 for about 3 seconds while pressing down iSCENE key whose assignment you want to change. The external component can now be controlled remotely just by selecting the iSCENE key. Muting audio output temporarily (MUTE) 1 Press uMUTE on the remote control to mute the audio output. The MUTE indicator on the front panel display flashes while audio output is muted. 2 Press uMUTE again to resume audio output. Enjoying pure hi-fi sound (Pure Direct mode) Use Pure Direct mode to enjoy the pure high fidelity sound of the selected source. When Pure Direct mode is activated, this unit plays back the selected source with the least circuitry. Press QPURE DIRECT (or hPURE DIRECT) to turn the Pure Direct mode on or off. The following features are disabled in Pure Direct mode. - sound field program and tone control - display and operation of the OPTION menu and SETUP menu - multi-zone function y • The front panel display turns off in Pure Direct mode. It turns on again when Pure Direct mode is turned off. ADVANCED OPERATION ADDITIONAL INFORMATION APPENDIX English 25 En
-
 1
1 -
2
-
3
-
4
-
5
-
6
-
7
-
8
-
9
-
10
-
11
-
12
-
13
-
14
-
15
-
16
-
17
-
18
-
19
-
20
-
21
-
22
-
23
-
 24
24 -
 25
25 -
 26
26 -
 27
27 -
 28
28 -
 29
29 -
 30
30 -
 31
31 -
 32
32 -
 33
33 -
 34
34 -
35
-
36
-
37
-
38
-
39
-
40
-
41
-
42
-
43
-
44
-
45
-
46
-
47
-
48
-
49
-
50
-
51
-
52
-
53
-
54
-
55
-
56
-
57
-
58
-
59
-
60
-
61
-
62
-
63
-
64
-
65
-
66
-
67
-
68
-
69
-
70
-
71
-
72
-
73
-
74
-
75
-
76
-
77
-
78
-
79
-
80
-
81
-
82
-
83
-
84
-
85
-
86
-
87
-
88
-
89
-
90
-
91
-
92
-
93
-
94
-
95
-
96
-
97
-
98
 |
 |