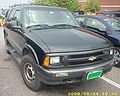
1995 Chevrolet Blazer Owner's Manual - Page 152
1995 Chevrolet Blazer Manual
Page 152 highlights
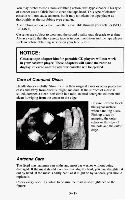
To help avoid hearing loss or damage: 1. Adjust the volume controlto the lowest setting. 2. Increase volume slowly until hear comfortably and clearly. you NOTICE: Before you add any sound equipment to your vehicle like a tape player, CB radio, mobile telephoneor two-way radio be sure you can add what want. If you can, it's very important you to doit properly. Added sound equipment may interfere the with operation of your vehicle's engine, Delco' radio or other systems, and even damage them. And, your vehicle's systems may interfere with the operationof sound equipment that has been added improperly. - - So, before adding sound equipment, check your dealer and with be sure to check Federal rules covering mobile radio and telephone units. Care of Your Cassette PIayer and Tape A tape player that is not cleaned regularly is subject to reduced sound quality, ruining the cassette, or damaging the mechanism. Tape cassettes that are not properly stored in their plastic cases away from contaminants, direct sunlight, and extremeheat, may not operate properly and could cause premature failure of the tape player. Your tape player should be cleaned with every hours of use to provide 50 optimum performance. Your radio may display "Cln" (Clean) to indicate that you have used your tape player 50 hours without re-setting the tape for clean timer. If you notice a reduction in sound quality, regardless when of the tape player was last cleaned, try playing a different cassette to see the if tape or tape playeris at fault. If the second cassette results in no improvement in sound quality,try cleaning the tape player. Proper tape player cleaning should be done with a scrubbing action, non-abrasive cleaning cassette. This isa wet-type cleaning system that uses a cleaning cassette with pads which scrub the tape head as theof the hubs cleaner cassette turn. properly clean your tape player, follow instructions To with the cleaning cassette. you use this typeof cleaner, the radio If may display an error and eject the cartridge. This is normal and is the result of an added featurein the tape player that detects broken tapes. If an error occurs, you will need to insert the cleaning cassette at leasttimes to thoroughly 3 clean the tape player. 3-18
-
 1
1 -
2
-
3
-
4
-
5
-
6
-
7
-
8
-
9
-
10
-
11
-
12
-
13
-
14
-
15
-
16
-
17
-
18
-
19
-
20
-
21
-
22
-
23
-
24
-
25
-
26
-
27
-
28
-
29
-
30
-
31
-
32
-
33
-
34
-
35
-
36
-
37
-
38
-
39
-
40
-
41
-
42
-
43
-
44
-
45
-
46
-
47
-
48
-
49
-
50
-
51
-
52
-
53
-
54
-
55
-
56
-
57
-
58
-
59
-
60
-
61
-
62
-
63
-
64
-
65
-
66
-
67
-
68
-
69
-
70
-
71
-
72
-
73
-
74
-
75
-
76
-
77
-
78
-
79
-
80
-
81
-
82
-
83
-
84
-
85
-
86
-
87
-
88
-
89
-
90
-
91
-
92
-
93
-
94
-
95
-
96
-
97
-
98
-
99
-
100
-
101
-
102
-
103
-
104
-
105
-
106
-
107
-
108
-
109
-
110
-
111
-
112
-
113
-
114
-
115
-
116
-
117
-
118
-
119
-
120
-
121
-
122
-
123
-
124
-
125
-
126
-
127
-
128
-
129
-
130
-
131
-
132
-
133
-
134
-
135
-
136
-
137
-
138
-
139
-
140
-
141
-
142
-
143
-
144
-
145
-
146
-
 147
147 -
 148
148 -
 149
149 -
 150
150 -
 151
151 -
 152
152 -
 153
153 -
 154
154 -
 155
155 -
 156
156 -
 157
157 -
158
-
159
-
160
-
161
-
162
-
163
-
164
-
165
-
166
-
167
-
168
-
169
-
170
-
171
-
172
-
173
-
174
-
175
-
176
-
177
-
178
-
179
-
180
-
181
-
182
-
183
-
184
-
185
-
186
-
187
-
188
-
189
-
190
-
191
-
192
-
193
-
194
-
195
-
196
-
197
-
198
-
199
-
200
-
201
-
202
-
203
-
204
-
205
-
206
-
207
-
208
-
209
-
210
-
211
-
212
-
213
-
214
-
215
-
216
-
217
-
218
-
219
-
220
-
221
-
222
-
223
-
224
-
225
-
226
-
227
-
228
-
229
-
230
-
231
-
232
-
233
-
234
-
235
-
236
-
237
-
238
-
239
-
240
-
241
-
242
-
243
-
244
-
245
-
246
-
247
-
248
-
249
-
250
-
251
-
252
-
253
-
254
-
255
-
256
-
257
-
258
-
259
-
260
-
261
-
262
-
263
-
264
-
265
-
266
-
267
-
268
-
269
-
270
-
271
-
272
-
273
-
274
-
275
-
276
-
277
-
278
-
279
-
280
-
281
-
282
-
283
-
284
-
285
-
286
-
287
-
288
-
289
-
290
-
291
-
292
-
293
-
294
-
295
-
296
-
297
-
298
-
299
-
300
-
301
-
302
-
303
-
304
-
305
-
306
-
307
-
308
-
309
-
310
-
311
-
312
-
313
-
314
-
315
-
316
-
317
-
318
-
319
-
320
-
321
-
322
-
323
-
324
-
325
-
326
-
327
-
328
-
329
-
330
-
331
-
332
-
333
-
334
-
335
-
336
-
337
-
338
-
339
-
340
-
341
-
342
-
343
-
344
-
345
-
346
-
347
-
348
-
349
-
350
-
351
-
352
-
353
-
354
-
355
-
356
-
357
-
358
-
359
-
360
-
361
-
362
-
363
-
364
-
365
-
366
-
367
-
368
-
369
-
370
-
371
-
372
-
373
-
374
-
375
-
376
-
377
-
378
-
379
-
380
 |
 |