3Ware 9550SXU-12 User Guide - Page 150
Removing a Unit Through 3BM, Moving a Unit from One Controller to Another
 |
UPC - 693494970128
View all 3Ware 9550SXU-12 manuals
Add to My Manuals
Save this manual to your list of manuals |
Page 150 highlights
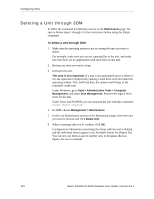
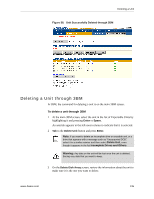
Configuring Units If you change your mind before physically removing the drives and want to reuse the drives and unit on the current controller, just click Rescan Controller. Removing a Unit Through 3BM Note: Even though removing a unit is supported in 3BM, you can also simply power down to remove the applicable drives since you are not booted yet. To remove a unit through 3BM 1 If your drives are not in hot swap bays, you do not need to remove a unit via 3BM. Simply power down and remove the applicable drives. Refer to your system's user guide for details on removing fixed disks. Warning: Physically removing drives which are not in hot swap bays can result in a system hang or may even damage the system and the drive. 2 At the main 3BM screen, highlight the unit you want to remove and press Enter to select it. An asterisk appears in the left-most column to indicate that the unit is selected. 3 Tab to the Maintain Unit button and press Enter. 4 In the pop-up menu, select Remove and press Enter. You can now physically remove the drives and move them to another controller. If your drives are in hot swap bays, you can do this without shutting down the system. Moving a Unit from One Controller to Another After you have configured a unit on a 3ware 9000 series controller, you can move it to a different 3ware 9000 series controller, and retain the configuration on the new controller. This is referred to as "array roaming." When connecting the unit to the new controller, you do not have to physically connect the drives to the same physical slots to which they were connected on the previous controller. The firmware will still recognize the unit. This feature is referred to as "disk roaming." 138 3ware SAS/SATA RAID Software User Guide, Version 9.5.1
-
 1
1 -
2
-
3
-
4
-
5
-
6
-
7
-
8
-
9
-
10
-
11
-
12
-
13
-
14
-
15
-
16
-
17
-
18
-
19
-
20
-
21
-
22
-
23
-
24
-
25
-
26
-
27
-
28
-
29
-
30
-
31
-
32
-
33
-
34
-
35
-
36
-
37
-
38
-
39
-
40
-
41
-
42
-
43
-
44
-
45
-
46
-
47
-
48
-
49
-
50
-
51
-
52
-
53
-
54
-
55
-
56
-
57
-
58
-
59
-
60
-
61
-
62
-
63
-
64
-
65
-
66
-
67
-
68
-
69
-
70
-
71
-
72
-
73
-
74
-
75
-
76
-
77
-
78
-
79
-
80
-
81
-
82
-
83
-
84
-
85
-
86
-
87
-
88
-
89
-
90
-
91
-
92
-
93
-
94
-
95
-
96
-
97
-
98
-
99
-
100
-
101
-
102
-
103
-
104
-
105
-
106
-
107
-
108
-
109
-
110
-
111
-
112
-
113
-
114
-
115
-
116
-
117
-
118
-
119
-
120
-
121
-
122
-
123
-
124
-
125
-
126
-
127
-
128
-
129
-
130
-
131
-
132
-
133
-
134
-
135
-
136
-
137
-
138
-
139
-
140
-
141
-
142
-
143
-
144
-
 145
145 -
 146
146 -
 147
147 -
 148
148 -
 149
149 -
 150
150 -
 151
151 -
 152
152 -
 153
153 -
 154
154 -
 155
155 -
156
-
157
-
158
-
159
-
160
-
161
-
162
-
163
-
164
-
165
-
166
-
167
-
168
-
169
-
170
-
171
-
172
-
173
-
174
-
175
-
176
-
177
-
178
-
179
-
180
-
181
-
182
-
183
-
184
-
185
-
186
-
187
-
188
-
189
-
190
-
191
-
192
-
193
-
194
-
195
-
196
-
197
-
198
-
199
-
200
-
201
-
202
-
203
-
204
-
205
-
206
-
207
-
208
-
209
-
210
-
211
-
212
-
213
-
214
-
215
-
216
-
217
-
218
-
219
-
220
-
221
-
222
-
223
-
224
-
225
-
226
-
227
-
228
-
229
-
230
-
231
-
232
-
233
-
234
-
235
-
236
-
237
-
238
-
239
-
240
-
241
-
242
-
243
-
244
-
245
-
246
-
247
-
248
-
249
-
250
-
251
-
252
-
253
-
254
-
255
-
256
-
257
-
258
-
259
-
260
-
261
-
262
-
263
-
264
-
265
-
266
-
267
-
268
-
269
-
270
-
271
-
272
-
273
-
274
-
275
-
276
-
277
-
278
-
279
-
280
-
281
-
282
-
283
-
284
-
285
-
286
-
287
-
288
-
289
-
290
-
291
-
292
-
293
-
294
-
295
-
296
-
297
-
298
-
299
-
300
-
301
-
302
-
303
-
304
-
305
-
306
-
307
-
308
-
309
-
310
-
311
-
312
-
313
-
314
-
315
-
316
-
317
-
318
-
319
-
320
-
321
-
322
-
323
-
324
-
325
-
326
-
327
-
328
-
329
-
330
-
331
-
332
-
333
-
334
-
335
-
336
-
337
-
338
-
339
-
340
-
341
-
342
-
343
-
344
-
345
-
346
-
347
-
348
-
349
-
350
-
351
-
352
-
353
-
354
-
355
-
356
-
357
-
358
-
359
-
360
-
361
 |
 |
