Brother International LK3-B432E MKII Instruction Manual - English - Page 21
. Installing the V-belt, The V-belt
 |
View all Brother International LK3-B432E MKII manuals
Add to My Manuals
Save this manual to your list of manuals |
Page 21 highlights
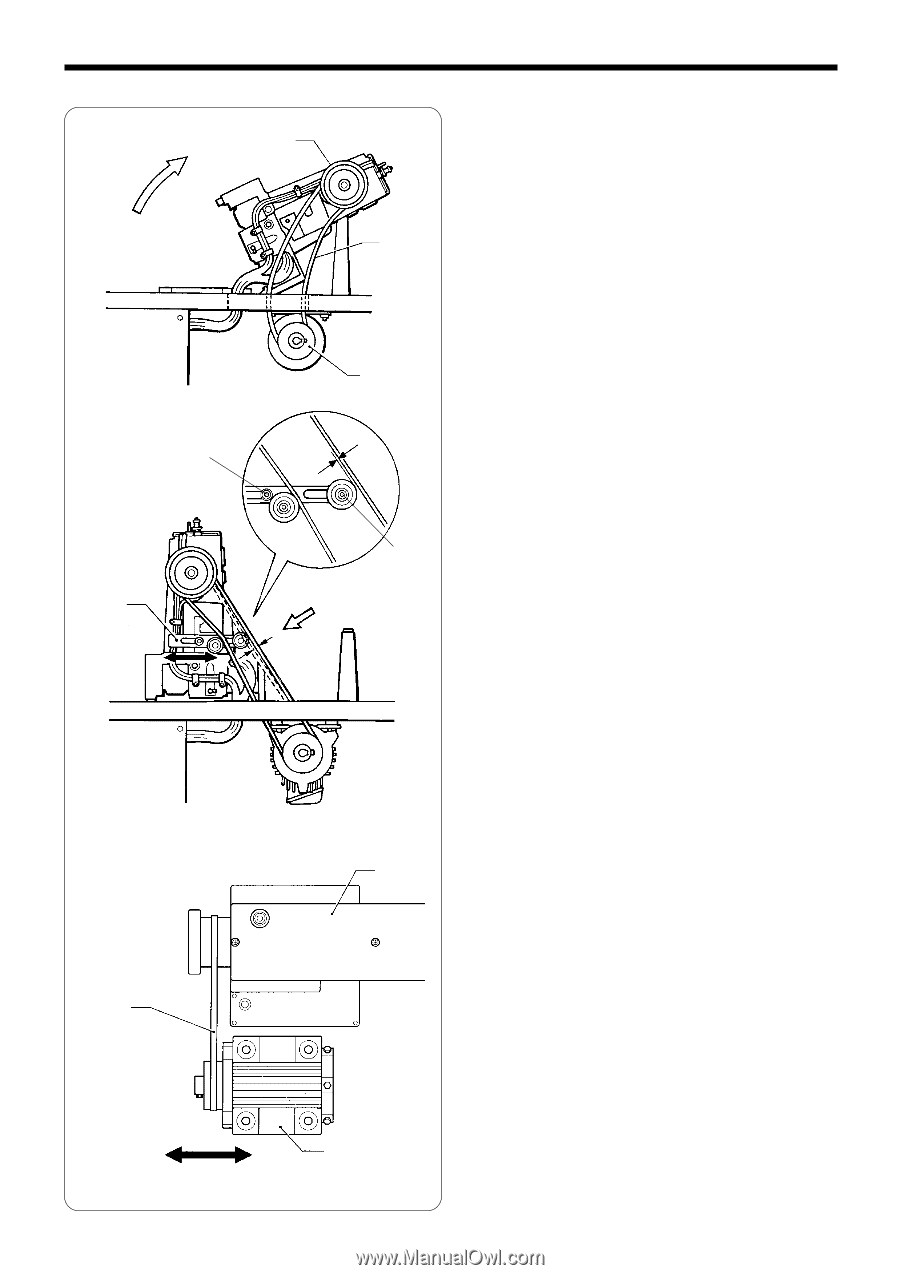
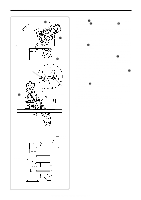
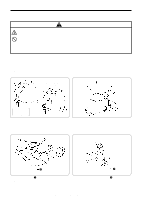
3. INSTALLATION 3-14 . Installing the V-belt w q e A Approx. 1mm B r Approx. 9-10mm 10N 1. Gently tilt back the machine head, and then place the V-belt q into the V grooves on the machine head pulley w and the motor pulley e. NOTE: After tilting back the machine head, do not push the face plate side or the pulley side from above. 2. Gently return the machine head to its original po- sition. * Be careful not to clamp the cords at this time. 3. Provisionally install the accessory tension pulley assembly r with the accessory flat washer, spring washer and bolt. 4. Adjust the belt tension by moving the tension pul- ley assembly to the right and left so that there is 9-10 mm of deflection in the V-belt q when it is gently pushed in the middle with a force of ap- proximately 10 N. After adjusting, tighten the bolt A to secure the left pulley assembly. 5. Move the right tension pulley so that there is a gap of about 1 mm between it and the V-belt q, and then tighten the bolt B to secure the right pulley assembly. NOTE: Use brother specified V-belt (belt, VM). The V-belt q may stretch slightly when it is first used, so adjust the belt tension after about 3,000 cycles of use. When above belt tension is week, this will be cause of following problems; • Noise & vibration become large. • Needle up stop position becomes unstable. • Error message [E-50] is displayed. Check that the motor is positioned so that the V- belt is straight. (Fig.1) V-belt 15 Sewing machine Motor Fig.1 LK3-B430E-, B431E-, B432E-, B433E- Mark II
-
 1
1 -
2
-
3
-
4
-
5
-
6
-
7
-
8
-
9
-
10
-
11
-
12
-
13
-
14
-
15
-
 16
16 -
 17
17 -
 18
18 -
 19
19 -
 20
20 -
 21
21 -
 22
22 -
 23
23 -
 24
24 -
 25
25 -
 26
26 -
27
-
28
-
29
-
30
-
31
-
32
-
33
-
34
-
35
-
36
-
37
-
38
-
39
-
40
-
41
-
42
-
43
-
44
-
45
-
46
-
47
-
48
-
49
-
50
-
51
-
52
-
53
-
54
-
55
-
56
-
57
-
58
-
59
-
60
-
61
-
62
-
63
-
64
-
65
-
66
-
67
-
68
-
69
-
70
-
71
-
72
-
73
 |
 |