Brother International LK3-B432E MKII Instruction Manual - English - Page 51
. DIP switches inside the control box
 |
View all Brother International LK3-B432E MKII manuals
Add to My Manuals
Save this manual to your list of manuals |
Page 51 highlights
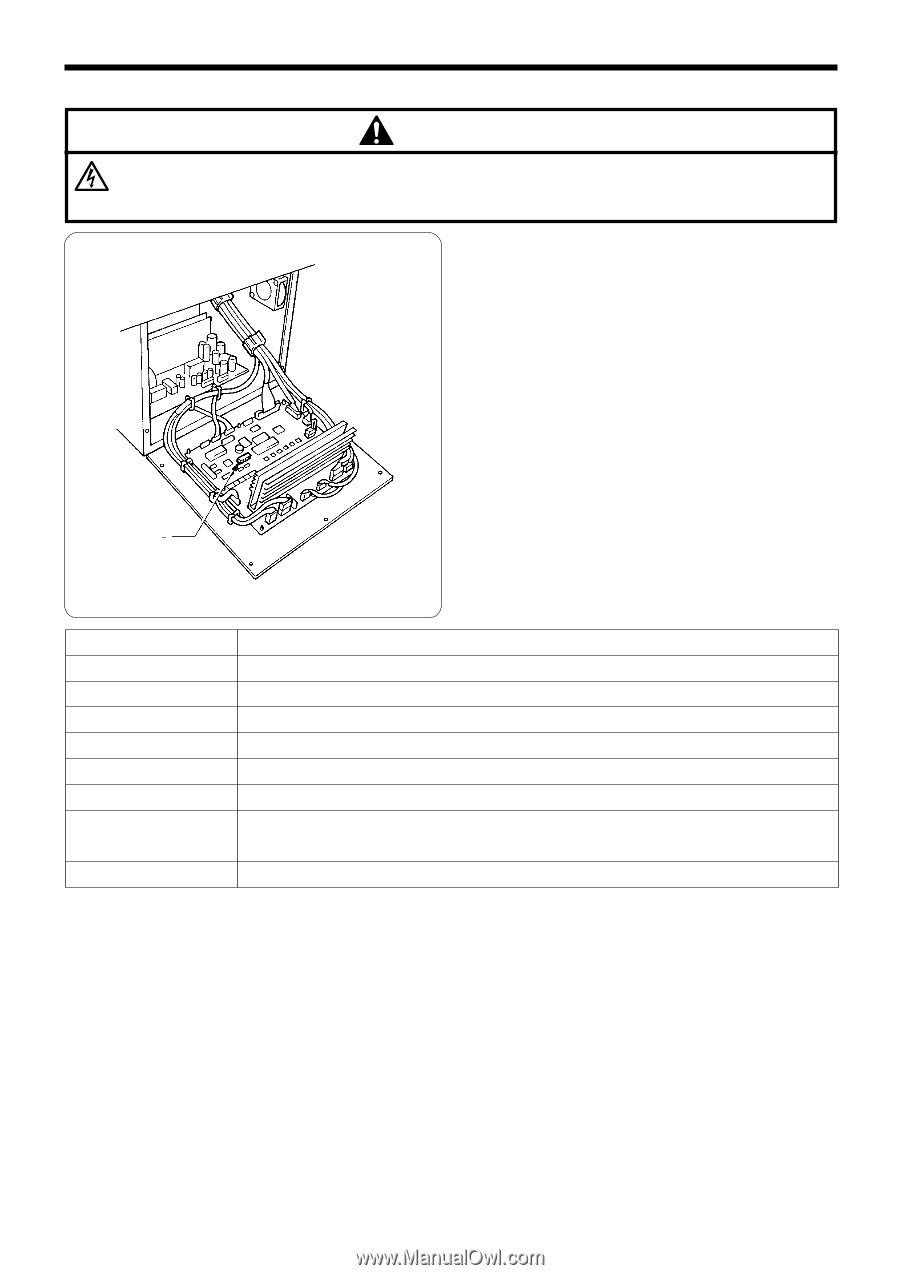
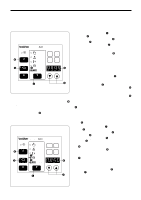
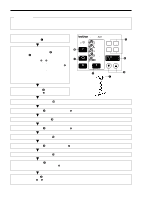
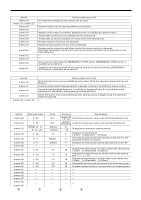
12 . CHANGING FUNCTIONS USING THE DIP SWITCHES 12-3 . DIP switches inside the control box DANGER Wait at least 5 minutes after turning off the power switch and disconnecting the power cord from the wall outlet before opening the face plate of the control box. Touching areas where high voltages are present can result in severe injury. The DIP switches q inside the control box are used to change functions which do not often need to be changed once they have been set. The functions can be changed as shown in the table below by changing the positions of the DIP switches q. * All DIP switches are set to OFF at the time of ship- ment. NOTE: When opening the cover, hold it securely so that it does not fall down. q Switch DIPB-1 DIPB-2 DIPB-3 DIPB-4 DIPB-5 DIPB-6 Motion when set to ON First two stitches are sewn at a low speed of 260 rpm. Last two stitches are sewn at a low speed of 260 rpm. - Last two stitches are sewn at a low speed of 700 rpm. First two stitches are sewn at a low speed of 400 rpm. Low speed sewing is not performed at the start of sewing. DIPB-7 The motor operates in reverse when the upper shaft stops, to return the needle bar to close to its highest position. *NOTE DIPB-8 Area checking of the sewing data is not carried out. *NOTE: When the motor operates in reverse to raise the needle, the thread take-up will stop at a position which is lower than its normal stopping position. As a result, the thread take-up will rise slightly at the sewing start, and this may result in the thread pulling out under certain coditions. 45 LK3-B430E-, B431E-, B432E-, B433E- Mark II
-
 1
1 -
2
-
3
-
4
-
5
-
6
-
7
-
8
-
9
-
10
-
11
-
12
-
13
-
14
-
15
-
16
-
17
-
18
-
19
-
20
-
21
-
22
-
23
-
24
-
25
-
26
-
27
-
28
-
29
-
30
-
31
-
32
-
33
-
34
-
35
-
36
-
37
-
38
-
39
-
40
-
41
-
42
-
43
-
44
-
45
-
 46
46 -
 47
47 -
 48
48 -
 49
49 -
 50
50 -
 51
51 -
 52
52 -
 53
53 -
 54
54 -
 55
55 -
 56
56 -
57
-
58
-
59
-
60
-
61
-
62
-
63
-
64
-
65
-
66
-
67
-
68
-
69
-
70
-
71
-
72
-
73
 |
 |