Brother International LK3-B432E MKII Instruction Manual - English - Page 29
CORRECT USE, 7-1 . Selecting the needle and thread, 7-2 . Installing the needle
 |
View all Brother International LK3-B432E MKII manuals
Add to My Manuals
Save this manual to your list of manuals |
Page 29 highlights
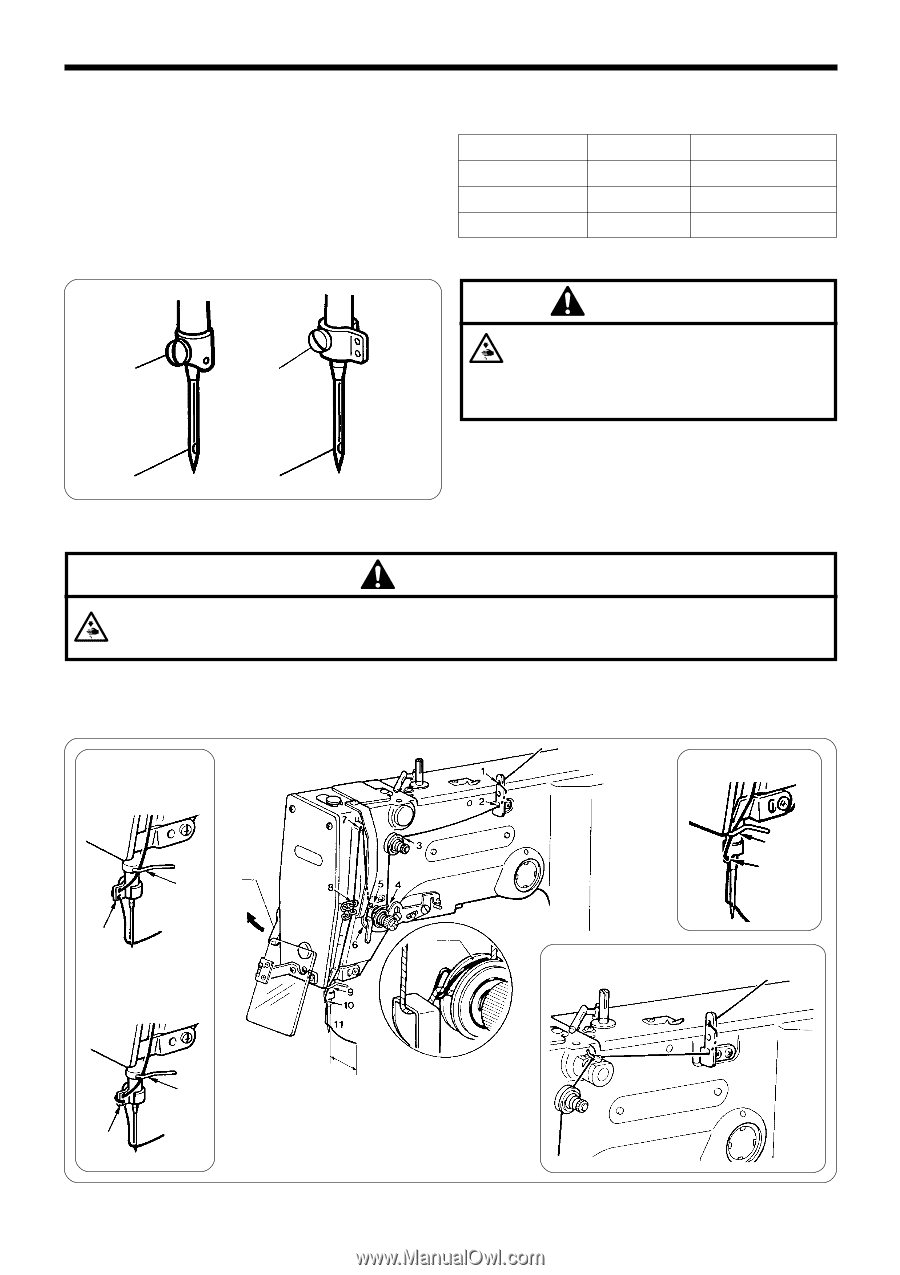
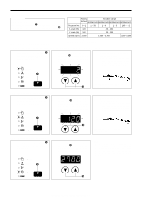
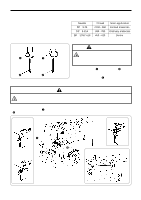
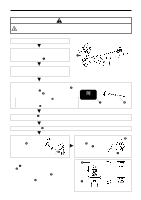
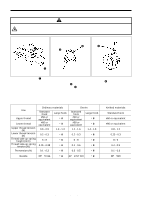
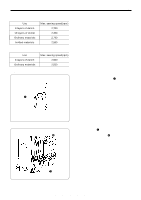
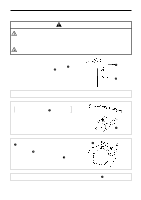
7. CORRECT USE 7. CORRECT USE 7-1 . Selecting the needle and thread Different needles and threads are used for different sewing applications. Refer to the table at right for details on which needle and thread to select. 7-2 . Installing the needle Needle DP × 5 #9 DP × 5 #14 DP × 17NY #19 Thread #100 - #60 #80 - #50 #50 - #20 Main application Knitted materials Ordinary materials Denim CAUTION q q Turn off the power switch before installing the needle, otherwise the machine may operate of the foot switch is depressed by mistake and serious injury could result. w w Loosen the set screw q, insert the needle w as far as it will go so that the groove is facing toward you (for the B431E Mark II, the groove is on the left side), and then tighten the set screw q. 7-3 . Threading the upper thread CAUTION Turn off the power switch before threading the thread, otherwise the machine may operate if the foot switch is depressed by mistake and serious injury could result. Thread the upper thread correctly as shown in the illustration below. * If the tension release lever q is raised in the direction of the arrow, it will be easier to open the tension disc w and pull the thread through. [Two holes] Spun rayon yarn [One hole] 9 q 11 10 Synthetic thread 9 10 11 w [When using the liquid cooling tank] 9 11 10 Approx. 40mm 23 LK3-B430E-, B431E-, B432E-, B433E- Mark II
-
 1
1 -
2
-
3
-
4
-
5
-
6
-
7
-
8
-
9
-
10
-
11
-
12
-
13
-
14
-
15
-
16
-
17
-
18
-
19
-
20
-
21
-
22
-
23
-
 24
24 -
 25
25 -
 26
26 -
 27
27 -
 28
28 -
 29
29 -
 30
30 -
 31
31 -
 32
32 -
 33
33 -
 34
34 -
35
-
36
-
37
-
38
-
39
-
40
-
41
-
42
-
43
-
44
-
45
-
46
-
47
-
48
-
49
-
50
-
51
-
52
-
53
-
54
-
55
-
56
-
57
-
58
-
59
-
60
-
61
-
62
-
63
-
64
-
65
-
66
-
67
-
68
-
69
-
70
-
71
-
72
-
73
 |
 |