Brother International PC-3000 Users Manual - English - Page 13
Screen - manual
 |
View all Brother International PC-3000 manuals
Add to My Manuals
Save this manual to your list of manuals |
Page 13 highlights
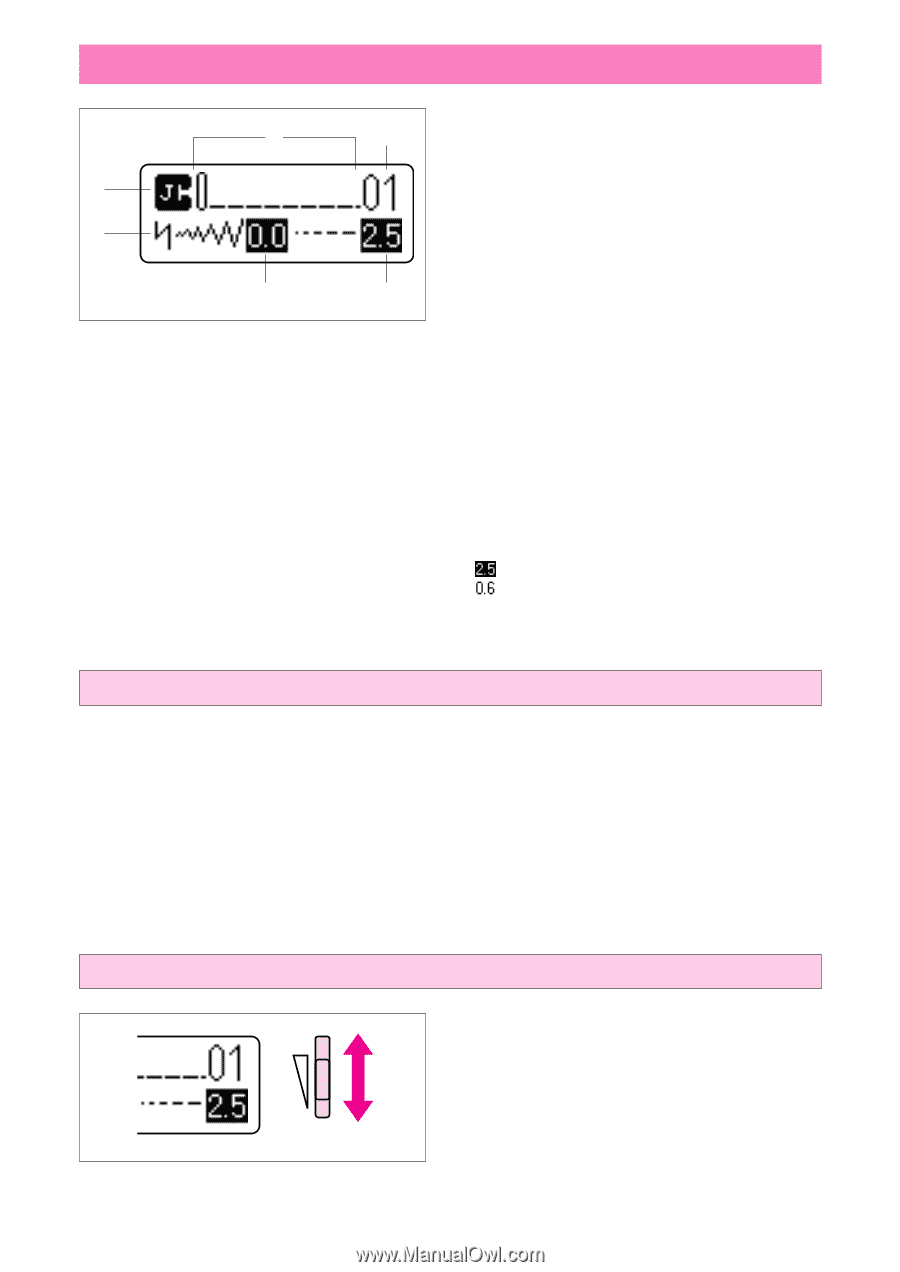
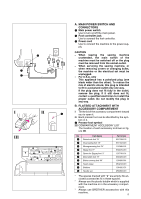
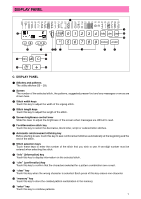
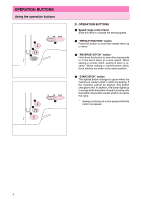
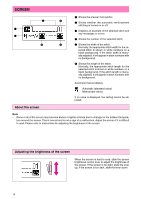
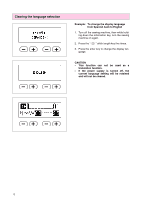
SCREEN 1 Shows the presser foot symbol. 3 4 2 Shows whether the automatic reinforcement stitching is turned on or off. 1 3 Displays an example of the selected stitch and any messages or errors. 2 4 Shows the number of the selected stitch. 5 6 5 Shows the width of the stitch. Normally, the appropriate stitch width for the se- lected stitch is shown in white numbers on a black background. If the stitch width is manu- ally adjusted, it will appear in black numbers with no background. 6 Shows the length of the stitch. Normally, the appropriate stitch length for the selected stitch is shown in white numbers on a black background. If the stitch length is manually adjusted, it will appear in black numbers with no background. Automatic/manual display Automatic (standard value) Manual (set value) If no value is displayed, the setting cannot be adjusted. About the screen Note - Some or all of the screen may become darker or lighter at times due to changes in the ambient tempera- ture around the screen. This is normal and is not a sign of a malfunction. Adjust the screen if it is difficult to read. Please refer to instructions for adjusting the brightness of the screen. Adjusting the brightness of the screen When the screen is hard to read, slide the screen brightness control lever to adjust the brightness of the screen. If the screen is too light, slide the lever up; if the screen is too dark, slide the lever down. 10
-
 1
1 -
2
-
3
-
4
-
5
-
6
-
7
-
 8
8 -
 9
9 -
 10
10 -
 11
11 -
 12
12 -
 13
13 -
 14
14 -
 15
15 -
 16
16 -
 17
17 -
 18
18 -
19
-
20
-
21
-
22
-
23
-
24
-
25
-
26
-
27
-
28
-
29
-
30
-
31
-
32
-
33
-
34
-
35
-
36
-
37
-
38
-
39
-
40
-
41
-
42
-
43
-
44
-
45
-
46
-
47
-
48
-
49
-
50
-
51
-
52
-
53
-
54
-
55
-
56
-
57
-
58
-
59
-
60
-
61
-
62
-
63
-
64
-
65
-
66
-
67
-
68
-
69
-
70
-
71
-
72
-
73
-
74
-
75
-
76
-
77
-
78
-
79
-
80
-
81
-
82
-
83
-
84
-
85
-
86
-
87
-
88
-
89
-
90
-
91
-
92
-
93
-
94
-
95
-
96
-
97
-
98
-
99
-
100
-
101
-
102
-
103
-
104
 |
 |