Brother International PC-3000 Users Manual - English - Page 62
Reverse side, Right side of fabric
 |
View all Brother International PC-3000 manuals
Add to My Manuals
Save this manual to your list of manuals |
Page 62 highlights
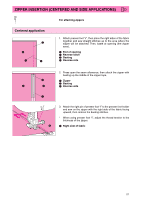
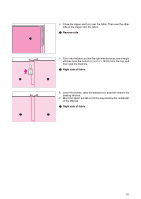
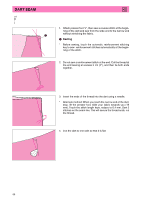
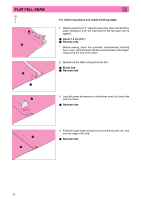
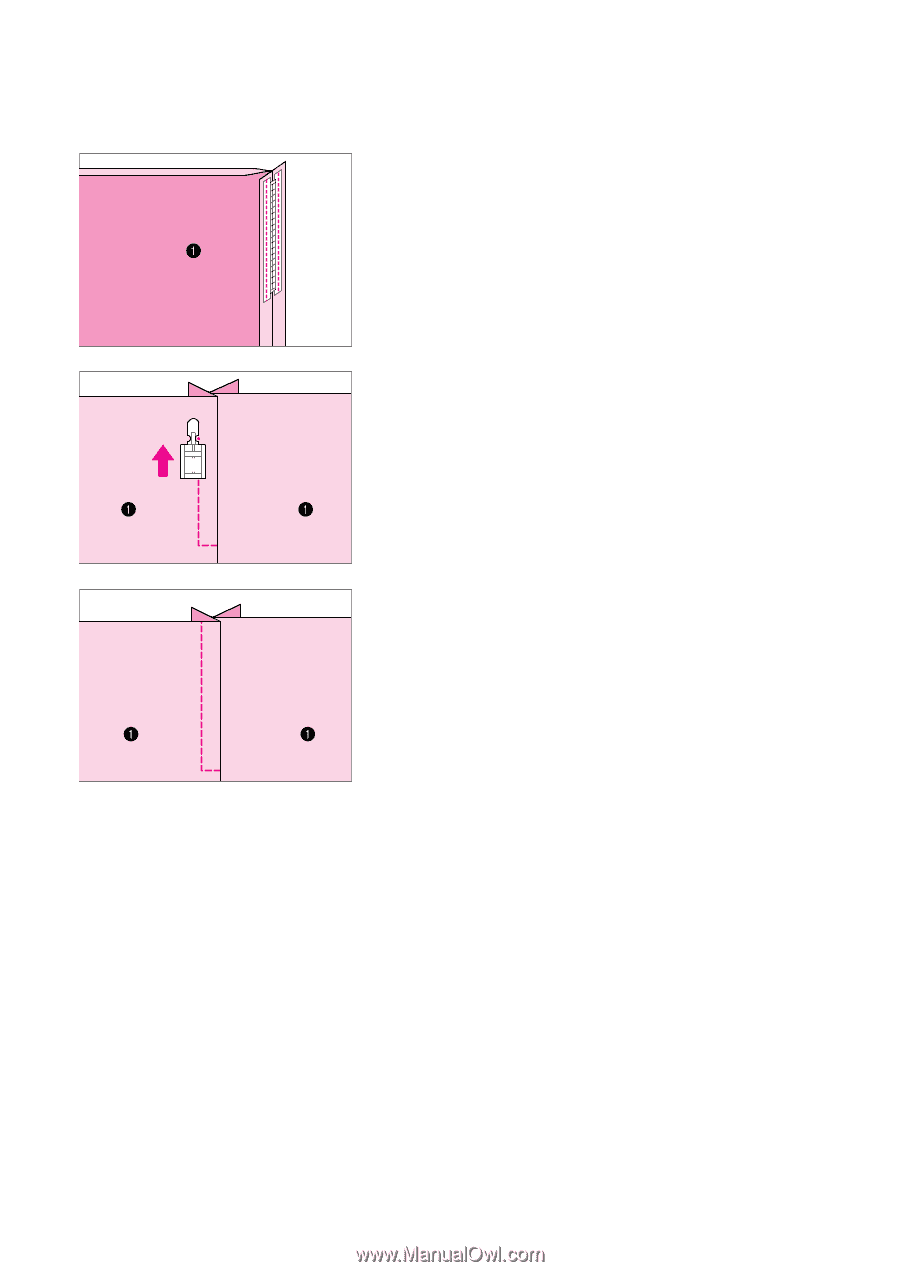
4. Close the zipper and turn over the fabric. Then sew the other side of the zipper onto the fabric. 1 Reverse side 5. Turn over the fabric so that the right side faces up, sew straight stitches from the bottom to 5 cm (1-15/16) from the top, and then stop the machine. 1 Right side of fabric I 6. Lower the needle, raise the presser foot, and then remove the basting stitches. 7. Move the zipper pull tab out of the way and sew the remainder of the stitches. 1 Right side of fabric 59
-
 1
1 -
2
-
3
-
4
-
5
-
6
-
7
-
8
-
9
-
10
-
11
-
12
-
13
-
14
-
15
-
16
-
17
-
18
-
19
-
20
-
21
-
22
-
23
-
24
-
25
-
26
-
27
-
28
-
29
-
30
-
31
-
32
-
33
-
34
-
35
-
36
-
37
-
38
-
39
-
40
-
41
-
42
-
43
-
44
-
45
-
46
-
47
-
48
-
49
-
50
-
51
-
52
-
53
-
54
-
55
-
56
-
 57
57 -
 58
58 -
 59
59 -
 60
60 -
 61
61 -
 62
62 -
 63
63 -
 64
64 -
 65
65 -
 66
66 -
 67
67 -
68
-
69
-
70
-
71
-
72
-
73
-
74
-
75
-
76
-
77
-
78
-
79
-
80
-
81
-
82
-
83
-
84
-
85
-
86
-
87
-
88
-
89
-
90
-
91
-
92
-
93
-
94
-
95
-
96
-
97
-
98
-
99
-
100
-
101
-
102
-
103
-
104
 |
 |
59
4.
Close the zipper and turn over the fabric. Then sew the other
side of the zipper onto the fabric.
1
Reverse side
5.
Turn over the fabric so that the right side faces up, sew straight
stitches from the bottom to 5 cm (1-15/16) from the top, and
then stop the machine.
1
Right side of fabric
6.
Lower the needle, raise the presser foot, and then remove the
basting stitches.
7.
Move the zipper pull tab out of the way and sew the remainder
of the stitches.
1
Right side of fabric
I