Brother International PC-3000 Users Manual - English - Page 75
Hem-stitch Heirloom Stitch
 |
View all Brother International PC-3000 manuals
Add to My Manuals
Save this manual to your list of manuals |
Page 75 highlights
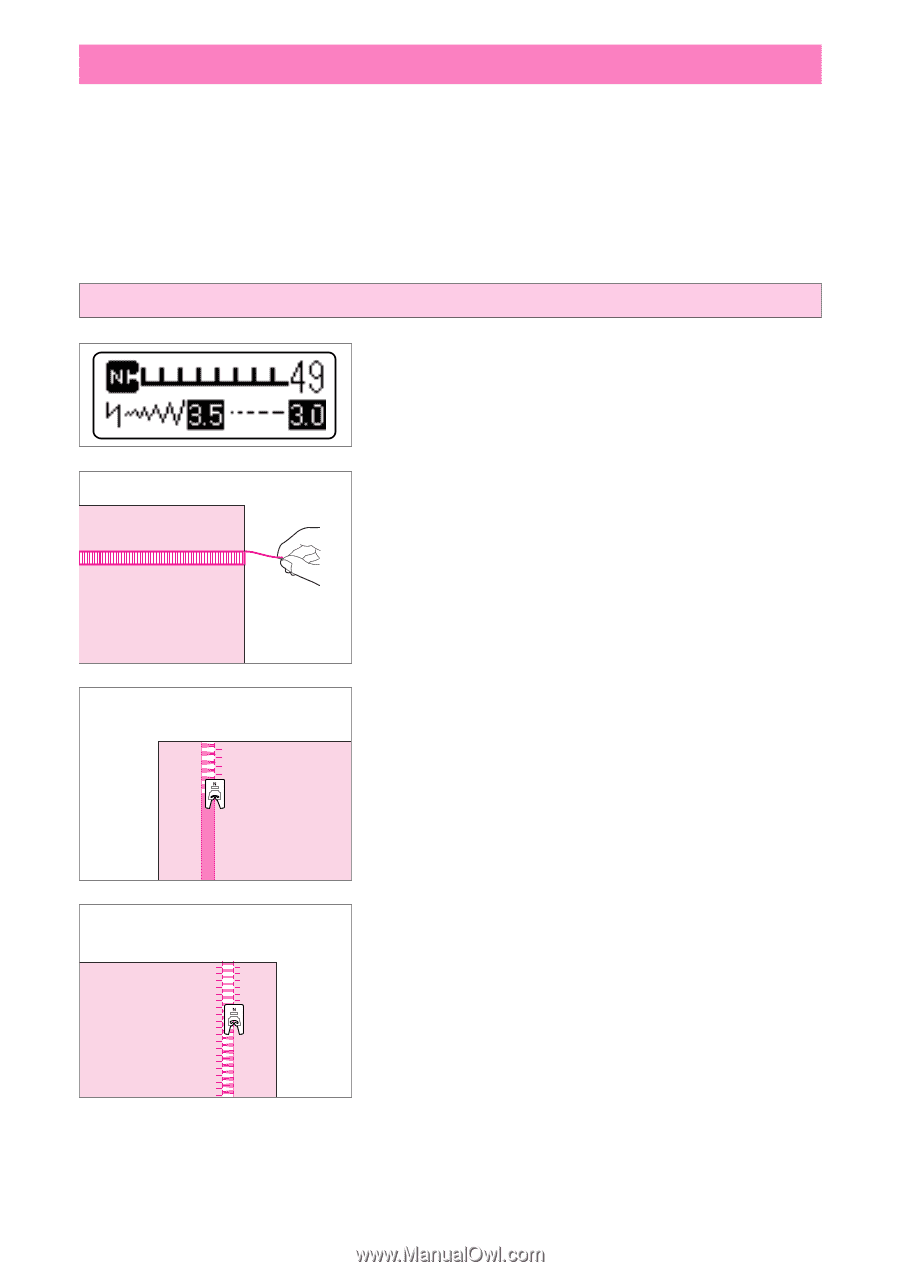
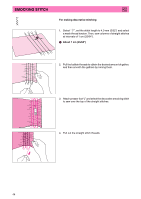
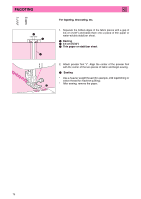
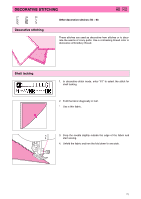
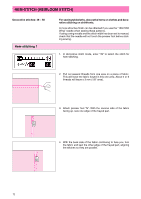
HEM-STITCH (HEIRLOOM STITCH) Decorative stitches: 46 - 50 Hem-stitching 1 For sewing tablecloths, decorative hems on clothes and decorative stitching on shirtfronts. A more attractive finish can be obtained if you use the "130/705H Wing" needle when sewing these patterns. If using a wing needle and the stitch width has been set to manual, check that the needle will not touch the presser foot before starting sewing. 1. In decorative stitch mode, enter "49" to select the stitch for hem-stitching. 2. Pull out several threads from one area on a piece of fabric. This will leave the fabric frayed in this one area. About 5 or 6 threads will leave a 3 mm (1/8" area). 3. Attach presser foot "N". With the reverse side of the fabric facing up, sew one edge of the frayed part. 4. With the back side of the fabric continuing to face you, turn the fabric and sew the other edge of the frayed part, aligning the stitches so they are parallel. 72
-
 1
1 -
2
-
3
-
4
-
5
-
6
-
7
-
8
-
9
-
10
-
11
-
12
-
13
-
14
-
15
-
16
-
17
-
18
-
19
-
20
-
21
-
22
-
23
-
24
-
25
-
26
-
27
-
28
-
29
-
30
-
31
-
32
-
33
-
34
-
35
-
36
-
37
-
38
-
39
-
40
-
41
-
42
-
43
-
44
-
45
-
46
-
47
-
48
-
49
-
50
-
51
-
52
-
53
-
54
-
55
-
56
-
57
-
58
-
59
-
60
-
61
-
62
-
63
-
64
-
65
-
66
-
67
-
68
-
69
-
 70
70 -
 71
71 -
 72
72 -
 73
73 -
 74
74 -
 75
75 -
 76
76 -
 77
77 -
 78
78 -
 79
79 -
 80
80 -
81
-
82
-
83
-
84
-
85
-
86
-
87
-
88
-
89
-
90
-
91
-
92
-
93
-
94
-
95
-
96
-
97
-
98
-
99
-
100
-
101
-
102
-
103
-
104
 |
 |