Brother International PC-3000 Users Manual - English - Page 21
Using the extra spool pin and the net
 |
View all Brother International PC-3000 manuals
Add to My Manuals
Save this manual to your list of manuals |
Page 21 highlights
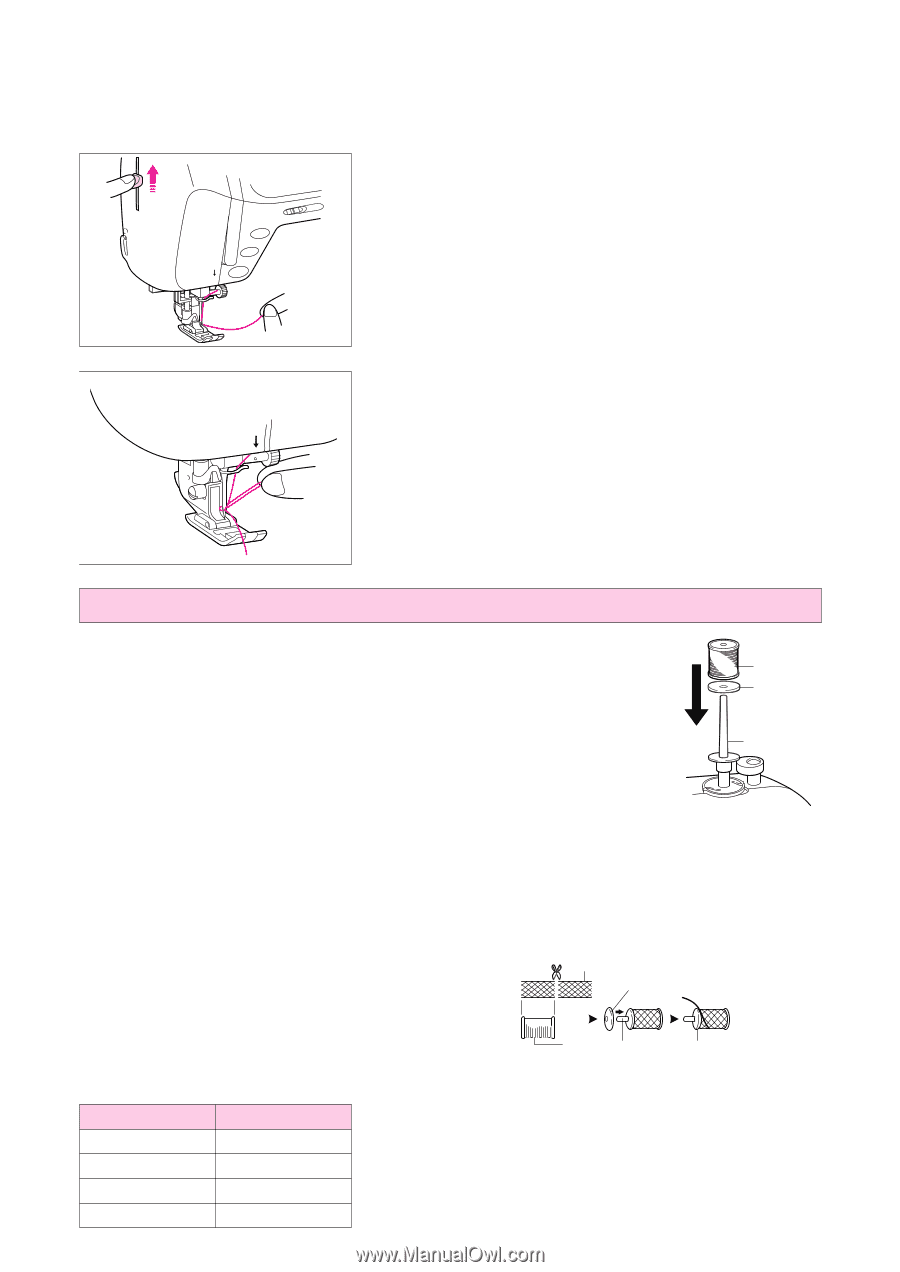
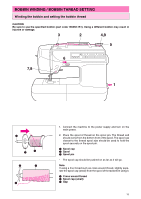
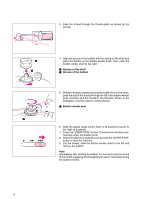
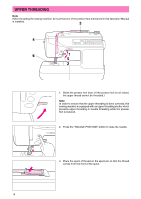
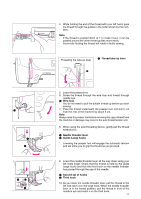
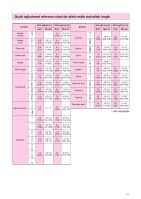
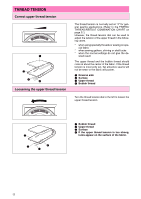
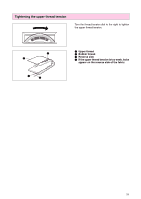
5 5 * Rotating your right hand slightly to check that the thread is engaged. 11. While gently holding the thread, raise the needle threader lever. 12. Pull the thread towards the rear to finish the upper threading. 13. Pass the thread underneath the presser foot and pull it out from the rear of the machine by about 5 cm. Using the extra spool pin and the net Extra spool pin Use when embroidering with metallic thread. 3 1. Insert the extra spool pin onto the end of the bobbin winder shaft. 2 2. Install the spool felt and the thread spool in that order, and then thread the upper thread. 1 1 Insert the extra spool pin into the end of the bobbin winder shaft 2 Spool felt 3 Thread spool * When setting the thread spool, set it so that the thread winds off from the front of the spool. * If using metallic thread, we recommend that you use a 90/14 home sewing machine needle. Note This method keeps the thread from twisting as it comes off the spool pin. Net If using special threads which wind quickly off the thread spool, attach a net to the spool before using. * Cut the net to match the size of the spool. 1 4 1 Net 2 Thread spool 3 Spool pin 4 Spool cap 23 4 Depending on the model, the net may be available as an optional part. Needle 65/9 75/11 90/14 Thread (cotton) #30, 50, 60 #30 #30 Note The auto-threading device cannot be used with the combinations shown at left. Transparent nylon thread can be used regardless of the chart providing needle used is 90/14 to 100/16. 100/16 #20 18
-
 1
1 -
2
-
3
-
4
-
5
-
6
-
7
-
8
-
9
-
10
-
11
-
12
-
13
-
14
-
15
-
 16
16 -
 17
17 -
 18
18 -
 19
19 -
 20
20 -
 21
21 -
 22
22 -
 23
23 -
 24
24 -
 25
25 -
 26
26 -
27
-
28
-
29
-
30
-
31
-
32
-
33
-
34
-
35
-
36
-
37
-
38
-
39
-
40
-
41
-
42
-
43
-
44
-
45
-
46
-
47
-
48
-
49
-
50
-
51
-
52
-
53
-
54
-
55
-
56
-
57
-
58
-
59
-
60
-
61
-
62
-
63
-
64
-
65
-
66
-
67
-
68
-
69
-
70
-
71
-
72
-
73
-
74
-
75
-
76
-
77
-
78
-
79
-
80
-
81
-
82
-
83
-
84
-
85
-
86
-
87
-
88
-
89
-
90
-
91
-
92
-
93
-
94
-
95
-
96
-
97
-
98
-
99
-
100
-
101
-
102
-
103
-
104
 |
 |