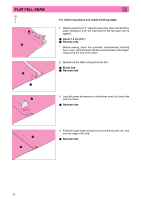
Brother International PC-3000 Users Manual - English - Page 70
Scallop Stitch
 |
View all Brother International PC-3000 manuals
Add to My Manuals
Save this manual to your list of manuals |
Page 70 highlights
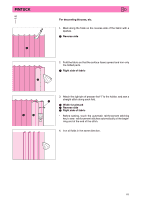
SCALLOP STITCH 25 5 6 N For decorating the collars of blouses, the edges of tablecloths, etc. 1. Attach presser foot "N", then sew the edge of the fabric so that the stitches are not right on the edge of the fabric. 1 Right side of fabric * Before sewing, touch the automatic reinforcement stitching key to sew reinforcement stitches automatically at the beginning and at the end of the stitch. 2. Trim along the stitches carefully so as not to cut the stitches. * There are products in the marketplace that will "seal" the trimmed areas. This will give a more finished appearance. 67
-
 1
1 -
2
-
3
-
4
-
5
-
6
-
7
-
8
-
9
-
10
-
11
-
12
-
13
-
14
-
15
-
16
-
17
-
18
-
19
-
20
-
21
-
22
-
23
-
24
-
25
-
26
-
27
-
28
-
29
-
30
-
31
-
32
-
33
-
34
-
35
-
36
-
37
-
38
-
39
-
40
-
41
-
42
-
43
-
44
-
45
-
46
-
47
-
48
-
49
-
50
-
51
-
52
-
53
-
54
-
55
-
56
-
57
-
58
-
59
-
60
-
61
-
62
-
63
-
64
-
 65
65 -
 66
66 -
 67
67 -
 68
68 -
 69
69 -
 70
70 -
 71
71 -
 72
72 -
 73
73 -
 74
74 -
 75
75 -
76
-
77
-
78
-
79
-
80
-
81
-
82
-
83
-
84
-
85
-
86
-
87
-
88
-
89
-
90
-
91
-
92
-
93
-
94
-
95
-
96
-
97
-
98
-
99
-
100
-
101
-
102
-
103
-
104
 |
 |
67
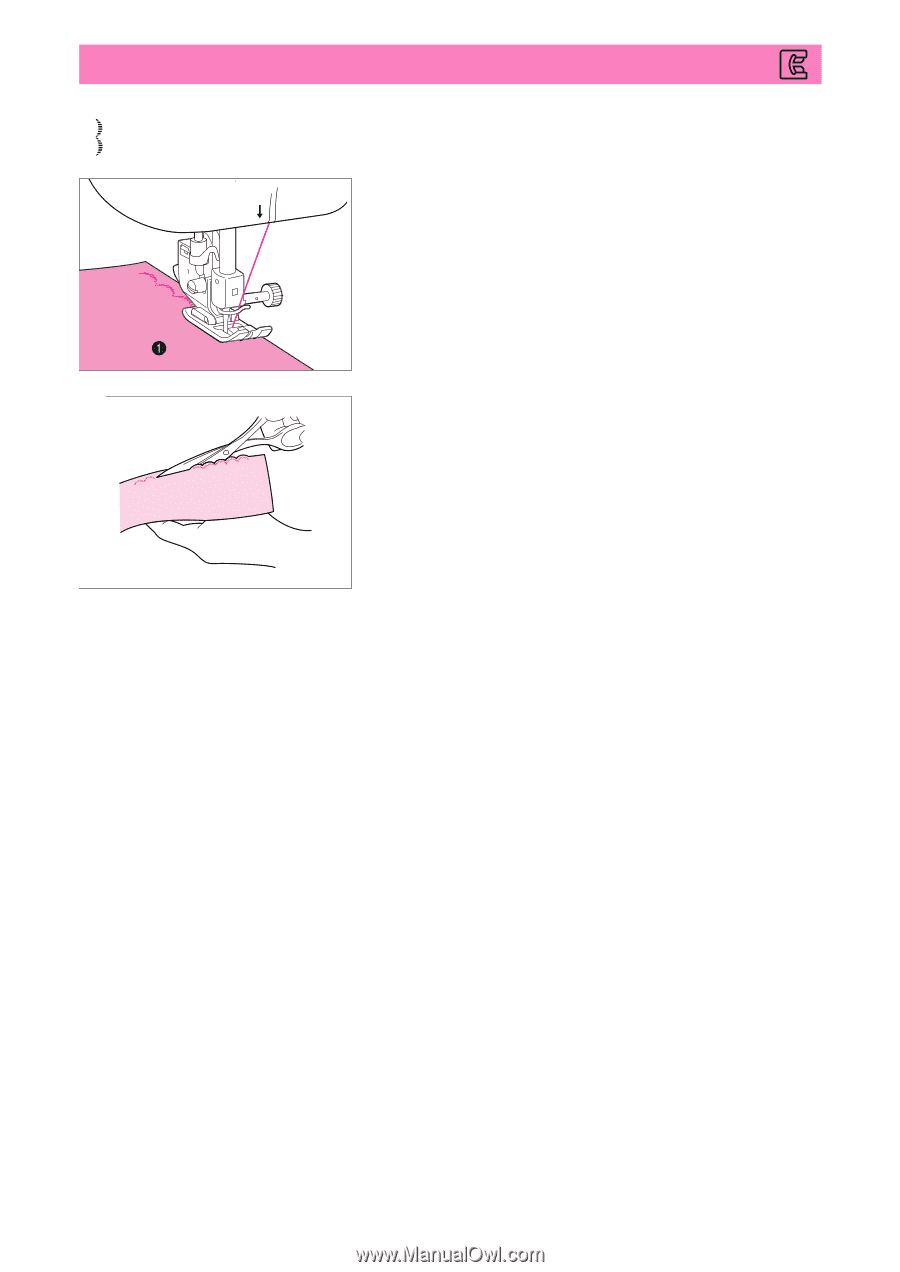
SCALLOP STITCH
1.
Attach presser foot
“
N
”
, then sew the edge of the fabric so that
the stitches are not right on the edge of the fabric.
1
Right side of fabric
*
Before sewing, touch the automatic reinforcement stitching
key to sew
reinforcement stitches automatically at the begin-
ning and at the end of the stitch.
2.
Trim along the stitches carefully so as not to cut the stitches.
*
There are products in the marketplace that will
“
seal
”
the
trimmed areas. This will give a more finished appearance.
For decorating the collars of blouses, the edges of tablecloths,
etc.
N
25
6
5