Brother International PC-3000 Users Manual - English - Page 51
Bar Tacking
 |
View all Brother International PC-3000 manuals
Add to My Manuals
Save this manual to your list of manuals |
Page 51 highlights
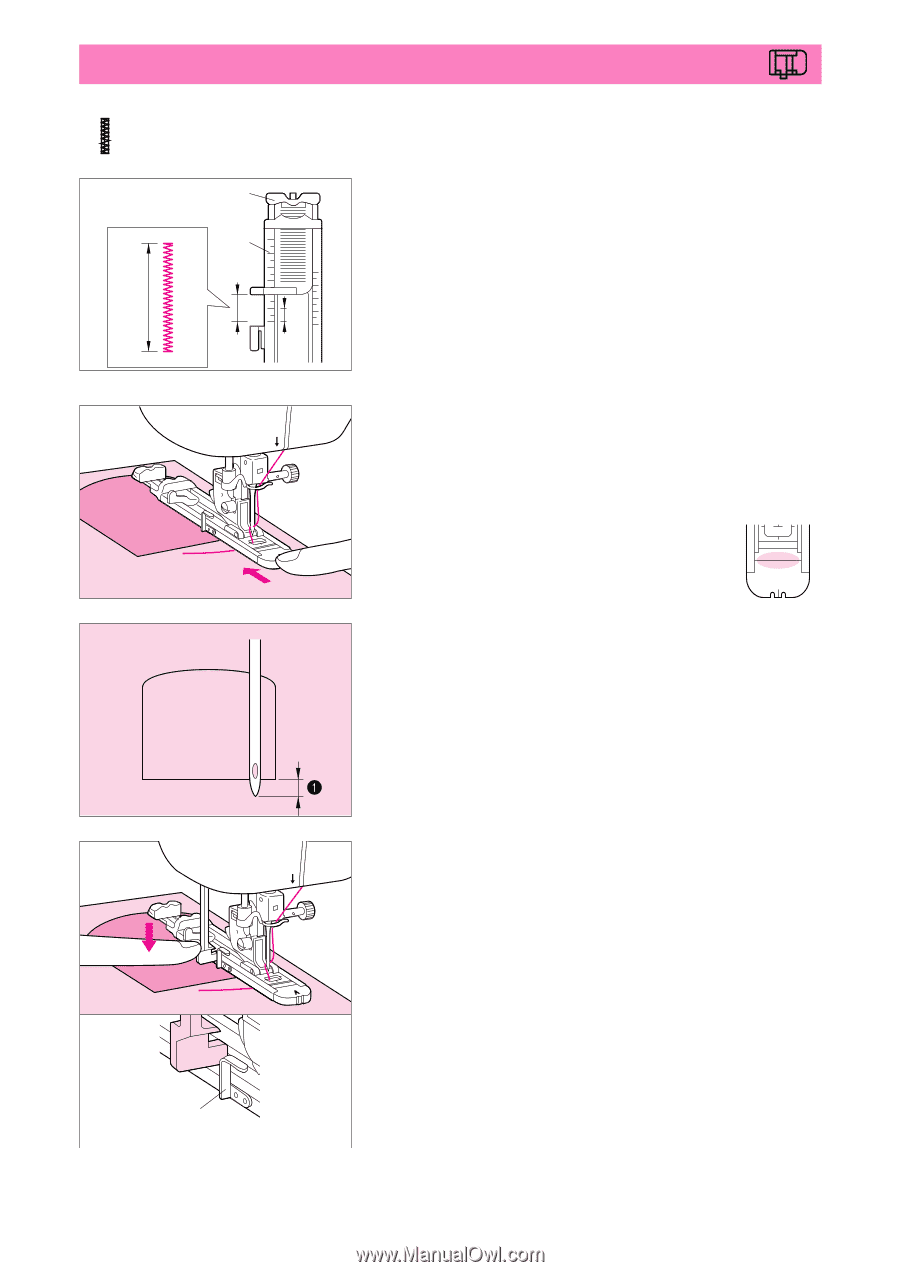
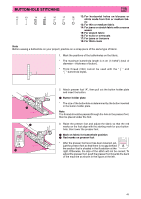
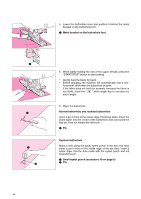
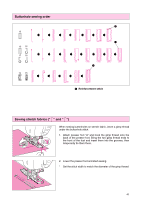
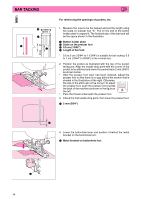
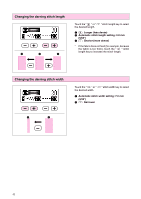
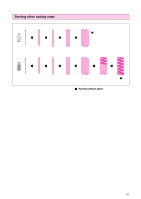
BAR TACKING 21 1 2 4 3 5 6 A For reinforcing the openings of pockets, etc. 1. Measure the area to be bar tacked and set the length using the scale on presser foot "A". Pull on the end of the button holder plate to expand it. The finished size of the bar tack will be the space shown in the illustration. 1 Button holder plate 2 Scale on the presser foot 3 0.5 cm (13/64") 4 Length of bar tack * 0.5 to 3 cm (13/64" to 1-13/64") is suitable for bar tacking. 0.5 to 1 cm (13/64" to 25/64") is the normal size. 2. Position the pocket as illustrated with the top of the pocket facing you. Align the needle drop point with the corner of the pocket to be stitched and move the pocket back 2 mm (5/64") as shown below. * After the presser foot lever has been lowered, adjust the presser foot so that there is no gap behind the section that is shaded in the illustration at the right. Otherwise, the size of the stitch will not be correct. To adjust the presser foot, push the presser foot towards the back of the machine as shown in the figure at the left. A * Pass the thread underneath the presser foot. 3. Check the first needle drop point, then lower the presser foot. 1 2 mm (5/64") 4. Lower the buttonhole lever and position it behind the metal 5 bracket on the buttonhole foot. 6 1 Metal bracket on buttonhole foot 1 48
-
 1
1 -
2
-
3
-
4
-
5
-
6
-
7
-
8
-
9
-
10
-
11
-
12
-
13
-
14
-
15
-
16
-
17
-
18
-
19
-
20
-
21
-
22
-
23
-
24
-
25
-
26
-
27
-
28
-
29
-
30
-
31
-
32
-
33
-
34
-
35
-
36
-
37
-
38
-
39
-
40
-
41
-
42
-
43
-
44
-
45
-
 46
46 -
 47
47 -
 48
48 -
 49
49 -
 50
50 -
 51
51 -
 52
52 -
 53
53 -
 54
54 -
 55
55 -
 56
56 -
57
-
58
-
59
-
60
-
61
-
62
-
63
-
64
-
65
-
66
-
67
-
68
-
69
-
70
-
71
-
72
-
73
-
74
-
75
-
76
-
77
-
78
-
79
-
80
-
81
-
82
-
83
-
84
-
85
-
86
-
87
-
88
-
89
-
90
-
91
-
92
-
93
-
94
-
95
-
96
-
97
-
98
-
99
-
100
-
101
-
102
-
103
-
104
 |
 |