Brother International PC-3000 Users Manual - English - Page 67
Flat Fell Seam
 |
View all Brother International PC-3000 manuals
Add to My Manuals
Save this manual to your list of manuals |
Page 67 highlights
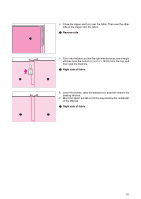
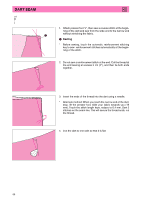
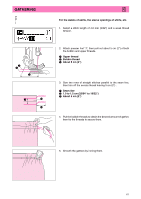
FLAT FELL SEAM 00 J For reinforcing seams and neatly finishing edges 1. Attach presser foot "J". Sew the seam line, then cut half of the seam allowance from the side that the flat fell seam will lie against. 1 About 1.2 cm (1/2") 2 Reverse side * Before sewing, touch the automatic reinforcement stitching key to sew reinforcement stitches automatically at the beginning and at the end of the stitch. 2. Spread out the fabric along the finish line. 1 Finish line 2 Reverse side 3. Lay both seam allowances to the shorter one's (cut one) side and iron them. 1 Reverse side 4. Fold the longer seam allowance around the shorter one, and sew the edge of the fold. 1 Reverse side 64
-
 1
1 -
2
-
3
-
4
-
5
-
6
-
7
-
8
-
9
-
10
-
11
-
12
-
13
-
14
-
15
-
16
-
17
-
18
-
19
-
20
-
21
-
22
-
23
-
24
-
25
-
26
-
27
-
28
-
29
-
30
-
31
-
32
-
33
-
34
-
35
-
36
-
37
-
38
-
39
-
40
-
41
-
42
-
43
-
44
-
45
-
46
-
47
-
48
-
49
-
50
-
51
-
52
-
53
-
54
-
55
-
56
-
57
-
58
-
59
-
60
-
61
-
 62
62 -
 63
63 -
 64
64 -
 65
65 -
 66
66 -
 67
67 -
 68
68 -
 69
69 -
 70
70 -
 71
71 -
 72
72 -
73
-
74
-
75
-
76
-
77
-
78
-
79
-
80
-
81
-
82
-
83
-
84
-
85
-
86
-
87
-
88
-
89
-
90
-
91
-
92
-
93
-
94
-
95
-
96
-
97
-
98
-
99
-
100
-
101
-
102
-
103
-
104
 |
 |
64
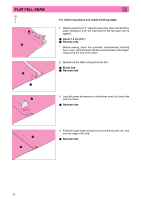
FLAT FELL SEAM
1.
Attach presser foot
“
J
”
. Sew the seam line, then cut half of the
seam allowance from the side that the flat fell seam will lie
against.
1
About 1.2 cm (1/2")
2
Reverse side
*
Before sewing, touch the automatic reinforcement stitching
key to sew
reinforcement stitches automatically at the begin-
ning and at the end of the stitch.
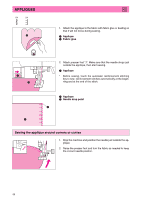
2.
Spread out the fabric along the finish line.
1
Finish line
2
Reverse side
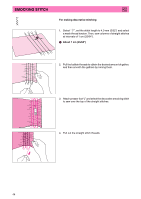
3.
Lay both seam allowances to the shorter one
’
s (cut one) side
and iron them.
1
Reverse side
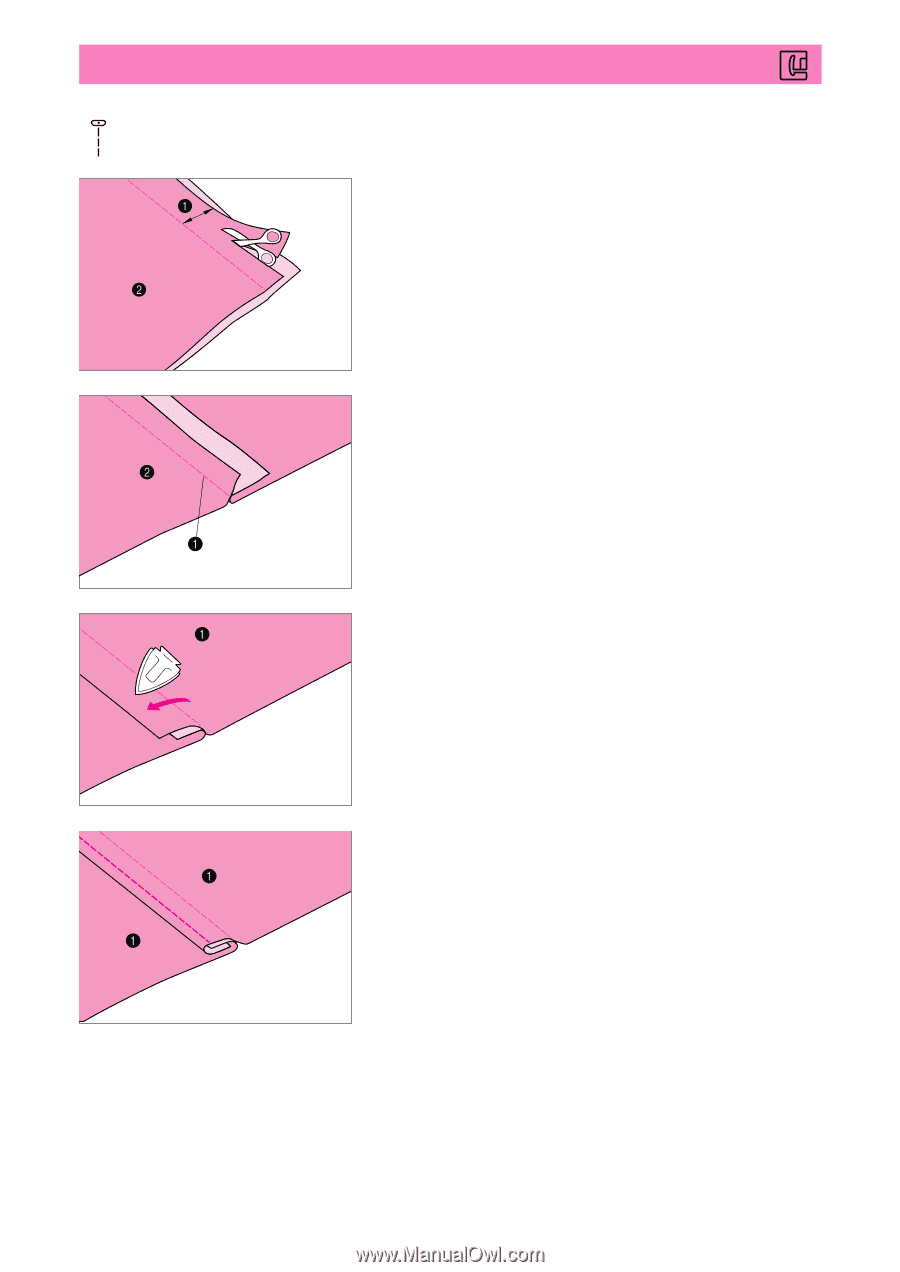
4.
Fold the longer seam allowance around the shorter one, and
sew the edge of the fold.
1
Reverse side
For reinforcing seams and neatly finishing edges
J
00