Brother International PC-3000 Users Manual - English - Page 44
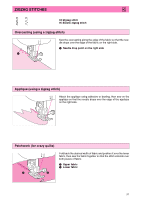
Blind Hem Stitching
 |
View all Brother International PC-3000 manuals
Add to My Manuals
Save this manual to your list of manuals |
Page 44 highlights
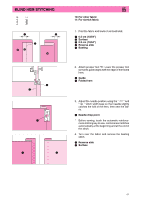
BLIND HEM STITCHING 10 11 1 3 R 10: For other fabric 11: For stretch fabric 1. Fold the fabric and baste it as illustrated. 1 0.5 cm (13/64") 2 Surface 3 0.5 cm (13/64") 4 Reverse side 5 Basting 2. Attach presser foot "R". Lower the presser foot so that its guide aligns with the edge of the folded hem. 1 Guide 2 Folded hem 1 3. Adjust the needle position using the " " and " " stitch width keys so that needle slightly catches the fold of the hem, then sew the fabric. R 1 Needle drop point * Before sewing, touch the automatic reinforcement stitching key to sew reinforcement stitches automatically at the beginning and at the end of the stitch. 4. Turn over the fabric and remove the basting stitch. 1 Reverse side 2 Surface 41
-
 1
1 -
2
-
3
-
4
-
5
-
6
-
7
-
8
-
9
-
10
-
11
-
12
-
13
-
14
-
15
-
16
-
17
-
18
-
19
-
20
-
21
-
22
-
23
-
24
-
25
-
26
-
27
-
28
-
29
-
30
-
31
-
32
-
33
-
34
-
35
-
36
-
37
-
38
-
 39
39 -
 40
40 -
 41
41 -
 42
42 -
 43
43 -
 44
44 -
 45
45 -
 46
46 -
 47
47 -
 48
48 -
 49
49 -
50
-
51
-
52
-
53
-
54
-
55
-
56
-
57
-
58
-
59
-
60
-
61
-
62
-
63
-
64
-
65
-
66
-
67
-
68
-
69
-
70
-
71
-
72
-
73
-
74
-
75
-
76
-
77
-
78
-
79
-
80
-
81
-
82
-
83
-
84
-
85
-
86
-
87
-
88
-
89
-
90
-
91
-
92
-
93
-
94
-
95
-
96
-
97
-
98
-
99
-
100
-
101
-
102
-
103
-
104
 |
 |
41
BLIND HEM STITCHING
10:For other fabric
11: For stretch fabric
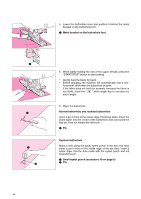
1.
Fold the fabric and baste it as illustrated.
1
0.5 cm (13/64")
2
Surface
3
0.5 cm (13/64")
4
Reverse side
5
Basting
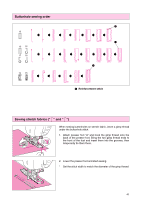
2.
Attach presser foot
“
R
”
. Lower the presser foot
so that its guide aligns with the edge of the folded
hem.
1
Guide
2
Folded hem
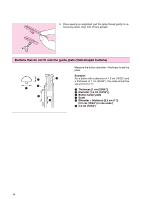
3.
Adjust the needle position using the
“
”
and
“
”
stitch width keys so that needle slightly
catches the fold of the hem, then sew the fab-
ric.
1
Needle drop point
*
Before sewing, touch the automatic reinforce-
ment stitching key to sew
reinforcement stitches
automatically at the beginning and at the end of
the stitch.
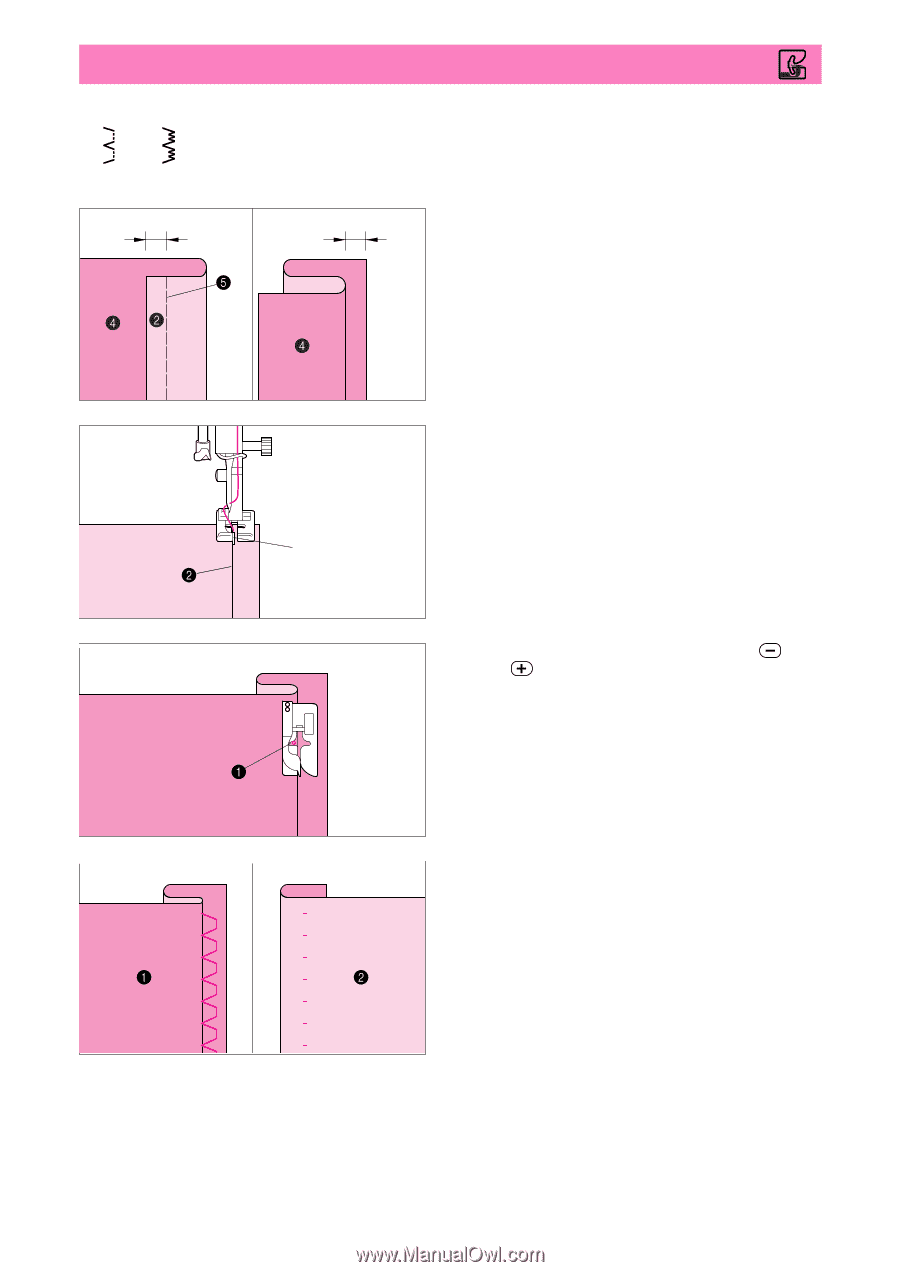
4.
Turn over the fabric and remove the basting
stitch.
1
Reverse side
2
Surface
11
10
R
3
1
1
R