Brother International PC-3000 Users Manual - English - Page 66
Pintuck
 |
View all Brother International PC-3000 manuals
Add to My Manuals
Save this manual to your list of manuals |
Page 66 highlights
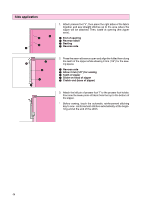
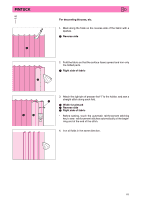
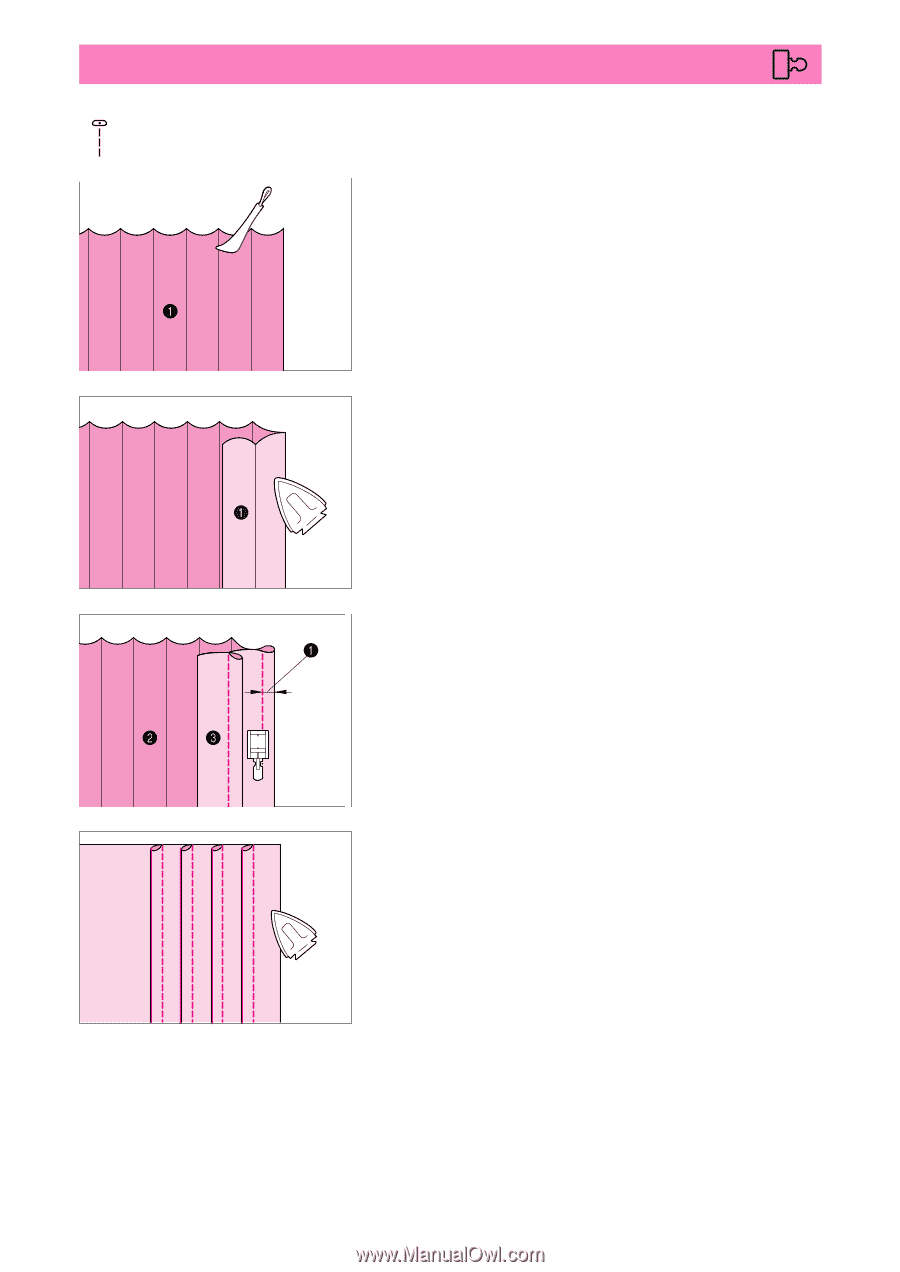
PINTUCK 00 I For decorating blouses, etc. 1. Mark along the folds on the reverse side of the fabric with a spatula. 1 Reverse side 2. Fold the fabric so that the surface faces upward and iron only the folded parts. 1 Right side of fabric 3. Attach the right pin of presser foot "I" to the holder, and sew a straight stitch along each fold. 1 Width for pintuck 2 Reverse side 3 Right side of fabric I * Before sewing, touch the automatic reinforcement stitching key to sew reinforcement stitches automatically at the begin- ning and at the end of the stitch. 4. Iron all folds in the same direction. 63
-
 1
1 -
2
-
3
-
4
-
5
-
6
-
7
-
8
-
9
-
10
-
11
-
12
-
13
-
14
-
15
-
16
-
17
-
18
-
19
-
20
-
21
-
22
-
23
-
24
-
25
-
26
-
27
-
28
-
29
-
30
-
31
-
32
-
33
-
34
-
35
-
36
-
37
-
38
-
39
-
40
-
41
-
42
-
43
-
44
-
45
-
46
-
47
-
48
-
49
-
50
-
51
-
52
-
53
-
54
-
55
-
56
-
57
-
58
-
59
-
60
-
 61
61 -
 62
62 -
 63
63 -
 64
64 -
 65
65 -
 66
66 -
 67
67 -
 68
68 -
 69
69 -
 70
70 -
 71
71 -
72
-
73
-
74
-
75
-
76
-
77
-
78
-
79
-
80
-
81
-
82
-
83
-
84
-
85
-
86
-
87
-
88
-
89
-
90
-
91
-
92
-
93
-
94
-
95
-
96
-
97
-
98
-
99
-
100
-
101
-
102
-
103
-
104
 |
 |
63
PINTUCK
1.
Mark along the folds on the reverse side of the fabric with a
spatula.
1
Reverse side
2.
Fold the fabric so that the surface faces upward and iron only
the folded parts.
1
Right side of fabric
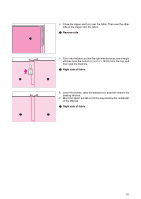
3.
Attach the right pin of presser foot
“
I
”
to the holder, and sew a
straight stitch along each fold.
1
Width for pintuck
2
Reverse side
3
Right side of fabric
*
Before sewing, touch the automatic reinforcement stitching
key to sew
reinforcement stitches automatically at the begin-
ning and at the end of the stitch.
4.
Iron all folds in the same direction.
For decorating blouses, etc.
00
I
I