Canon I9100 i9100 Quick Start Guide - Page 7
Basic Printing, Prepare to load paper.
 |
View all Canon I9100 manuals
Add to My Manuals
Save this manual to your list of manuals |
Page 7 highlights
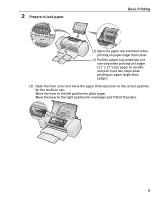
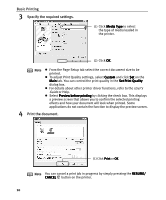
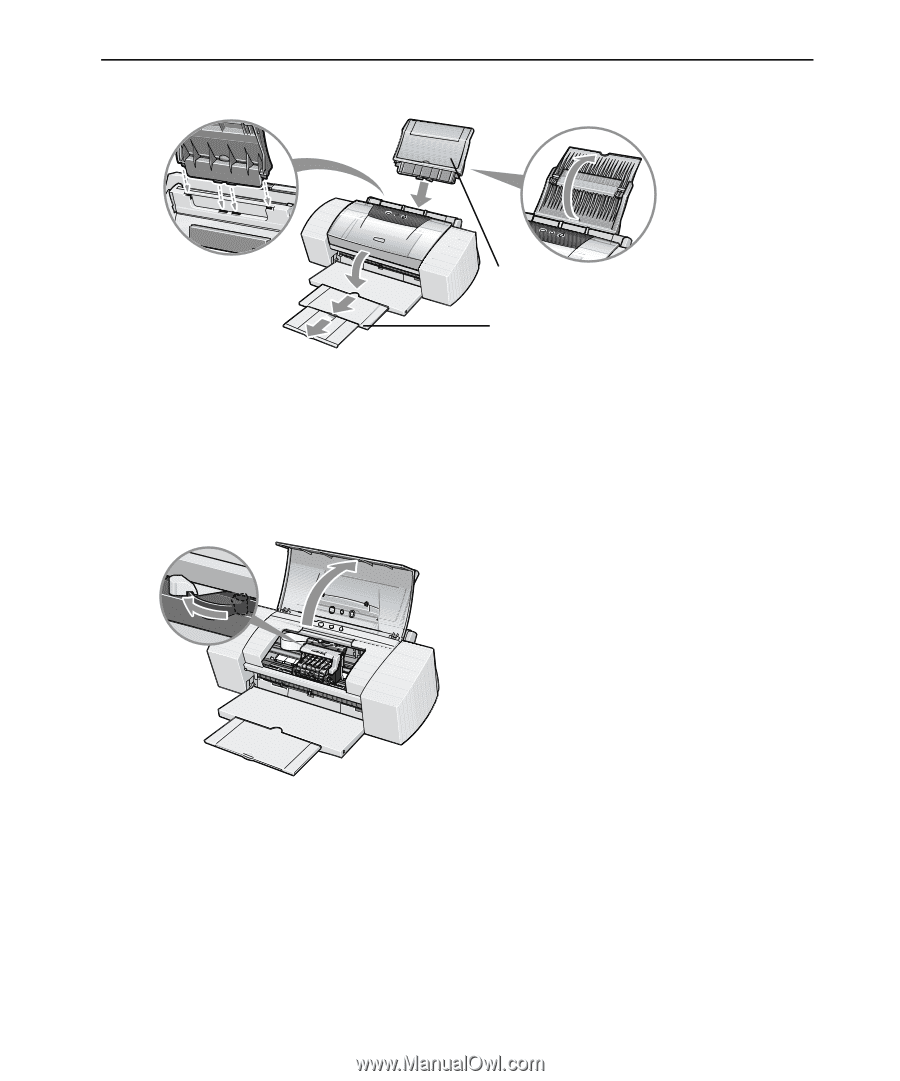
2 Prepare to load paper. Basic Printing (1) Open the paper rest extension when printing on paper larger than Letter. (2) Pull the output tray extension out one step when printing on Ledger (11" x 17") size paper or smaller, and pull it out two steps when printing on paper larger than Ledger. (3) Open the front cover and move the paper thickness lever to the correct position for the media in use. Move the lever to the left position for plain paper. Move the lever to the right position for envelopes and T-Shirt Transfers. 5
-
 1
1 -
 2
2 -
 3
3 -
 4
4 -
 5
5 -
 6
6 -
 7
7 -
 8
8 -
 9
9 -
 10
10 -
 11
11 -
 12
12 -
13
-
14
-
15
-
16
-
17
-
18
-
19
-
20
-
21
-
22
-
23
-
24
-
25
-
26
-
27
-
28
-
29
-
30
-
31
-
32
-
33
-
34
-
35
-
36
-
37
-
38
-
39
-
40
-
41
-
42
-
43
-
44
-
45
-
46
-
47
-
48
-
49
-
50
-
51
-
52
-
53
-
54
-
55
-
56
-
57
-
58
-
59
-
60
-
61
-
62
-
63
-
64
-
65
-
66
-
67
-
68
-
69
-
70
-
71
-
72
 |
 |
Basic Printing
5
2
Prepare to load paper.
(3)
Open the front cover and move the paper thickness lever to the correct position
for the media in use.
Move the lever to the left position for plain paper.
Move the lever to the right position for envelopes and T-Shirt Transfers.
(1)
Open the paper rest extension when
printing on paper larger than Letter.
(2)
Pull the output tray extension out
one step when printing on Ledger
(11" x 17") size paper or smaller,
and pull it out two steps when
printing on paper larger than
Ledger.