Casio LK280 User Guide - Page 24
Incorporating a Sampled Sound, into a Drum Set Drum Sampling
 |
View all Casio LK280 manuals
Add to My Manuals
Save this manual to your list of manuals |
Page 24 highlights
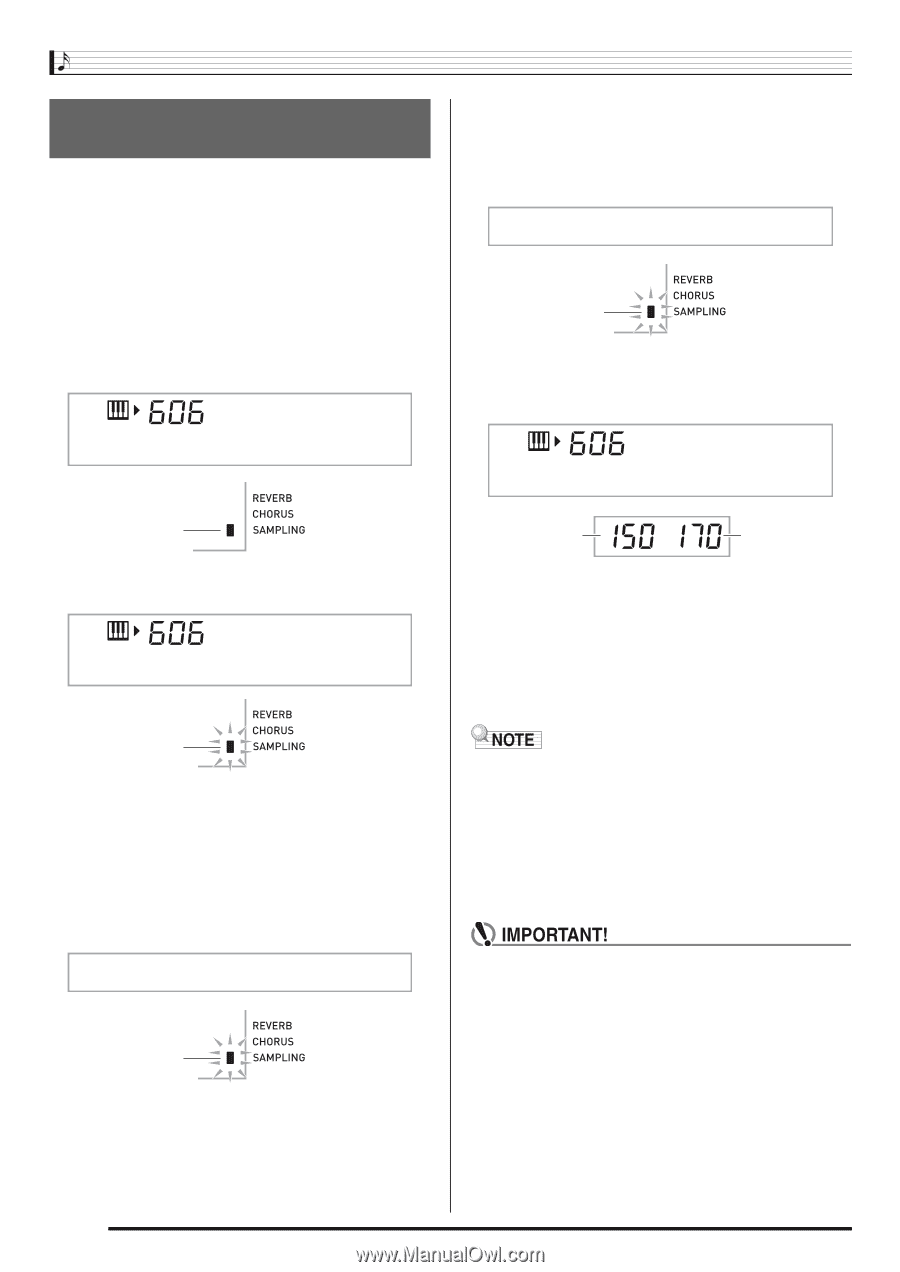
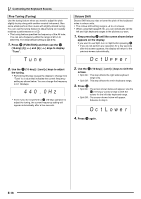
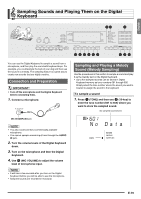
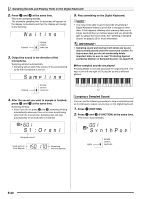
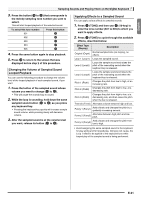
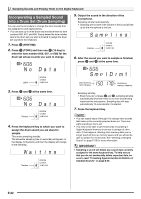
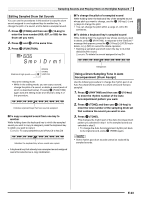
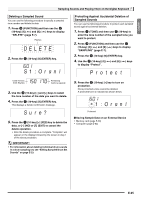
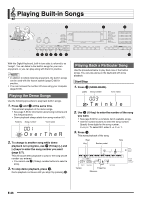
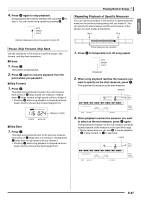
Sampling Sounds and Playing Them on the Digital Keyboard Incorporating a Sampled Sound into a Drum Set (Drum Sampling) You can use the procedure to change the drum sounds that are assigned to each keyboard key. • You can store up to three drum sets and store them as tone numbers 606, 607, and 608. Simply select the tone number where the drum set you want is located to assign the drum set sounds to the keyboard. 1. Press bo (RHYTHM). 2. Press bn (TONE) and then use br (10-key) to enter the tone number (606, 607, or 608) for the drum set whose sounds you want to change. 5. Output the sound in the direction of the microphone. Sampling will start automatically. • Sampling will not start if the volume of the sound picked up by the microphone is too low. Samp l i n g Flashes 6. After the sound you want to sample is finished, press cr and cs at the same time. No Da t a Smp l D r m1 Lights 3. Press cr and cs at the same time. No Da t a Used memory (Unit: Kbytes) Remaining memory capacity Sampling will stop. cr cs • Even if you do not press and , sampling will stop automatically whenever there is no more sound being input from the microphone. Sampling also will stop automatically 10 seconds after it is started. 7. Press the keyboard key. Flashes 4. Press the keyboard key to which you want to assign the drum sound you are about to sample. This enters sampling standby. The allowable sampling time (in seconds) will appear on the display momentarily and then the display will change to the following. Wa i t i n g Flashes • You can repeat steps 3 through 6 to change other sounds that make up the currently selected drum set. There are eight sounds per drum set. • You may not be able to get 10 seconds of sampling if Digital Keyboard memory is low due to storage of other data. If this happens, deleting other memory data you no longer need will free up memory space and you should be able to sample for 10 seconds. See "Deleting a Sampled Sound" on page E-25 for more information. • Sampling a sound will delete any sound data currently assigned to the same keyboard key. To help ensure that you do not accidentally delete important data, be sure to read "Protecting Against Accidental Deletion of Sampled Sounds" on page E-25. E-22
-
 1
1 -
2
-
3
-
4
-
5
-
6
-
7
-
8
-
9
-
10
-
11
-
12
-
13
-
14
-
15
-
16
-
17
-
18
-
 19
19 -
 20
20 -
 21
21 -
 22
22 -
 23
23 -
 24
24 -
 25
25 -
 26
26 -
 27
27 -
 28
28 -
 29
29 -
30
-
31
-
32
-
33
-
34
-
35
-
36
-
37
-
38
-
39
-
40
-
41
-
42
-
43
-
44
-
45
-
46
-
47
-
48
-
49
-
50
-
51
-
52
-
53
-
54
-
55
-
56
-
57
-
58
-
59
-
60
-
61
-
62
-
63
-
64
-
65
-
66
-
67
-
68
-
69
-
70
-
71
-
72
-
73
-
74
-
75
-
76
 |
 |