Cisco AIR-LAP1131G-A-K9 Hardware Installation Guide - Page 39
Mounting on a Horizontal or Vertical Surface
 |
View all Cisco AIR-LAP1131G-A-K9 manuals
Add to My Manuals
Save this manual to your list of manuals |
Page 39 highlights
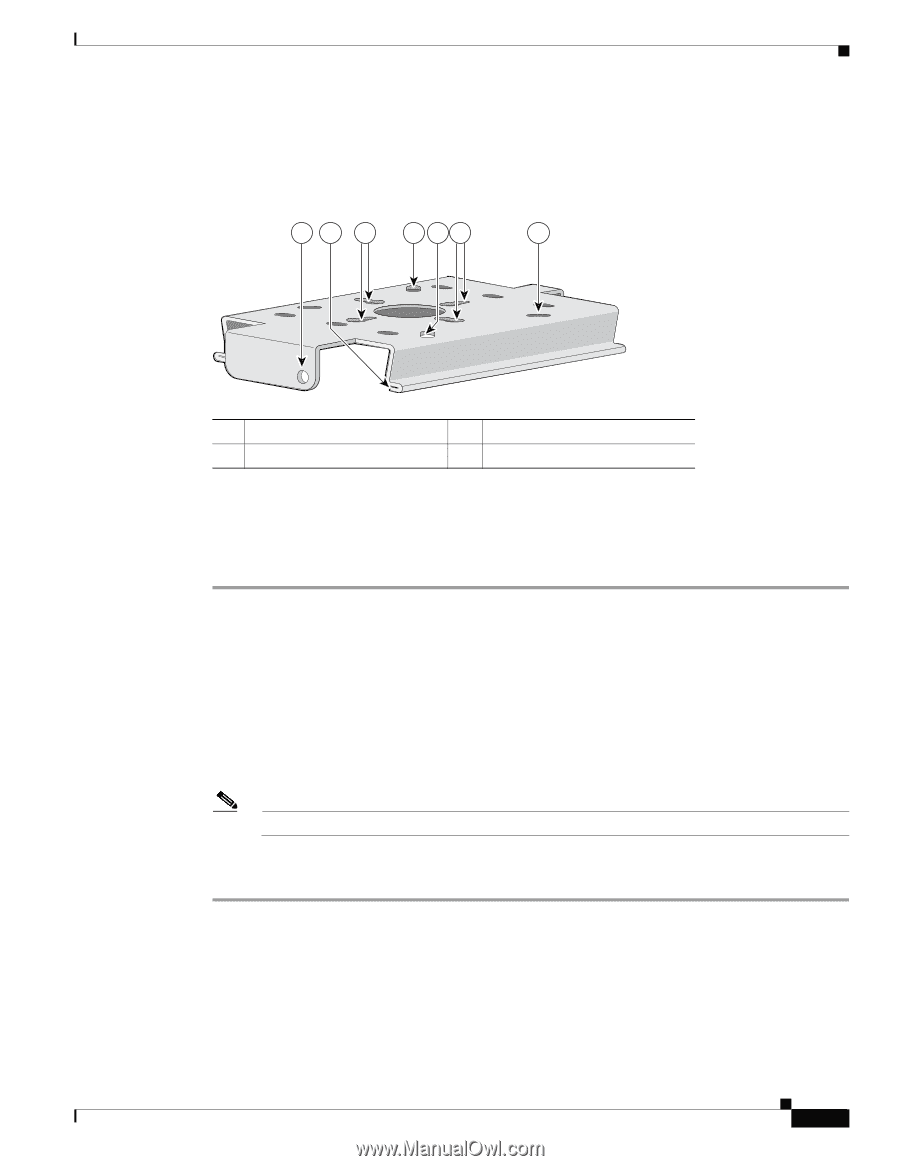
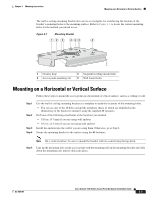
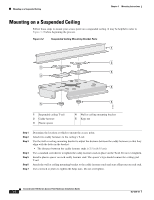
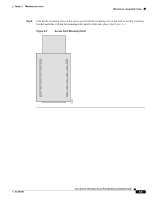
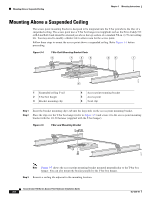
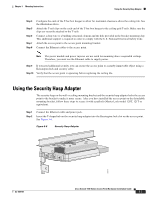
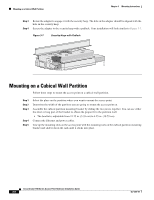
Chapter 3 Mounting Instructions Mounting on a Horizontal or Vertical Surface The wall or ceiling mounting bracket also serves as a template for transferring the location of the bracket's mounting holes to the mounting surface. Refer to Figure 3-1 to locate the various mounting holes for the method you intend to use. Figure 3-1 Mounting Bracket 12 3 4 43 4 81171 1 Security hasp 2 Access point mounting rail 3 Suspended ceiling mount holes 4 Wall mount holes Mounting on a Horizontal or Vertical Surface Follow these steps to mount the access point on a horizontal or vertical surface, such as a ceiling or wall. Step 1 Step 2 Step 3 Step 4 Use the wall or ceiling mounting bracket as a template to mark the locations of the mounting holes. • You can use any of the 10 holes around the periphery (three of which are identified in the illustration) of the bracket to mount it using the supplied #8 fasteners. Drill one of the following sized holes at the locations you marked: • 3/16 in. (4.7 mm) if you are using wall anchors • 3/32 in. (2.3 mm) if you are not using wall anchors Install the anchors into the wall if you are using them. Otherwise, go to Step 4. Secure the mounting bracket to the surface using the #8 fasteners. Note On a vertical surface, be sure to mount the bracket with its security hasp facing down. Step 5 Line up the mounting slots on the access point with the mounting rail on the mounting bracket and slide down the mounting rails until it clicks into place. OL-4309-07 Cisco Aironet 1100 Series Access Point Hardware Installation Guide 3-3
-
 1
1 -
2
-
3
-
4
-
5
-
6
-
7
-
8
-
9
-
10
-
11
-
12
-
13
-
14
-
15
-
16
-
17
-
18
-
19
-
20
-
21
-
22
-
23
-
24
-
25
-
26
-
27
-
28
-
29
-
30
-
31
-
32
-
33
-
 34
34 -
 35
35 -
 36
36 -
 37
37 -
 38
38 -
 39
39 -
 40
40 -
 41
41 -
 42
42 -
 43
43 -
 44
44 -
45
-
46
-
47
-
48
-
49
-
50
-
51
-
52
-
53
-
54
-
55
-
56
-
57
-
58
-
59
-
60
-
61
-
62
-
63
-
64
-
65
-
66
-
67
-
68
-
69
-
70
-
71
-
72
-
73
-
74
-
75
-
76
-
77
-
78
-
79
-
80
-
81
-
82
-
83
-
84
-
85
-
86
-
87
-
88
-
89
-
90
-
91
-
92
-
93
-
94
-
95
-
96
-
97
-
98
-
99
-
100
-
101
-
102
-
103
-
104
-
105
-
106
-
107
-
108
-
109
-
110
-
111
-
112
-
113
-
114
-
115
-
116
 |
 |