Compaq Presario 2500 Reference Guide - Page 48
Creating a New Notebook-to-Notebook Network Ad Hoc
 |
View all Compaq Presario 2500 manuals
Add to My Manuals
Save this manual to your list of manuals |
Page 48 highlights
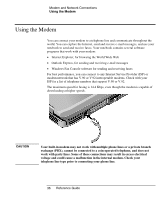
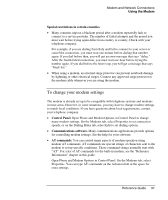
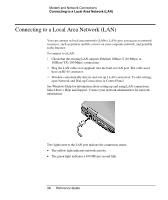
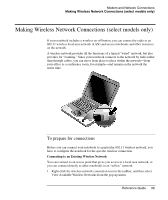
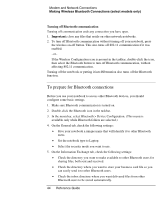
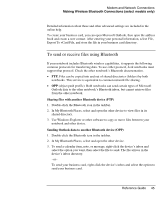
Modem and Network Connections Making Wireless Network Connections (select models only) 2. A list of available networks appears. Select the network you want, enter the encryption key if required, and select Connect. If the network you want is not on the list, select Advanced > Configure, and enter the required network parameters. If the network is not using 802.1x authentication protocol, clear the automatic key option. 3. On the General tab, edit network settings as needed for your local network. See your network administrator. You can also display an icon in the taskbar when connected to a network. 4. On the Wireless Networks tab, view the wireless networks available within range. Each network SSID is listed. Select the network you want and select Configure. 5. If the wireless network uses standard encrypted communication, uncheck the automatic key option, and then select the following parameters. See your network administrator for the required settings: • Key: ASCII passphrase or hexadecimal key string. • Key format: ASCII for passphrase, hexadecimal for key string. • Key length: smaller number for 64-bit encryption, larger number for 128-bit. 6. Select OK to save the configuration. This network is added to your list of preferred networks. The notebook automatically connects to the first preferred network within range if wireless communication is turned on. Creating a New Notebook-to-Notebook Network (Ad Hoc) You can set up a new network available to other local notebooks. 1. Select Start > Control Panel > Network and Internet Connections > Network Connections. 2. Double-click the wireless connection to show its status, and then select Properties. 3. On the Wireless Networks tab, select Add to create a new network. 4. Type a name for the new network. 40 Reference Guide
-
 1
1 -
2
-
3
-
4
-
5
-
6
-
7
-
8
-
9
-
10
-
11
-
12
-
13
-
14
-
15
-
16
-
17
-
18
-
19
-
20
-
21
-
22
-
23
-
24
-
25
-
26
-
27
-
28
-
29
-
30
-
31
-
32
-
33
-
34
-
35
-
36
-
37
-
38
-
39
-
40
-
41
-
42
-
 43
43 -
 44
44 -
 45
45 -
 46
46 -
 47
47 -
 48
48 -
 49
49 -
 50
50 -
 51
51 -
 52
52 -
 53
53 -
54
-
55
-
56
-
57
-
58
-
59
-
60
-
61
-
62
-
63
-
64
-
65
-
66
-
67
-
68
-
69
-
70
-
71
-
72
-
73
-
74
-
75
-
76
-
77
-
78
-
79
-
80
-
81
-
82
-
83
-
84
-
85
-
86
-
87
-
88
-
89
-
90
-
91
-
92
-
93
-
94
-
95
-
96
-
97
-
98
-
99
-
100
-
101
-
102
-
103
-
104
-
105
-
106
-
107
-
108
-
109
-
110
-
111
-
112
-
113
-
114
-
115
-
116
-
117
-
118
 |
 |
