Dell Precision 490 Desktop User's Guide - Page 84
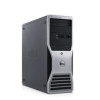
CD/DVD drive
 |
View all Dell Precision 490 Desktop manuals
Add to My Manuals
Save this manual to your list of manuals |
Page 84 highlights
8. If no screws are attached to the drive, check the inside of the drive panel for shoulder screws and attach them to the new drive. 1 CD/DVD drive 2 screws 9. Gently slide the drive into place until you hear a click or feel the drive securely installed. 1 sliding-plate lever 2 CD/DVD drive 10. Attach the power and data cables to the CD/DVD drive. 11. If you are installing an IDE drive, another CD/DVD drive may be attached to the same data cable by another connector. The other end of the data cable should connect to the system board connector labeled "IDE." To locate the system board connector, see System Board Components. If you are installing a SATA drive, connect the other end of the data cable to a SATA connector on the system board. 1 IDE data cable 2 power cable
-
 1
1 -
2
-
3
-
4
-
5
-
6
-
7
-
8
-
9
-
10
-
11
-
12
-
13
-
14
-
15
-
16
-
17
-
18
-
19
-
20
-
21
-
22
-
23
-
24
-
25
-
26
-
27
-
28
-
29
-
30
-
31
-
32
-
33
-
34
-
35
-
36
-
37
-
38
-
39
-
40
-
41
-
42
-
43
-
44
-
45
-
46
-
47
-
48
-
49
-
50
-
51
-
52
-
53
-
54
-
55
-
56
-
57
-
58
-
59
-
60
-
61
-
62
-
63
-
64
-
65
-
66
-
67
-
68
-
69
-
70
-
71
-
72
-
73
-
74
-
75
-
76
-
77
-
78
-
 79
79 -
 80
80 -
 81
81 -
 82
82 -
 83
83 -
 84
84 -
 85
85 -
 86
86 -
 87
87 -
 88
88 -
 89
89 -
90
-
91
-
92
-
93
-
94
-
95
-
96
-
97
-
98
-
99
-
100
-
101
-
102
-
103
-
104
-
105
-
106
-
107
-
108
-
109
-
110
-
111
-
112
-
113
-
114
-
115
-
116
-
117
-
118
-
119
-
120
-
121
-
122
-
123
-
124
-
125
-
126
-
127
-
128
-
129
-
130
-
131
-
132
-
133
-
134
-
135
-
136
-
137
-
138
-
139
-
140
-
141
-
142
-
143
-
144
-
145
-
146
-
147
-
148
-
149
-
150
-
151
-
152
-
153
-
154
-
155
-
156
-
157
-
158
-
159
-
160
-
161
-
162
-
163
-
164
-
165
-
166
-
167
-
168
-
169
-
170
 |
 |
