Dell V313W User's Guide - Page 35
Working with photos, Using a memory card or flash drive with the printer
 |
UPC - 884116016519
View all Dell V313W manuals
Add to My Manuals
Save this manual to your list of manuals |
Page 35 highlights
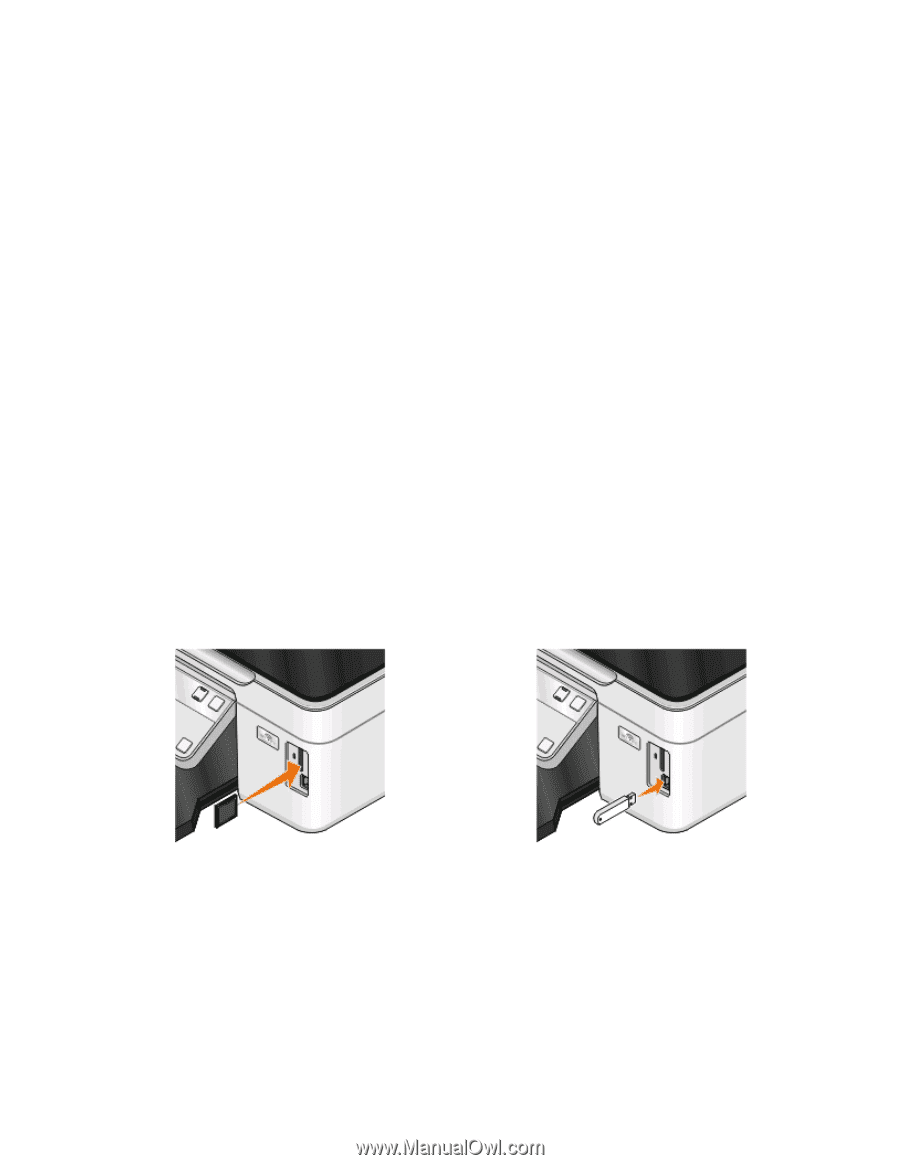
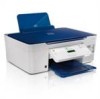
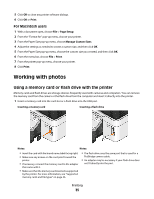
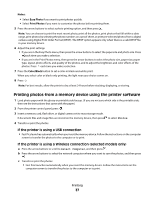
5 Click OK to close any printer software dialogs. 6 Click OK or Print. For Macintosh users 1 With a document open, choose File > Page Setup. 2 From the "Format for" pop-up menu, choose your printer. 3 From the Paper Size pop-up menu, choose Manage Custom Sizes. 4 Adjust the settings as needed to create a custom size, and then click OK. 5 From the Paper Size pop-up menu, choose the custom size you created, and then click OK. 6 From the menu bar, choose File > Print. 7 From the printer pop-up menu, choose your printer. 8 Click Print. Working with photos Using a memory card or flash drive with the printer Memory cards and flash drives are storage devices frequently used with cameras and computers. You can remove the memory card from the camera or the flash drive from the computer and insert it directly into the printer. 1 Insert a memory card into the card slot or a flash drive into the USB port. Inserting a memory card Inserting a flash drive Notes: Notes: • Insert the card with the brand name label facing right. • Make sure any arrows on the card point toward the printer. • If necessary, connect the memory card to the adapter that came with it. • Make sure that the memory card inserted is supported by the printer. For more information, see "Supported memory cards and file types" on page 36. • The flash drive uses the same port that is used for a PictBridge camera cable. • An adapter may be necessary if your flash drive does not fit directly into the port. Printing 35
-
 1
1 -
2
-
3
-
4
-
5
-
6
-
7
-
8
-
9
-
10
-
11
-
12
-
13
-
14
-
15
-
16
-
17
-
18
-
19
-
20
-
21
-
22
-
23
-
24
-
25
-
26
-
27
-
28
-
29
-
 30
30 -
 31
31 -
 32
32 -
 33
33 -
 34
34 -
 35
35 -
 36
36 -
 37
37 -
 38
38 -
 39
39 -
 40
40 -
41
-
42
-
43
-
44
-
45
-
46
-
47
-
48
-
49
-
50
-
51
-
52
-
53
-
54
-
55
-
56
-
57
-
58
-
59
-
60
-
61
-
62
-
63
-
64
-
65
-
66
-
67
-
68
-
69
-
70
-
71
-
72
-
73
-
74
-
75
-
76
-
77
-
78
-
79
-
80
-
81
-
82
-
83
-
84
-
85
-
86
-
87
-
88
-
89
-
90
-
91
-
92
-
93
-
94
-
95
-
96
-
97
-
98
-
99
-
100
-
101
-
102
-
103
-
104
-
105
-
106
-
107
-
108
-
109
-
110
-
111
-
112
-
113
-
114
-
115
-
116
-
117
-
118
-
119
-
120
-
121
-
122
-
123
-
124
-
125
-
126
-
127
-
128
-
129
-
130
-
131
-
132
-
133
-
134
-
135
 |
 |