Dell V313W User's Guide - Page 94
Jams and misfeeds troubleshooting, Paper jam in the printer, Paper jam in the paper support - scanner software
 |
UPC - 884116016519
View all Dell V313W manuals
Add to My Manuals
Save this manual to your list of manuals |
Page 94 highlights
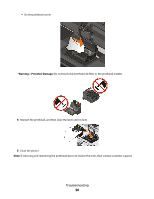
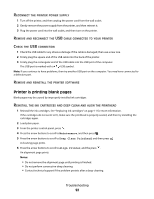
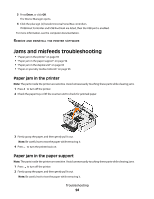
3 Press Enter, or click OK. The Device Manager opens. 4 Click the plus sign (+) beside Universal Serial Bus controllers. If USB Host Controller and USB Root Hub are listed, then the USB port is enabled. For more information, see the computer documentation. REMOVE AND REINSTALL THE PRINTER SOFTWARE Jams and misfeeds troubleshooting • "Paper jam in the printer" on page 94 • "Paper jam in the paper support" on page 94 • "Paper jam in the duplex unit" on page 95 • "Paper or specialty media misfeeds" on page 96 Paper jam in the printer Note: The parts inside the printer are sensitive. Avoid unnecessarily touching these parts while clearing jams. 1 Press to turn off the printer. 2 Check the paper tray or lift the scanner unit to check for jammed paper. 3 Firmly grasp the paper, and then gently pull it out. Note: Be careful not to tear the paper while removing it. 4 Press to turn the printer back on. Paper jam in the paper support Note: The parts inside the printer are sensitive. Avoid unnecessarily touching these parts while clearing jams. 1 Press to turn off the printer. 2 Firmly grasp the paper, and then gently pull it out. Note: Be careful not to tear the paper while removing it. Troubleshooting 94
-
 1
1 -
2
-
3
-
4
-
5
-
6
-
7
-
8
-
9
-
10
-
11
-
12
-
13
-
14
-
15
-
16
-
17
-
18
-
19
-
20
-
21
-
22
-
23
-
24
-
25
-
26
-
27
-
28
-
29
-
30
-
31
-
32
-
33
-
34
-
35
-
36
-
37
-
38
-
39
-
40
-
41
-
42
-
43
-
44
-
45
-
46
-
47
-
48
-
49
-
50
-
51
-
52
-
53
-
54
-
55
-
56
-
57
-
58
-
59
-
60
-
61
-
62
-
63
-
64
-
65
-
66
-
67
-
68
-
69
-
70
-
71
-
72
-
73
-
74
-
75
-
76
-
77
-
78
-
79
-
80
-
81
-
82
-
83
-
84
-
85
-
86
-
87
-
88
-
 89
89 -
 90
90 -
 91
91 -
 92
92 -
 93
93 -
 94
94 -
 95
95 -
 96
96 -
 97
97 -
 98
98 -
 99
99 -
100
-
101
-
102
-
103
-
104
-
105
-
106
-
107
-
108
-
109
-
110
-
111
-
112
-
113
-
114
-
115
-
116
-
117
-
118
-
119
-
120
-
121
-
122
-
123
-
124
-
125
-
126
-
127
-
128
-
129
-
130
-
131
-
132
-
133
-
134
-
135
 |
 |