Denon AVR-3312CI AVR3312CI_OwnersManual - Page 78
Rec Out Mode, Zone2, Select, Zone2 / Rec Select
 |
UPC - 883795002042
View all Denon AVR-3312CI manuals
Add to My Manuals
Save this manual to your list of manuals |
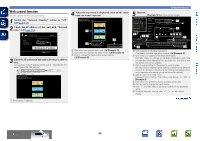
Page 78 highlights
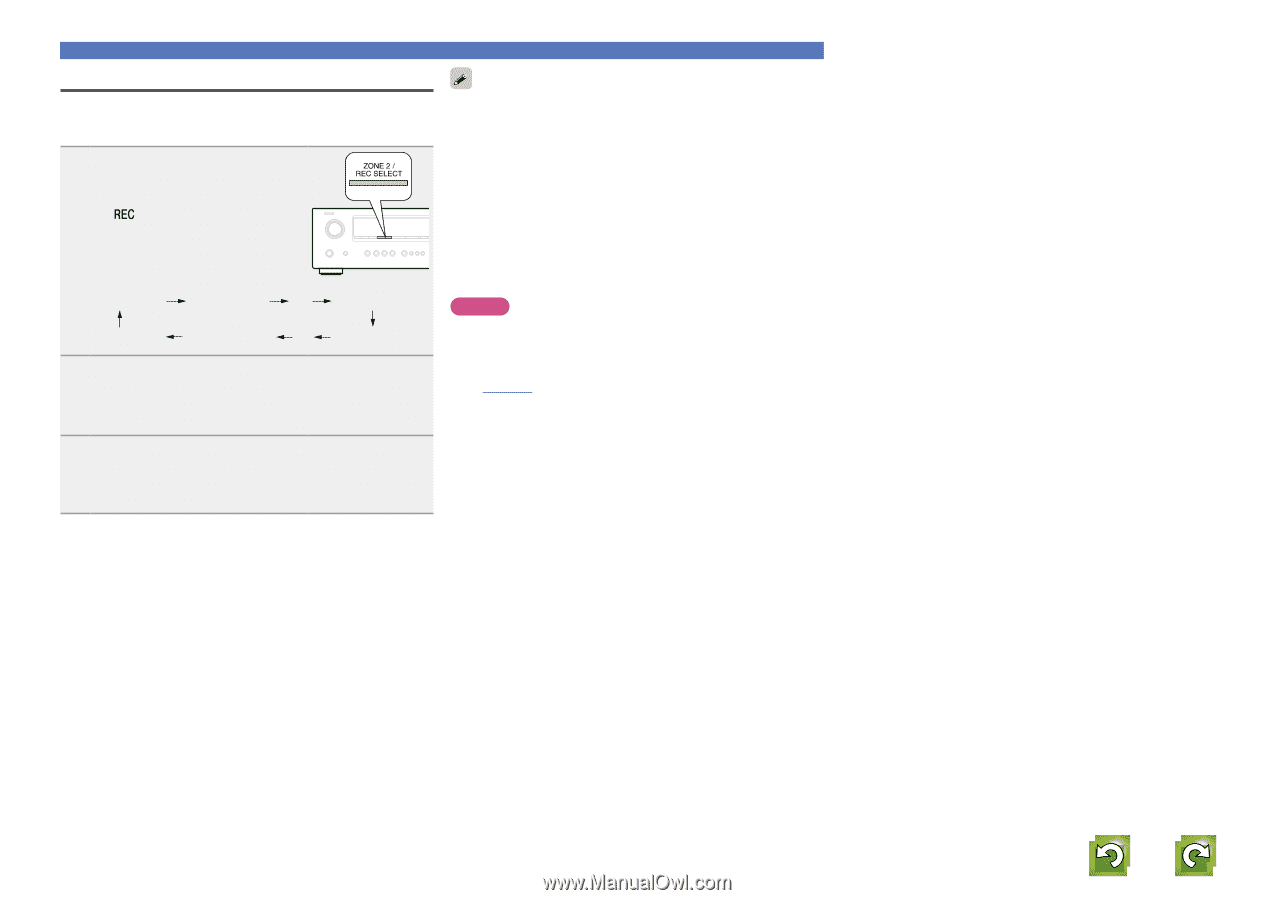
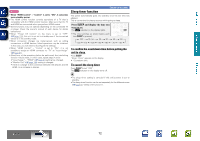
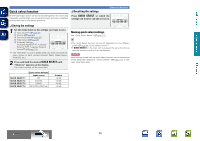
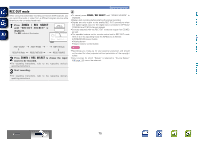
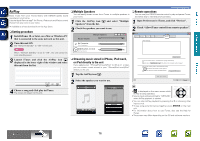
Basic version Advanced version REC OUT mode When using the audio/video recording connectors (DVR outputs), you can record the audio or video from a different program source while listening to the currently played track. 1 Press ZONE2 / REC SELECT until "RECOUT SOURCE" is displayed. The indicator illuminates. ZONE2 SOURCE ZONE2 PHONO ···· ZONE2 HD Radio RECOUT HD Radio RECOUT NET/USB ···· RECOUT SOURCE 2 Press ZONE2 / REC SELECT to choose the input source to be recorded. • For operating instructions, refer to the respective device's operating instructions. Convenient functions • To cancel, press ZONE2 / REC SELECT until "ZONE2 SOURCE" is displayed. • Make a test recording before starting the actual recording. • Signals are only output to the analog REC OUT connectors when the digital signals input to the digital input connectors (OPTICAL/ COAXIAL) are PCM (2-channel) signals. • Sources selected with the REC OUT mode are output from ZONE2 as well. • The operable buttons on the remote control unit in REC OUT mode while it is in the operating mode for ZONE2 are as follows: • ZONE/DEVICE power button • Muting button • Master volume control button NOTE • Recordings you make are for your personal enjoyment and should not be used for other purposes without permission of the copyright holder. • Input sources for which "Delete" is selected at "Source Delete" (vpage 116) cannot be selected. 3 Start recording. • For operating instructions, refer to the respective device's operating instructions. Information BD 75
-
 1
1 -
2
-
3
-
4
-
5
-
6
-
7
-
8
-
9
-
10
-
11
-
12
-
13
-
14
-
15
-
16
-
17
-
18
-
19
-
20
-
21
-
22
-
23
-
24
-
25
-
26
-
27
-
28
-
29
-
30
-
31
-
32
-
33
-
34
-
35
-
36
-
37
-
38
-
39
-
40
-
41
-
42
-
43
-
44
-
45
-
46
-
47
-
48
-
49
-
50
-
51
-
52
-
53
-
54
-
55
-
56
-
57
-
58
-
59
-
60
-
61
-
62
-
63
-
64
-
65
-
66
-
67
-
68
-
69
-
70
-
71
-
72
-
 73
73 -
 74
74 -
 75
75 -
 76
76 -
 77
77 -
 78
78 -
 79
79 -
 80
80 -
 81
81 -
 82
82 -
 83
83 -
84
-
85
-
86
-
87
-
88
-
89
-
90
-
91
-
92
-
93
-
94
-
95
-
96
-
97
-
98
-
99
-
100
-
101
-
102
-
103
-
104
-
105
-
106
-
107
-
108
-
109
-
110
-
111
-
112
-
113
-
114
-
115
-
116
-
117
-
118
-
119
-
120
-
121
-
122
-
123
-
124
-
125
-
126
-
127
-
128
-
129
-
130
-
131
-
132
-
133
-
134
-
135
-
136
-
137
-
138
-
139
-
140
-
141
-
142
-
143
-
144
-
145
-
146
-
147
-
148
-
149
-
150
-
151
-
152
-
153
-
154
-
155
-
156
-
157
 |
 |