Garmin RINO 130 Owner's Manual - Page 55
Projecting a Waypoint
 |
UPC - 753759031978
View all Garmin RINO 130 manuals
Add to My Manuals
Save this manual to your list of manuals |
Page 55 highlights
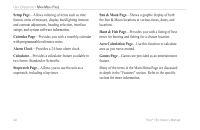
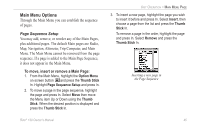
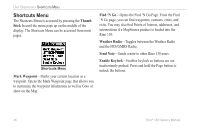
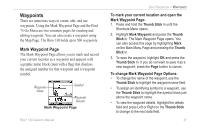
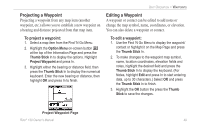
Projecting a Waypoint Projecting a waypoint from any map item (another waypoint, etc.) allows you to establish a new waypoint on a bearing and distance projected from that map item. To project a waypoint: 1. Select a map item from the Find 'N Go Menu. 2. Highlight the Option Menu on-screen button at the top of the Information Page and press the Thumb Stick In to display the options. Highlight Project Waypoint and press In. 3. Highlight either the bearing or distance field, then press the Thumb Stick In to display the numerical keyboard. Enter the new bearing or distance, then highlight OK and press In to finish. UNIT OPERATION > WAYPOINTS Editing a Waypoint A waypoint or contact can be edited to add notes or change the map symbol, name, coordinates, or elevation. You can also delete a waypoint or contact. To edit a waypoint: 1. Use the Find 'N Go Menu to display the waypoint/ contact or highlight it on the Map Page and press the Thumb Stick In. 2. To make changes to the waypoint map symbol, name, location coordinates, elevation fields and notes, highlight the desired field and press the Thumb Stick In to display the keyboard. (For Notes, highlight Edit and press In to start entering data, up to 30 characters.) Select OK and press the Thumb Stick In to finish. 3. Highlight the OK button the press the Thumb Stick to save the changes. Project Waypoint Page Rino® 130 Owner's Manual 49
-
 1
1 -
2
-
3
-
4
-
5
-
6
-
7
-
8
-
9
-
10
-
11
-
12
-
13
-
14
-
15
-
16
-
17
-
18
-
19
-
20
-
21
-
22
-
23
-
24
-
25
-
26
-
27
-
28
-
29
-
30
-
31
-
32
-
33
-
34
-
35
-
36
-
37
-
38
-
39
-
40
-
41
-
42
-
43
-
44
-
45
-
46
-
47
-
48
-
49
-
 50
50 -
 51
51 -
 52
52 -
 53
53 -
 54
54 -
 55
55 -
 56
56 -
 57
57 -
 58
58 -
 59
59 -
 60
60 -
61
-
62
-
63
-
64
-
65
-
66
-
67
-
68
-
69
-
70
-
71
-
72
-
73
-
74
-
75
-
76
-
77
-
78
-
79
-
80
-
81
-
82
-
83
-
84
-
85
-
86
-
87
-
88
-
89
-
90
-
91
-
92
-
93
-
94
-
95
-
96
-
97
-
98
-
99
-
100
-
101
-
102
-
103
-
104
-
105
-
106
-
107
-
108
-
109
-
110
-
111
-
112
-
113
-
114
-
115
-
116
-
117
-
118
-
119
-
120
-
121
-
122
-
123
-
124
-
125
-
126
-
127
-
128
-
129
-
130
-
131
-
132
 |
 |
