HP Photosmart C4400 Full User Guide - Page 54
Print enlargements, Settings, Borderless, Prints/Total, Print, To print an enlargement of a photo - parts
 |
View all HP Photosmart C4400 manuals
Add to My Manuals
Save this manual to your list of manuals |
Page 54 highlights
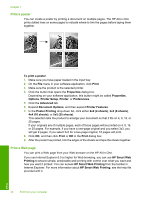
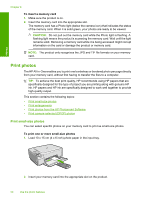
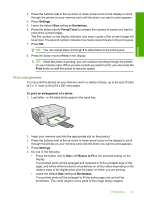
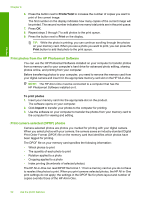
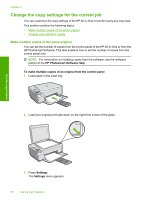
Photos 3. Press the buttons next to the up arrow or down arrow icons on the display to scroll through the photos on your memory card until the photo you want to print appears. 4. Press Settings. 5. Leave the default Size setting as Borderless. 6. Press the button next to Prints/Total to increase the number of copies you want to print of the current image. The first number on the display indicates how many copies of the current image will be printed. The second number indicates how many total prints are in the print queue. 7. Press OK. TIP: You can repeat steps 3 through 8 to add photos to the print queue. 8. Press the button next to Print on the display. TIP: While the photo is printing, you can continue scrolling through the photos on your memory card. When you see a photo you want to print, you can press the Print button to add that photo to the print queue. Print enlargements You can print the photos on your memory card in a variety of sizes, up to the size of letter (8.5 x 11 inch) or A4 (210 x 297 mm) paper. To print an enlargement of a photo 1. Load letter- or A4-sized photo paper in the input tray. 2. Insert your memory card into the appropriate slot on the product. 3. Press the buttons next to the up arrow or down arrow icons on the display to scroll through the photos on your memory card until the photo you want to print appears. 4. Press Settings. 5. Do one of the following: • Press the button next to Size until Resize to Fit is the selected setting on the display. Your printed photo will be enlarged and centered to fit the printable area of the page, and will be either bordered or borderless on all four sides depending on the relative sizes of the digital photo and the paper on which you are printing. • Leave the default Size setting as Borderless. Your printed photo will be enlarged to fill the entire page size and will be borderless. This could result in some parts of the image being cropped. Print photos 51
-
 1
1 -
2
-
3
-
4
-
5
-
6
-
7
-
8
-
9
-
10
-
11
-
12
-
13
-
14
-
15
-
16
-
17
-
18
-
19
-
20
-
21
-
22
-
23
-
24
-
25
-
26
-
27
-
28
-
29
-
30
-
31
-
32
-
33
-
34
-
35
-
36
-
37
-
38
-
39
-
40
-
41
-
42
-
43
-
44
-
45
-
46
-
47
-
48
-
 49
49 -
 50
50 -
 51
51 -
 52
52 -
 53
53 -
 54
54 -
 55
55 -
 56
56 -
 57
57 -
 58
58 -
 59
59 -
60
-
61
-
62
-
63
-
64
-
65
-
66
-
67
-
68
-
69
-
70
-
71
-
72
-
73
-
74
-
75
-
76
-
77
-
78
-
79
-
80
-
81
-
82
-
83
-
84
-
85
-
86
-
87
-
88
-
89
-
90
-
91
-
92
-
93
-
94
-
95
-
96
-
97
-
98
-
99
-
100
-
101
-
102
-
103
-
104
-
105
-
106
-
107
-
108
-
109
-
110
-
111
-
112
-
113
-
114
-
115
-
116
-
117
-
118
-
119
-
120
-
121
-
122
-
123
-
124
-
125
-
126
-
127
-
128
-
129
-
130
-
131
-
132
-
133
-
134
-
135
-
136
-
137
-
138
-
139
-
140
-
141
-
142
-
143
-
144
-
145
-
146
-
147
-
148
-
149
-
150
-
151
-
152
-
153
-
154
-
155
-
156
-
157
-
158
-
159
-
160
-
161
-
162
-
163
-
164
-
165
-
166
-
167
-
168
-
169
-
170
-
171
-
172
-
173
-
174
-
175
-
176
-
177
-
178
-
179
-
180
-
181
-
182
-
183
-
184
-
185
-
186
-
187
-
188
-
189
-
190
-
191
-
192
-
193
-
194
-
195
-
196
-
197
-
198
-
199
-
200
-
201
-
202
-
203
-
204
-
205
-
206
-
207
-
208
-
209
-
210
-
211
-
212
-
213
-
214
-
215
-
216
-
217
-
218
-
219
-
220
-
221
-
222
-
223
-
224
-
225
-
226
-
227
-
228
-
229
-
230
-
231
-
232
-
233
-
234
-
235
-
236
-
237
-
238
-
239
-
240
-
241
-
242
-
243
 |
 |
