Konica Minolta bizhub C280 bizhub C220/C280/C360 Print Operations User Guide - Page 104
Layout] tab
 |
View all Konica Minolta bizhub C280 manuals
Add to My Manuals
Save this manual to your list of manuals |
Page 104 highlights
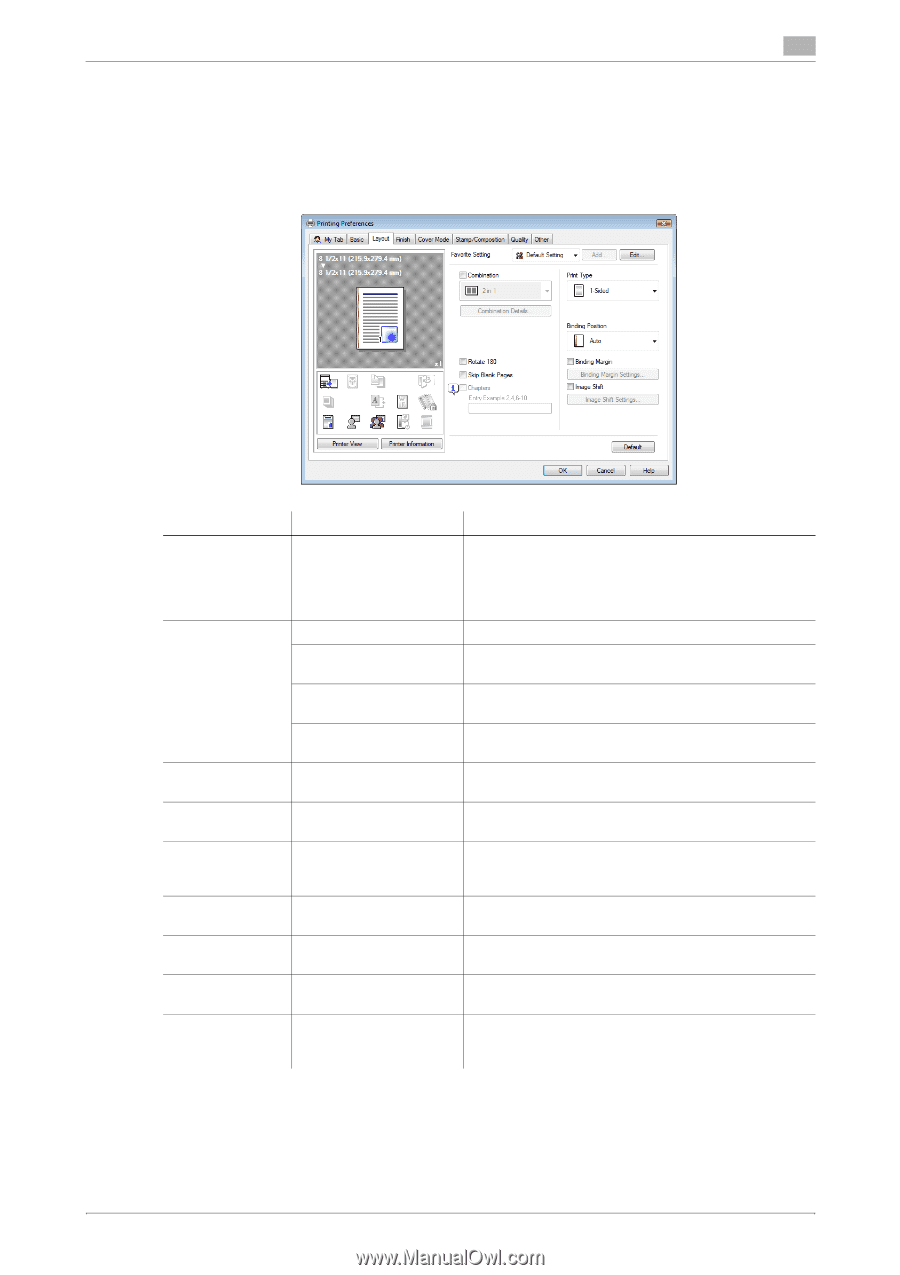
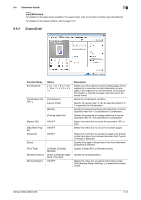
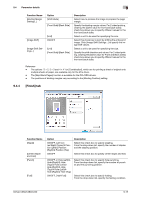
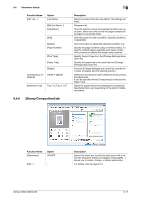
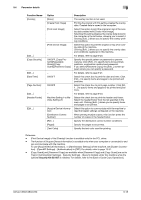
9.4 Parameter details 9 d Reference For details on the paper sizes loadable in the paper trays, refer to the [User's Guide Copy Operations]. For details on the output method, refer to page 12-2. 9.4.3 [Layout] tab Function Name [Combination] [Combination Details...] [Rotate 180] [Skip Blank Pages] [Chapters] [Entry] [Print Type] [Binding Position] [Binding Margin] Option 2 in 1, 4 in 1, 6 in 1, 9 in 1, 16 in 1, 2 e 2, 3 e 3, 4 e 4 [Combination] [Layout Order] [Border] [Overlap width line] ON/OFF ON/OFF ON/OFF − [1-Sided], [2-Sided], [Booklet] [Auto], [Left Bind], [Right Bind], [Top Bind] ON/OFF Description Select any of the options to print multiple pages of the original on to one sheet or print information on one page of the original on to several sheets. In [Combination Details...], specify the page order and use of the border frame. Select the combination condition. Specify the layout order. It can be specified when N in 1 is specified for Combination. Specify the presence and type of border lines. It can be specified when N in 1 is specified for Combination. Specify the presence of overlap width line. It can be specified when N e N is specified for Combination. Select this check box to rotate the document 180° to print. Select this check box to not print any blank pages. Select this check box to specify the page to be printed on the front side. It can be specified when Print Type is [2-Sided] or [Booklet]. Specify the pages to be printed on the front side when [Chapters] is selected. Specify 2-Sided Print or Booklet printing. Specify the binding position. Select this check box to specify the binding margin. Click [Binding Margin Settings...] to specify the margin values. bizhub C360/C280/C220 9-14
-
 1
1 -
2
-
3
-
4
-
5
-
6
-
7
-
8
-
9
-
10
-
11
-
12
-
13
-
14
-
15
-
16
-
17
-
18
-
19
-
20
-
21
-
22
-
23
-
24
-
25
-
26
-
27
-
28
-
29
-
30
-
31
-
32
-
33
-
34
-
35
-
36
-
37
-
38
-
39
-
40
-
41
-
42
-
43
-
44
-
45
-
46
-
47
-
48
-
49
-
50
-
51
-
52
-
53
-
54
-
55
-
56
-
57
-
58
-
59
-
60
-
61
-
62
-
63
-
64
-
65
-
66
-
67
-
68
-
69
-
70
-
71
-
72
-
73
-
74
-
75
-
76
-
77
-
78
-
79
-
80
-
81
-
82
-
83
-
84
-
85
-
86
-
87
-
88
-
89
-
90
-
91
-
92
-
93
-
94
-
95
-
96
-
97
-
98
-
 99
99 -
 100
100 -
 101
101 -
 102
102 -
 103
103 -
 104
104 -
 105
105 -
 106
106 -
 107
107 -
 108
108 -
 109
109 -
110
-
111
-
112
-
113
-
114
-
115
-
116
-
117
-
118
-
119
-
120
-
121
-
122
-
123
-
124
-
125
-
126
-
127
-
128
-
129
-
130
-
131
-
132
-
133
-
134
-
135
-
136
-
137
-
138
-
139
-
140
-
141
-
142
-
143
-
144
-
145
-
146
-
147
-
148
-
149
-
150
-
151
-
152
-
153
-
154
-
155
-
156
-
157
-
158
-
159
-
160
-
161
-
162
-
163
-
164
-
165
-
166
-
167
-
168
-
169
-
170
-
171
-
172
-
173
-
174
-
175
-
176
-
177
-
178
-
179
-
180
-
181
-
182
-
183
-
184
-
185
-
186
-
187
-
188
-
189
-
190
-
191
-
192
-
193
-
194
-
195
-
196
-
197
-
198
-
199
-
200
-
201
-
202
-
203
-
204
-
205
-
206
-
207
-
208
-
209
-
210
-
211
-
212
-
213
-
214
-
215
-
216
-
217
-
218
-
219
-
220
-
221
-
222
-
223
-
224
-
225
-
226
-
227
-
228
-
229
-
230
-
231
-
232
-
233
-
234
-
235
-
236
-
237
-
238
-
239
-
240
-
241
-
242
-
243
-
244
-
245
-
246
-
247
-
248
-
249
-
250
-
251
-
252
-
253
-
254
-
255
-
256
-
257
-
258
-
259
-
260
-
261
-
262
-
263
-
264
-
265
-
266
-
267
-
268
-
269
-
270
-
271
-
272
-
273
-
274
-
275
-
276
-
277
-
278
-
279
-
280
-
281
-
282
-
283
-
284
-
285
-
286
-
287
-
288
-
289
-
290
-
291
-
292
-
293
-
294
-
295
-
296
-
297
-
298
-
299
-
300
-
301
-
302
-
303
-
304
-
305
-
306
-
307
-
308
-
309
-
310
-
311
 |
 |