Kyocera FS 1020D FS-1020D Operation Guide Rev 1.4 - Page 29
KM-NET, for Clients, KM-NET for Clients, Custom Paper Type Settings, Normal 3, KM-NET for, Clients
 |
View all Kyocera FS 1020D manuals
Add to My Manuals
Save this manual to your list of manuals |
Page 29 highlights
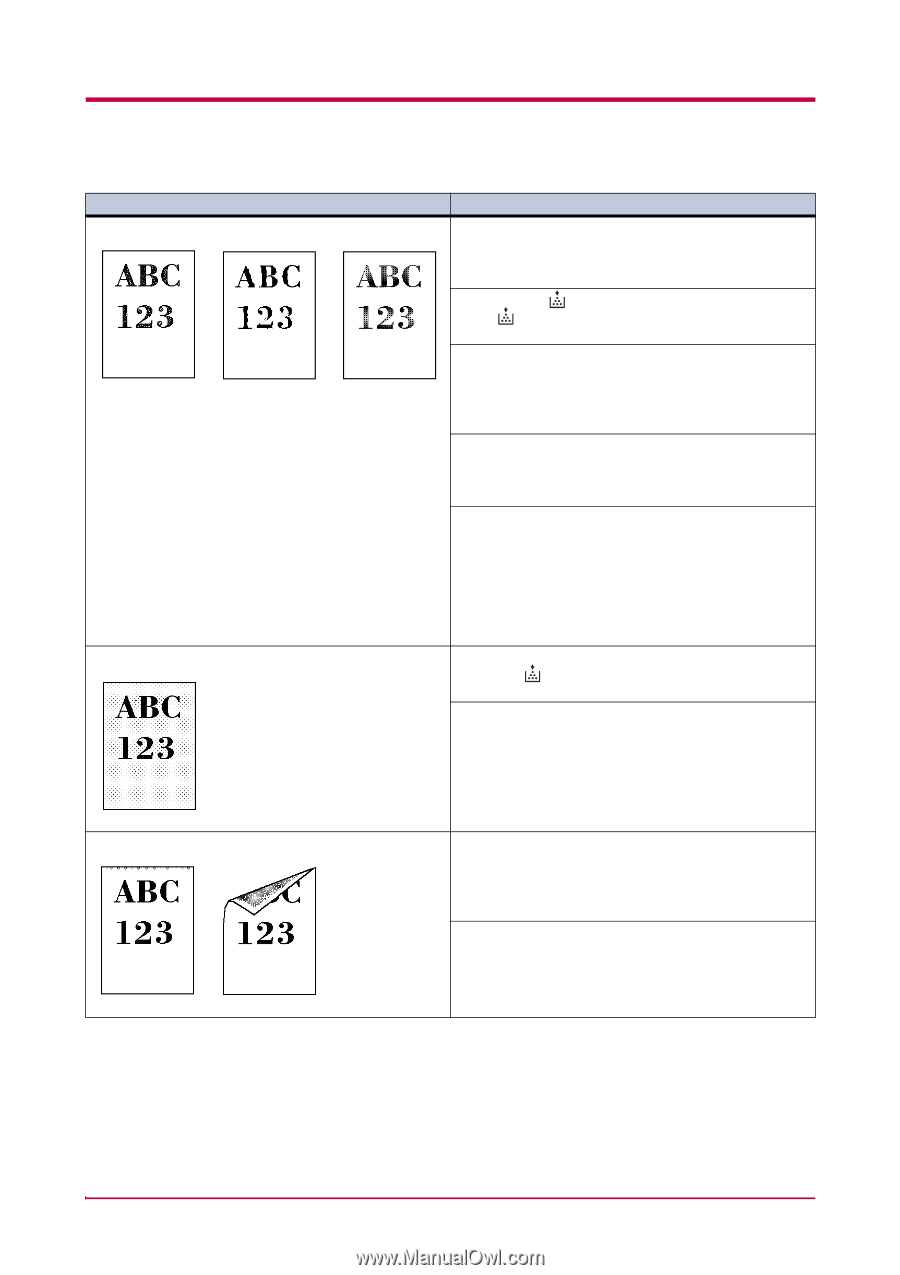
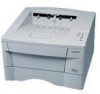
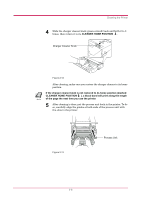
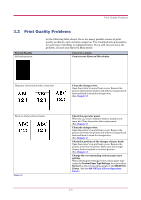
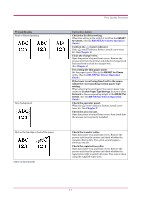
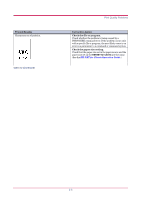
Printed Results Faint or blurred printing Grey background. Dirt on the top edge or back of the paper Table 3-2 (Continued) Print Quality Problems Corrective Action Check the EcoPrint setting. When this setting is On, switch it to Off on the KM-NET for Clients. (See the KM-NET for Clients Operation Guide.) Confirm the (toner) indicator. If the (toner) indicator flashes, install a new toner kit. (See Chapter 2) Clean the charger wire. Open the printer's top and front covers. Remove the process unit from the printer and slide the charger knob back and forth to clean the charger wire. (See Chapter 2) Try setting the thin paper mode. Set the paper type to Thin in the KM-NET for Clients utility. (See the KM-NET for Clients Operation Guide.) If the toner is not being fixed well to the paper, adjust the corresponding custom paper type setting. When selecting the settings for the custom paper type under the Custom Paper Type Settings, be sure to select Normal 3 as the corresponding weight in the KM-NET for Clients. (See the KM-NET for Clients Operation Guide.) Check the operator panel. When the (toner) indicator flashes, install a new toner kit. (See Chapter 2) Check the process unit. Open the printer's top and front covers, then check that the process unit is properly installed. Check the transfer roller. Open the printer's top and front covers. Remove the process unit from the printer and check whether the transfer roller is dirty. If so, print several pages to eliminate the dirt. Check the registration roller. Open the printer's top and front covers. Remove the process unit from the printer and check whether the registration roller is soiled with toner. If so, wipe it clean using the supplied wiper cloth. 3-4
-
 1
1 -
2
-
3
-
4
-
5
-
6
-
7
-
8
-
9
-
10
-
11
-
12
-
13
-
14
-
15
-
16
-
17
-
18
-
19
-
20
-
21
-
22
-
23
-
 24
24 -
 25
25 -
 26
26 -
 27
27 -
 28
28 -
 29
29 -
 30
30 -
 31
31 -
 32
32 -
 33
33 -
 34
34 -
35
-
36
-
37
-
38
-
39
-
40
-
41
-
42
-
43
-
44
-
45
-
46
-
47
-
48
-
49
-
50
-
51
-
52
-
53
-
54
-
55
-
56
-
57
-
58
-
59
-
60
-
61
-
62
-
63
-
64
-
65
-
66
-
67
-
68
-
69
-
70
-
71
-
72
-
73
-
74
-
75
-
76
-
77
-
78
-
79
-
80
-
81
-
82
-
83
-
84
-
85
-
86
-
87
-
88
-
89
-
90
-
91
-
92
-
93
-
94
-
95
-
96
-
97
-
98
 |
 |