Kyocera FS 1020D FS-1020D Operation Guide Rev 1.4 - Page 71
Start, Printers and Faxes, Kyocera Mita FS-1020D KX, Properties, Device Settings, Memory - mita kx driver
 |
View all Kyocera FS 1020D manuals
Add to My Manuals
Save this manual to your list of manuals |
Page 71 highlights
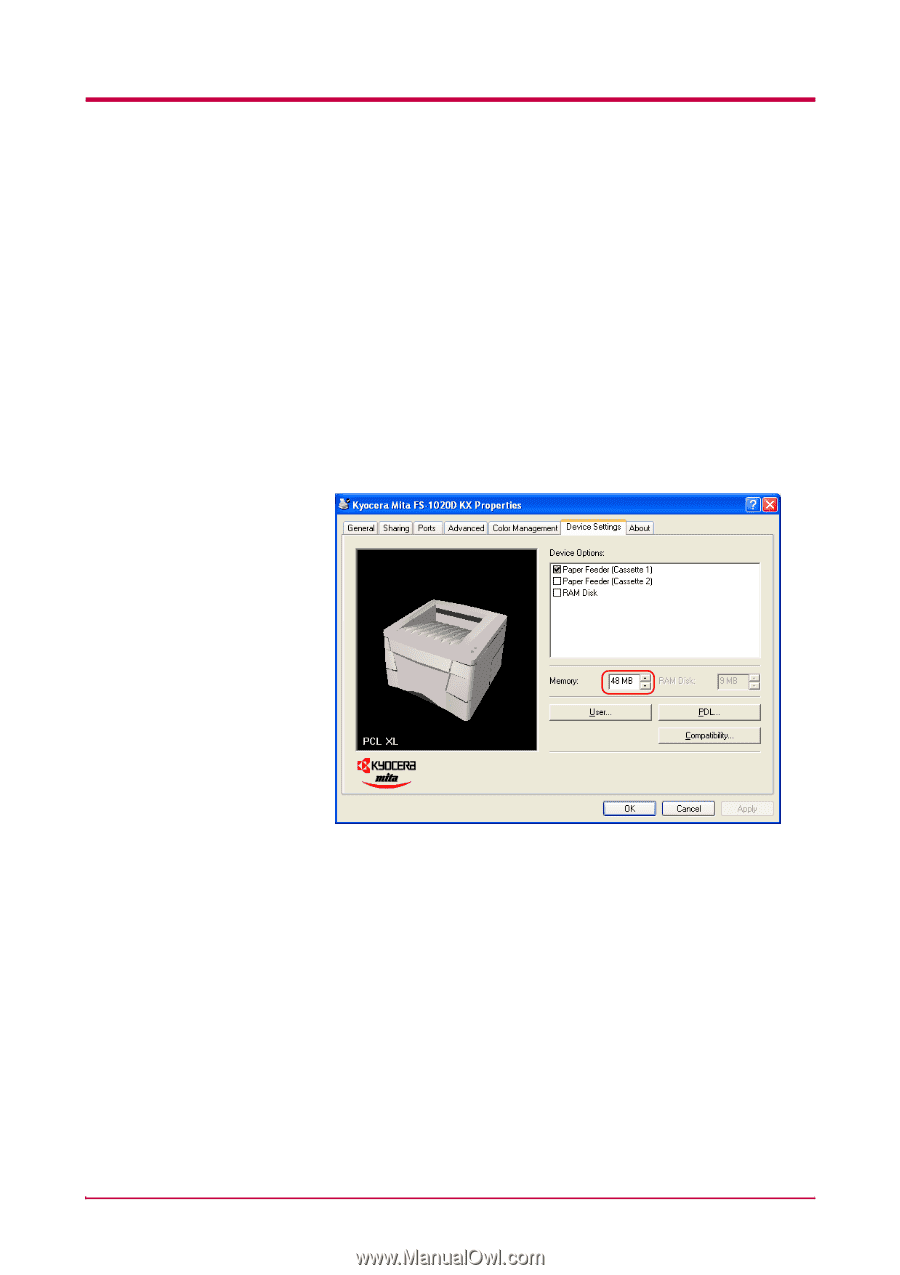
Expansion Memory Installation Setting the Printer Driver After you install the additional memory to the printer, follow the instructions below to set the printer driver so that the printer can use the memories efficiently. 1 Click the Windows Start button, and then click Printers and Faxes. 2 Right click the Kyocera Mita FS-1020D KX icon, and click Properties. The Properties dialog box will open. Click the Device Settings tab. 3 Enter the total memory size installed to the printer (up to 272 MB) in the Memory box. A-7
-
 1
1 -
2
-
3
-
4
-
5
-
6
-
7
-
8
-
9
-
10
-
11
-
12
-
13
-
14
-
15
-
16
-
17
-
18
-
19
-
20
-
21
-
22
-
23
-
24
-
25
-
26
-
27
-
28
-
29
-
30
-
31
-
32
-
33
-
34
-
35
-
36
-
37
-
38
-
39
-
40
-
41
-
42
-
43
-
44
-
45
-
46
-
47
-
48
-
49
-
50
-
51
-
52
-
53
-
54
-
55
-
56
-
57
-
58
-
59
-
60
-
61
-
62
-
63
-
64
-
65
-
 66
66 -
 67
67 -
 68
68 -
 69
69 -
 70
70 -
 71
71 -
 72
72 -
 73
73 -
 74
74 -
 75
75 -
 76
76 -
77
-
78
-
79
-
80
-
81
-
82
-
83
-
84
-
85
-
86
-
87
-
88
-
89
-
90
-
91
-
92
-
93
-
94
-
95
-
96
-
97
-
98
 |
 |
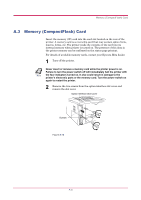
Expansion Memory Installation
A-7
Setting the Printer Driver
After you install the additional memory to the printer, follow the
instructions below to set the printer driver so that the printer can use the
memories efficiently.
1
Click the Windows
Start
button, and then click
Printers and Faxes
.
2
Right click the
Kyocera Mita FS-1020D KX
icon, and click
Properties
.
The
Properties
dialog box will open. Click the
Device Settings
tab.
3
Enter the total memory size installed to the printer (up to 272 MB)
in the
Memory
box.