Kyocera FS 1020D FS-1020D Operation Guide Rev 1.4 - Page 73
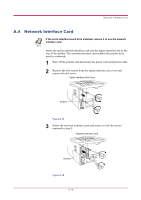
If the Network Interface Card or the Serial Interface Board is, installed, A-13
 |
View all Kyocera FS 1020D manuals
Add to My Manuals
Save this manual to your list of manuals |
Page 73 highlights
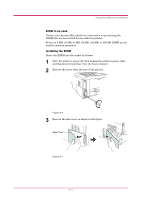
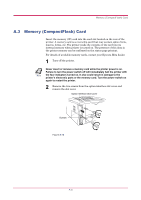
Memory (CompactFlash) Card If the Network Interface Card or the Serial Interface Board is installed Remove the two screws from the network interface card or the serial interface board and remove it. Network Interface Card (or Serial Interface Board) Screws Figure A-13 3 Insert the memory card in the slot. Insert as shown in the figure. Push it in all the way. Memory Card Figure A-14 4 Close and secure the slot cover. If the network interface card or the serial interface board kit is removed in the step 2 above, reinstall and secure the card or the kit. A-9
-
 1
1 -
2
-
3
-
4
-
5
-
6
-
7
-
8
-
9
-
10
-
11
-
12
-
13
-
14
-
15
-
16
-
17
-
18
-
19
-
20
-
21
-
22
-
23
-
24
-
25
-
26
-
27
-
28
-
29
-
30
-
31
-
32
-
33
-
34
-
35
-
36
-
37
-
38
-
39
-
40
-
41
-
42
-
43
-
44
-
45
-
46
-
47
-
48
-
49
-
50
-
51
-
52
-
53
-
54
-
55
-
56
-
57
-
58
-
59
-
60
-
61
-
62
-
63
-
64
-
65
-
66
-
67
-
 68
68 -
 69
69 -
 70
70 -
 71
71 -
 72
72 -
 73
73 -
 74
74 -
 75
75 -
 76
76 -
 77
77 -
 78
78 -
79
-
80
-
81
-
82
-
83
-
84
-
85
-
86
-
87
-
88
-
89
-
90
-
91
-
92
-
93
-
94
-
95
-
96
-
97
-
98
 |
 |
Memory (CompactFlash) Card
A-9
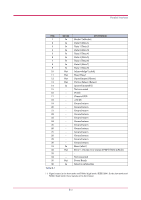
If the Network Interface Card or the Serial Interface Board is
installed
Remove the two screws from the network interface card or the serial
interface board and remove it.
Figure A-13
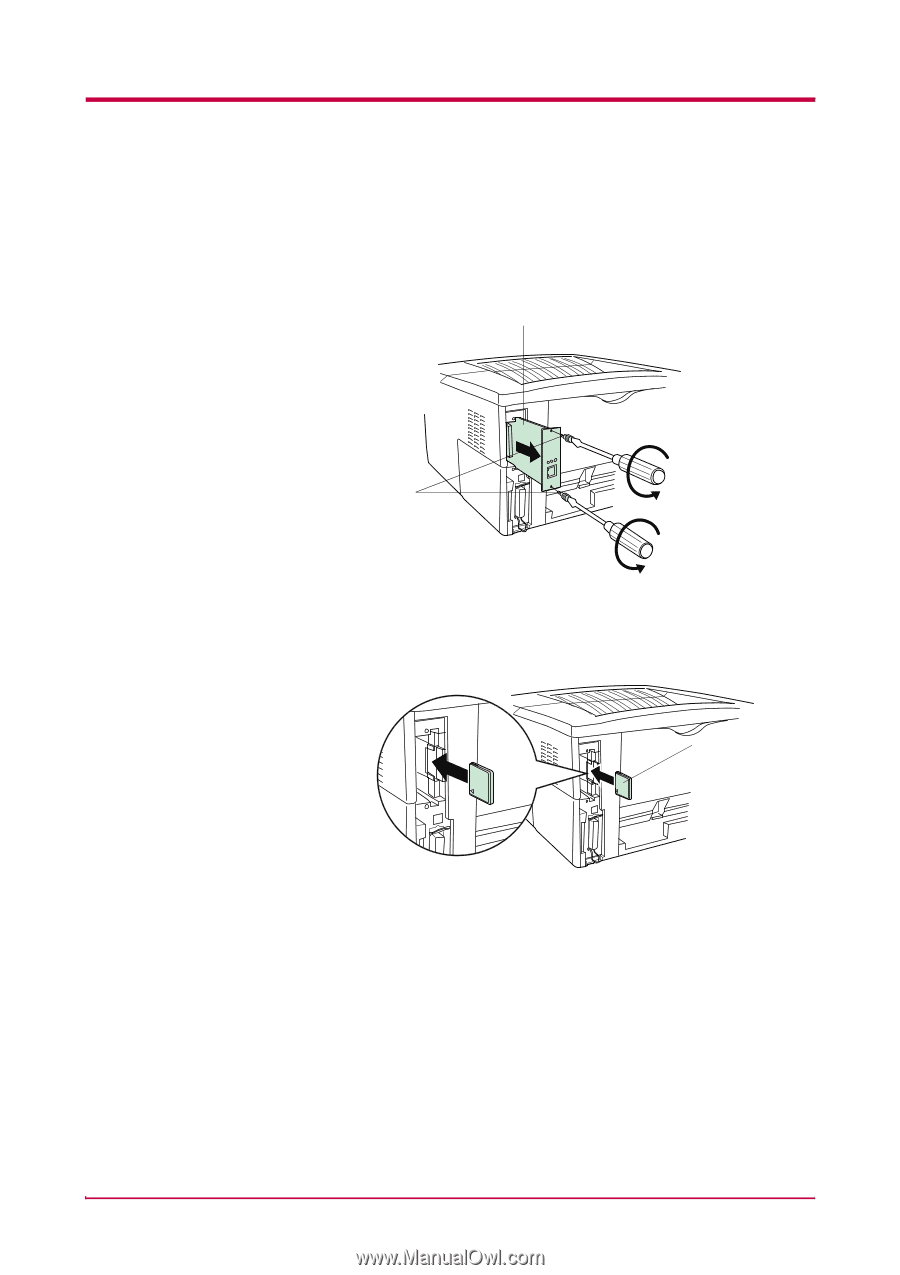
3
Insert the memory card in the slot. Insert as shown in the figure.
Push it in all the way.
Figure A-14
4
Close and secure the slot cover. If the network interface card or the
serial interface board kit is removed in the step 2 above, reinstall
and secure the card or the kit.
Network Interface Card
(or Serial Interface Board)
Screws
Memory Card