Kyocera FS 1020D FS-1020D Operation Guide Rev 1.4 - Page 70
To remove a DIMM, Testing the Expansion Memory
 |
View all Kyocera FS 1020D manuals
Add to My Manuals
Save this manual to your list of manuals |
Page 70 highlights
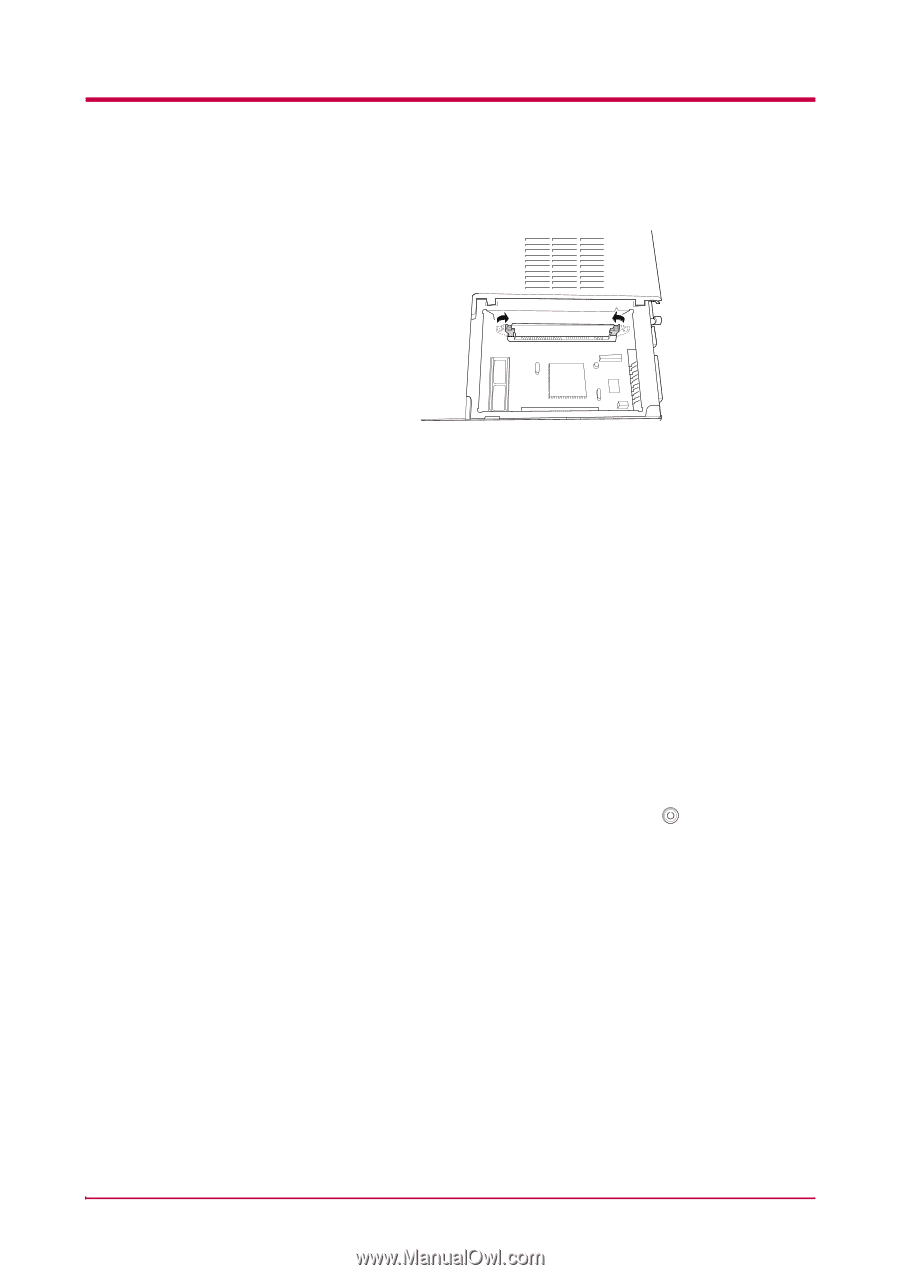
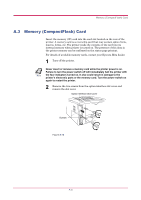
Expansion Memory Installation 7 Close the clips on the DIMM slot to secure the DIMM. Figure A-11 8 When you have finished installing the DIMM, replace the side cover and fasten it with the screw. To remove a DIMM: Remove the side cover as shown in steps 1 to 3 on page A-4, then carefully pull the end clips outwards and pull the DIMM out of the socket. Testing the Expansion Memory After you have finished installing DIMM in the printer, test the printer to see if installation succeeded. To test the expansion memory, proceed as follows: 1 Make sure the power switch is off. Plug the power cord into the printer and turn on the power. 2 When the printer is online, press and hold the key for 3 seconds or more. 3 If the installation succeeded, the amount of memory shown on the status page will correspond with the amount of expansion memory. (The factory installed memory size is 16 MB.) A-6
-
 1
1 -
2
-
3
-
4
-
5
-
6
-
7
-
8
-
9
-
10
-
11
-
12
-
13
-
14
-
15
-
16
-
17
-
18
-
19
-
20
-
21
-
22
-
23
-
24
-
25
-
26
-
27
-
28
-
29
-
30
-
31
-
32
-
33
-
34
-
35
-
36
-
37
-
38
-
39
-
40
-
41
-
42
-
43
-
44
-
45
-
46
-
47
-
48
-
49
-
50
-
51
-
52
-
53
-
54
-
55
-
56
-
57
-
58
-
59
-
60
-
61
-
62
-
63
-
64
-
 65
65 -
 66
66 -
 67
67 -
 68
68 -
 69
69 -
 70
70 -
 71
71 -
 72
72 -
 73
73 -
 74
74 -
 75
75 -
76
-
77
-
78
-
79
-
80
-
81
-
82
-
83
-
84
-
85
-
86
-
87
-
88
-
89
-
90
-
91
-
92
-
93
-
94
-
95
-
96
-
97
-
98
 |
 |