Kyocera TASKalfa 3051ci Printing System (11),(12),(13),(14) Color Printing Gu - Page 61
Control Bar, Printing with a Control Bar
 |
View all Kyocera TASKalfa 3051ci manuals
Add to My Manuals
Save this manual to your list of manuals |
Page 61 highlights
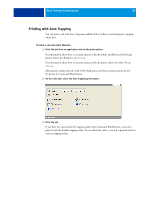
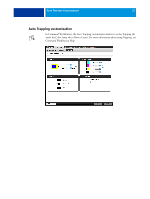
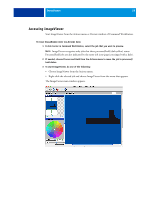
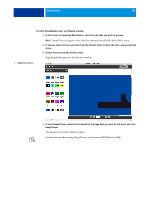
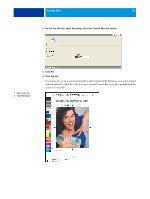
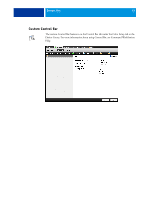
CONTROL BAR 61 CONTROL BAR Control Bar allows you to add a static color bar and dynamic job information to each printed page at a user-defined location. The default Control Bar is designed to fit the E100 default paper size, Letter/A4, or larger. You can create Control Bars for other paper sizes. The Control Bar feature is available with Productivity Package option on the E100. NOTE: If a Control Bar does not fit on the page, it will be clipped. NOTE: If a background color is defined as "white" for a user-defined Control Bar, it must be defined in the CMYK color space for the Paper Simulation feature to take effect. For more information about Paper Simulation, see Paper Simulation White Point Editing. The default Control Bar provides a color bar and dynamic job information. Many jobs print satisfactorily with the default Control Bar, but if you require your own Control Bar, create it by defining custom values on the Control Bar tab in Color Setup. Printing with a Control Bar Print a job with the default Control Bar by setting the Control Bar print option to On from the printer driver. You can print a job with a Control Bar by setting the Control Bar print option to On. TO PRINT A JOB WITH A CONTROL BAR 1 Print the job from an application and set the print options. For information about how to set print options with the Adobe and Microsoft PostScript printer drivers for Windows, see Printing. For information about how to set print options with the printer drivers for Mac OS, see Printing. Alternatively, submit the job to the E100 Hold queue and then set print options in Job Properties in Command WorkStation.
-
 1
1 -
2
-
3
-
4
-
5
-
6
-
7
-
8
-
9
-
10
-
11
-
12
-
13
-
14
-
15
-
16
-
17
-
18
-
19
-
20
-
21
-
22
-
23
-
24
-
25
-
26
-
27
-
28
-
29
-
30
-
31
-
32
-
33
-
34
-
35
-
36
-
37
-
38
-
39
-
40
-
41
-
42
-
43
-
44
-
45
-
46
-
47
-
48
-
49
-
50
-
51
-
52
-
53
-
54
-
55
-
 56
56 -
 57
57 -
 58
58 -
 59
59 -
 60
60 -
 61
61 -
 62
62 -
 63
63 -
 64
64 -
 65
65 -
 66
66 -
67
-
68
-
69
-
70
-
71
-
72
-
73
-
74
-
75
-
76
-
77
-
78
-
79
-
80
-
81
-
82
-
83
 |
 |
