Lexmark Z647 User's Guide for Mac OS 9 - Page 20
Step 2: Customize the print settings
 |
View all Lexmark Z647 manuals
Add to My Manuals
Save this manual to your list of manuals |
Page 20 highlights
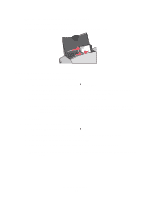
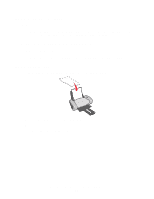
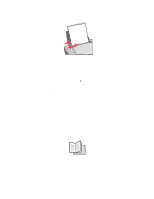
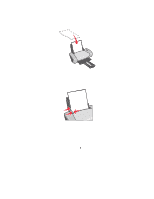
• Load the cards vertically against the right side of the paper support. • Make sure your cards are not used or damaged. • Make sure the print side is facing you. • Do not force the cards into the printer. • Squeeze and slide the paper guide to the left edge of the cards. Note: If you are using Letter size paper, adjusting the paper guide may not be necessary. Step 2: Customize the print settings 1 Choose a paper size and orientation: a From the software program, choose File Page Setup. b From the Paper Size pop-up menu, choose a card size. c From Orientation, click the portrait or landscape icon. d Click OK. Printing cards 20
-
 1
1 -
2
-
3
-
4
-
5
-
6
-
7
-
8
-
9
-
10
-
11
-
12
-
13
-
14
-
 15
15 -
 16
16 -
 17
17 -
 18
18 -
 19
19 -
 20
20 -
 21
21 -
 22
22 -
 23
23 -
 24
24 -
 25
25 -
26
-
27
-
28
-
29
-
30
-
31
-
32
-
33
-
34
-
35
-
36
-
37
-
38
-
39
-
40
-
41
-
42
-
43
-
44
-
45
-
46
-
47
-
48
-
49
-
50
-
51
-
52
-
53
-
54
-
55
-
56
-
57
-
58
-
59
-
60
-
61
-
62
-
63
-
64
-
65
-
66
-
67
-
68
-
69
-
70
-
71
-
72
-
73
-
74
-
75
 |
 |

Printing cards
20
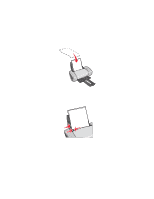
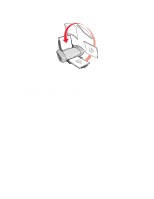
•
Load the cards vertically against the right side of the paper support.
•
Make sure your cards are not used or damaged.
•
Make sure the print side is facing you.
•
Do not force the cards into the printer.
•
Squeeze and slide the paper guide to the left edge of the cards.
Note:
If you are using Letter size paper, adjusting the paper guide may not be necessary.
Step 2: Customize the print settings
1
Choose a paper size and orientation:
a
From the software program, choose
File
Page Setup
.
b
From the Paper
Size pop-up menu, choose a card size.
c
From Orientation, click the portrait or landscape icon.
d
Click
OK
.