Lexmark Z705 User's Guide for Mac OS X - Page 14
Using the paper type sensor, Z700-P700 Series Utility, Print, Z700-P700 Series, Quality & Media - manual
 |
UPC - 734646890007
View all Lexmark Z705 manuals
Add to My Manuals
Save this manual to your list of manuals |
Page 14 highlights
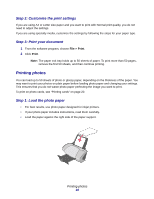
Click the: Select: Advanced menu Select Printer Network Printer Configuration Calibrate Paper Type Sensor When you want to: • Select a printer and make it the default printer. • Find the IP address for the selected printer. • Add a printer located on a remote subnet. You can add a single printer or search the subnet for all available printers. • View a list of all USB, USB print sharing, and network printers. • Configure a network printer. • View a list of network printers. Ensure that the paper type sensor is working correctly. 3 To learn more about what you can do with your printer, click ? to view the printer software Help. 4 Click the red button in the upper left corner to close the Z700-P700 Series Utility. Using the paper type sensor Your printer has a paper type sensor that detects the following paper types loaded in your printer, and automatically adjusts the Paper Type setting in the Print dialog accordingly: • Plain • Coated • Glossy/Photo • Transparency When you install your printer, the paper type sensor is set on Automatic (default). If you want to turn off the paper type sensor and manually choose your paper type: 1 From the software program, choose File Print. 2 From the Printer pop-up menu, choose Z700-P700 Series. 3 From the pop-up menu in the upper left corner, choose Quality & Media. 4 From the Paper Type pop-up menu, choose your preferred paper type. 5 Click Print. Note: Although the printer can detect the type of paper you are using, it cannot detect the paper size. Make sure you select the appropriate paper size in the Page Setup dialog. Using the paper type sensor 14
-
 1
1 -
2
-
3
-
4
-
5
-
6
-
7
-
8
-
 9
9 -
 10
10 -
 11
11 -
 12
12 -
 13
13 -
 14
14 -
 15
15 -
 16
16 -
 17
17 -
 18
18 -
 19
19 -
20
-
21
-
22
-
23
-
24
-
25
-
26
-
27
-
28
-
29
-
30
-
31
-
32
-
33
-
34
-
35
-
36
-
37
-
38
-
39
-
40
-
41
-
42
-
43
-
44
-
45
-
46
-
47
-
48
-
49
-
50
-
51
-
52
-
53
-
54
-
55
-
56
-
57
-
58
-
59
-
60
-
61
-
62
-
63
-
64
-
65
-
66
-
67
 |
 |
