Lexmark Z705 User's Guide for Mac OS X - Page 31
Printing iron-on transfers, Step 3: Print your handouts, Step 1: Load the iron-on transfers
 |
UPC - 734646890007
View all Lexmark Z705 manuals
Add to My Manuals
Save this manual to your list of manuals |
Page 31 highlights
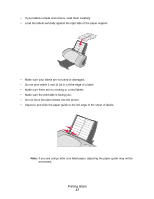
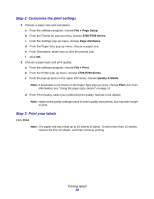
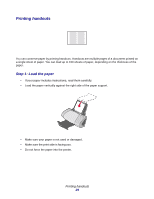
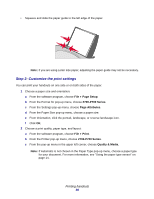
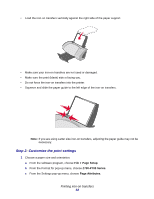
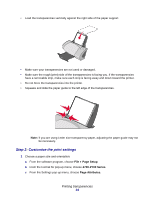
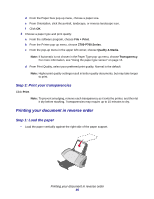
d From Print Quality, select your preferred print quality. Normal is the default. Note: Higher print quality settings result in better quality documents, but may take longer to print. e From the pop-up menu in the upper left corner, choose Layout. f From the Pages per Sheet pop-up menu, choose the number of pages you want to print on one sheet. g From Layout Direction, click the graphic that shows the order you want the pages to print on the sheet. h If you want to print a border around each image, choose an option from the Border pop- up menu. Step 3: Print your handouts Click Print. Printing iron-on transfers You can load up to 100 iron-on transfers, depending on the thickness of the iron-on transfers. You may want to print your image on plain paper before printing it on an iron-on transfer. This ensures you do not waste iron-on transfers perfecting the image you want to print. When the image prints to your satisfaction, load the iron-on transfers. Note: For best results, load iron-on transfers one at a time. Step 1: Load the iron-on transfers • If your iron-on transfers include instructions, read them carefully. Printing iron-on transfers 31
-
 1
1 -
2
-
3
-
4
-
5
-
6
-
7
-
8
-
9
-
10
-
11
-
12
-
13
-
14
-
15
-
16
-
17
-
18
-
19
-
20
-
21
-
22
-
23
-
24
-
25
-
 26
26 -
 27
27 -
 28
28 -
 29
29 -
 30
30 -
 31
31 -
 32
32 -
 33
33 -
 34
34 -
 35
35 -
 36
36 -
37
-
38
-
39
-
40
-
41
-
42
-
43
-
44
-
45
-
46
-
47
-
48
-
49
-
50
-
51
-
52
-
53
-
54
-
55
-
56
-
57
-
58
-
59
-
60
-
61
-
62
-
63
-
64
-
65
-
66
-
67
 |
 |
