Motorola MILESTONE PLUS User Guide - Page 6
Set up & go, Wi-Fi connect, Cool content & more - phone
 |
View all Motorola MILESTONE PLUS manuals
Add to My Manuals
Save this manual to your list of manuals |
Page 6 highlights
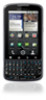
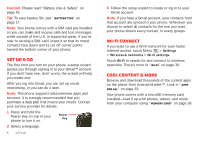
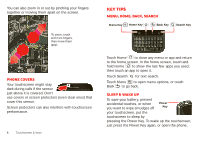
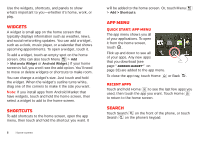
Caution: Please read "Battery Use & Safety" on page 45. Tip: To save battery life, see "Battery tips" on page 17. Note: Your phone comes with a SIM card pre-installed so you can make and receive calls and text messages while outside of the U.S. in supported areas. If you're new to owning a SIM card, insert it so that its metal contacts face down and its cut off corner points toward the bottom corner of your phone. Set up & go The first time you turn on your phone, a setup wizard guides you through signing in to your Gmail™ account. If you don't have one, don't worry, the wizard will help you create one. After you log into Gmail, you can set up social networking, or you can do it later. Note: This phone supports data-intensive apps and services. It is strongly recommended that you purchase a data plan that meets your needs. Contact your service provider for details. 1 Press and hold the Power Key on top of your phone to turn it on. Power Key 2 Select a language. 4 Let's go 3 Follow the setup wizard to create or log in to your Gmail account. Note: If you have a Gmail account, your contacts from that account are synced to your phone. Whenever you choose to select all contacts for the one you want, your phone shows every contact, in every groups. Wi-Fi connect If you want to use a Wi-Fi network for even faster Internet access, touch Menu > Settings > Wireless & networks > Wi-Fi settings. Touch Wi-Fi to search for and connect to wireless networks. There's more in "Wi-Fi" on page 36. Cool content & more Browse and download thousands of the coolest apps on the planet from Android Market™. Look in "Apps for all" on page 33. Your phone comes with a microSD memory card installed-load it up with photos, videos, and music from your computer using "Memory card" on page 38.
-
 1
1 -
 2
2 -
 3
3 -
 4
4 -
 5
5 -
 6
6 -
 7
7 -
 8
8 -
 9
9 -
 10
10 -
 11
11 -
 12
12 -
13
-
14
-
15
-
16
-
17
-
18
-
19
-
20
-
21
-
22
-
23
-
24
-
25
-
26
-
27
-
28
-
29
-
30
-
31
-
32
-
33
-
34
-
35
-
36
-
37
-
38
-
39
-
40
-
41
-
42
-
43
-
44
-
45
-
46
-
47
-
48
-
49
-
50
-
51
-
52
-
53
-
54
-
55
-
56
-
57
-
58
-
59
-
60
 |
 |
