Netgear FM114P FR114W Reference Manual - Page 83
Printer Management, Port Options - print server drivers
 |
UPC - 606449024029
View all Netgear FM114P manuals
Add to My Manuals
Save this manual to your list of manuals |
Page 83 highlights
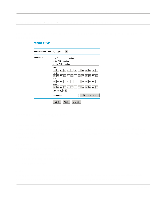
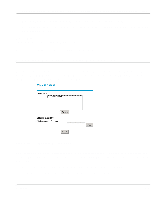
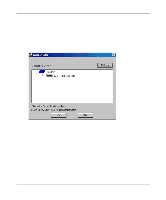
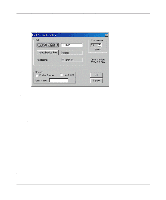
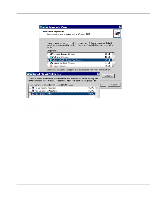
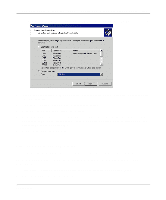
Reference Manual for the Model FR114P, FR114W and FM114P Cable/DSL ProSafe Firewall c. If desired, change the Printer name to be more descriptive (such as DeskJet on PrintServer) d. If prompted about Sharing, do NOT enable Sharing. 10. Installation is now complete. You can now print using this printer. To make changes later, use the Start menu to run this program. The default installation is Start -> Programs -> NETGEAR Firewall Print Server -> Add Port. Printer Management • Using PTP printing, print jobs can be managed in the same manner as any Windows printer. Open the Printers folder (Start -> Settings -> Printers) and double-click any printer to see the current print jobs. • If the printer attached to the firewall is changed, run the 'Add Port' program again and select the new printer. • To delete a port created by this setup program, use the 'Windows Delete Port' facility: a. Right-click any printer in the Printers folder, and select Properties. b. Locate the Delete Port button. This button is on either the Details or Ports tab, depending on your version of Windows. Port Options The options for the Print Port Driver are accessed via the Windows Port Settings button. Print Server 7-3
-
 1
1 -
2
-
3
-
4
-
5
-
6
-
7
-
8
-
9
-
10
-
11
-
12
-
13
-
14
-
15
-
16
-
17
-
18
-
19
-
20
-
21
-
22
-
23
-
24
-
25
-
26
-
27
-
28
-
29
-
30
-
31
-
32
-
33
-
34
-
35
-
36
-
37
-
38
-
39
-
40
-
41
-
42
-
43
-
44
-
45
-
46
-
47
-
48
-
49
-
50
-
51
-
52
-
53
-
54
-
55
-
56
-
57
-
58
-
59
-
60
-
61
-
62
-
63
-
64
-
65
-
66
-
67
-
68
-
69
-
70
-
71
-
72
-
73
-
74
-
75
-
76
-
77
-
 78
78 -
 79
79 -
 80
80 -
 81
81 -
 82
82 -
 83
83 -
 84
84 -
 85
85 -
 86
86 -
 87
87 -
 88
88 -
89
-
90
-
91
-
92
-
93
-
94
-
95
-
96
-
97
-
98
-
99
-
100
-
101
-
102
-
103
-
104
-
105
-
106
-
107
-
108
-
109
-
110
-
111
-
112
-
113
-
114
-
115
-
116
-
117
-
118
-
119
-
120
-
121
-
122
-
123
-
124
-
125
-
126
-
127
-
128
-
129
-
130
-
131
-
132
-
133
-
134
-
135
-
136
-
137
-
138
-
139
-
140
-
141
-
142
-
143
-
144
-
145
-
146
-
147
-
148
-
149
-
150
 |
 |