Netgear WNDR3700 WNDR3700 User Manual - Page 110
Priority Category, MAC Address, Refresh, Priority, Apply, Turn Internet Access QoS On, QoS Setup
 |
UPC - 606449061314
View all Netgear WNDR3700 manuals
Add to My Manuals
Save this manual to your list of manuals |
Page 110 highlights
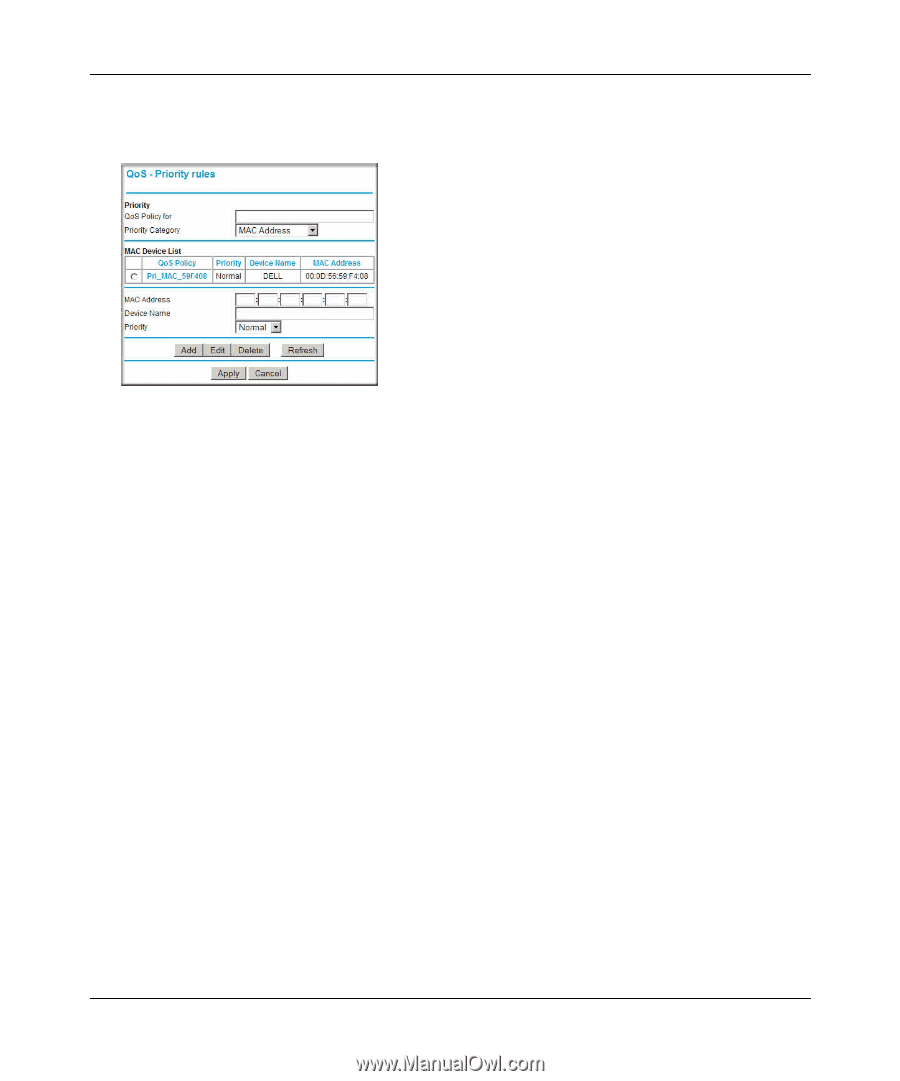
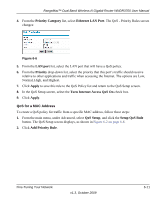
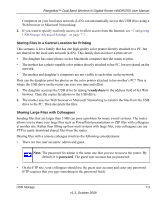
RangeMax™ Dual Band Wireless-N Gigabit Router WNDR3700 User Manual 3. From the Priority Category list, select MAC Address. The QoS - Priority Rules screen changes: Figure 6-7 4. If the device to be prioritized appears in the MAC Device List, select it. The information from the MAC Device List will be used to populate the policy name, MAC Address, and Device Name fields. If the device does not appear in the MAC Device List, click Refresh. If it still does not appear, you must complete these fields manually. 5. From the Priority drop-down list, select the priority that this device's traffic should receive relative to other applications and traffic when accessing the Internet. The options are Low, Normal, High, and Highest. 6. Click Apply to save this rule to the QoS Policy list and return to the QoS Setup screen. 7. In the QoS Setup screen, select the Turn Internet Access QoS On check box. 8. Click Apply. Editing or Deleting an Existing QoS Policy To edit or delete an existing QoS policy: 1. From the main menu, under Advanced, select QoS Setup. The QoS Setup screen displays, as shown in Figure 6-2 on page 6-8. 2. Select the radio button next to the QoS policy to be edited or deleted, and do one of the following: • Click Delete to remove the QoS policy. • Click Edit to edit the QoS policy. Follow the instructions in the preceding sections to change the policy settings. Fine-Tuning Your Network v1.3, October 2009 6-12
-
 1
1 -
2
-
3
-
4
-
5
-
6
-
7
-
8
-
9
-
10
-
11
-
12
-
13
-
14
-
15
-
16
-
17
-
18
-
19
-
20
-
21
-
22
-
23
-
24
-
25
-
26
-
27
-
28
-
29
-
30
-
31
-
32
-
33
-
34
-
35
-
36
-
37
-
38
-
39
-
40
-
41
-
42
-
43
-
44
-
45
-
46
-
47
-
48
-
49
-
50
-
51
-
52
-
53
-
54
-
55
-
56
-
57
-
58
-
59
-
60
-
61
-
62
-
63
-
64
-
65
-
66
-
67
-
68
-
69
-
70
-
71
-
72
-
73
-
74
-
75
-
76
-
77
-
78
-
79
-
80
-
81
-
82
-
83
-
84
-
85
-
86
-
87
-
88
-
89
-
90
-
91
-
92
-
93
-
94
-
95
-
96
-
97
-
98
-
99
-
100
-
101
-
102
-
103
-
104
-
 105
105 -
 106
106 -
 107
107 -
 108
108 -
 109
109 -
 110
110 -
 111
111 -
 112
112 -
 113
113 -
 114
114 -
 115
115 -
116
-
117
-
118
-
119
-
120
-
121
-
122
-
123
-
124
-
125
-
126
-
127
-
128
-
129
-
130
-
131
-
132
-
133
-
134
-
135
-
136
-
137
-
138
-
139
-
140
-
141
-
142
-
143
-
144
-
145
-
146
-
147
-
148
-
149
 |
 |