Nikon COOLPIX L120 User Manual - Page 33
Indicators Displayed in Easy auto Mode, Functions Available in Easy Auto Mode, Note on the Flash - timer
 |
View all Nikon COOLPIX L120 manuals
Add to My Manuals
Save this manual to your list of manuals |
Page 33 highlights
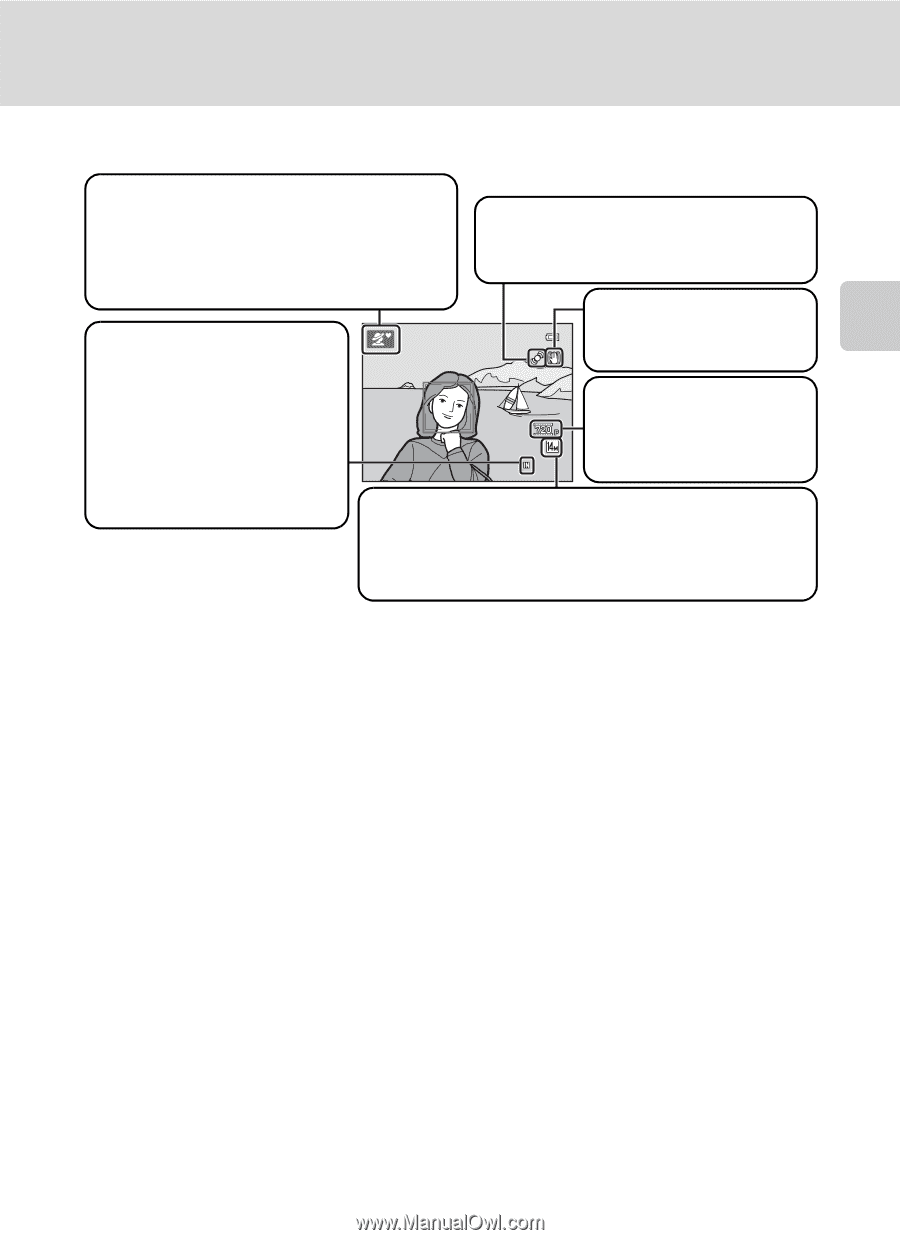
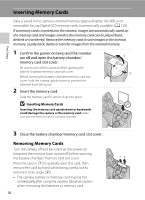
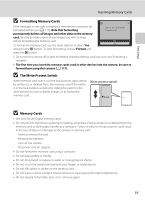
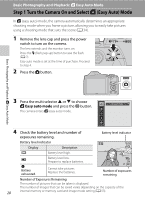
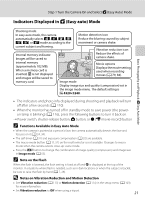
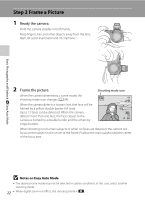
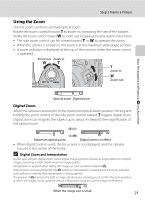
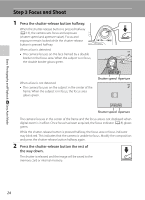
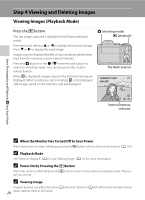
Step 1 Turn the Camera On and Select G (Easy Auto) Mode Indicators Displayed in G (Easy auto) Mode Basic Photography and Playback: G Easy Auto Mode Shooting mode In easy auto mode, the camera Motion detection icon automatically selects U, e, f, g, Reduce the blurring caused by subject h, i, or j mode according to the movement or camera shake. current subject and framing. Vibration reduction icon Internal memory indicator Images will be saved to Reduce the effects of camera shake. internal memory (approximately 102 MB). When a memory card is inserted, C is not displayed and images will be saved to Movie options Displays the movie setting used when recording 30 movies (A 79, 84). memory card. Image mode Display image size and quality (compression) set in the image mode menu. The default setting is k 4320×3240. • The indicators and photo info displayed during shooting and playback will turn off after a few seconds (A 110). • When the monitor has turned off in standby mode to save power (the poweron lamp is blinking) (A 116), press the following buttons to turn it back on. ➝ Power switch, shutter-release button, A button, or b (e movie-record) button C Functions Available in Easy Auto Mode • When the camera is pointed at a person's face, the camera automatically detects the face and focuses on it (A 24, 34). • The self-timer (A 31) and exposure compensation (A 32) are available. • The macro mode button (A 11, 51) on the multi selector is not available. Changes to macro mode when the camera selects close-up scene mode. • Press the d button to change the combination of image quality (compression) and image size in Image mode (A 53). C Note on the Flash When the flash is lowered, the flash setting is fixed at off and W is displayed at the top of the monitor. In situations where flash is needed, such as in dark locations or when the subject is backlit, be sure to raise the flash by hand (A 7, 28). D Notes on Vibration Reduction and Motion Detection • See Vibration reduction (A 113) or Motion detection (A 114) in the setup menu (A 103) for more information. • Set Vibration reduction to Off when using a tripod. 21
-
 1
1 -
2
-
3
-
4
-
5
-
6
-
7
-
8
-
9
-
10
-
11
-
12
-
13
-
14
-
15
-
16
-
17
-
18
-
19
-
20
-
21
-
22
-
23
-
24
-
25
-
26
-
27
-
 28
28 -
 29
29 -
 30
30 -
 31
31 -
 32
32 -
 33
33 -
 34
34 -
 35
35 -
 36
36 -
 37
37 -
 38
38 -
39
-
40
-
41
-
42
-
43
-
44
-
45
-
46
-
47
-
48
-
49
-
50
-
51
-
52
-
53
-
54
-
55
-
56
-
57
-
58
-
59
-
60
-
61
-
62
-
63
-
64
-
65
-
66
-
67
-
68
-
69
-
70
-
71
-
72
-
73
-
74
-
75
-
76
-
77
-
78
-
79
-
80
-
81
-
82
-
83
-
84
-
85
-
86
-
87
-
88
-
89
-
90
-
91
-
92
-
93
-
94
-
95
-
96
-
97
-
98
-
99
-
100
-
101
-
102
-
103
-
104
-
105
-
106
-
107
-
108
-
109
-
110
-
111
-
112
-
113
-
114
-
115
-
116
-
117
-
118
-
119
-
120
-
121
-
122
-
123
-
124
-
125
-
126
-
127
-
128
-
129
-
130
-
131
-
132
-
133
-
134
-
135
-
136
-
137
-
138
-
139
-
140
-
141
-
142
-
143
-
144
-
145
-
146
-
147
-
148
-
149
-
150
-
151
-
152
-
153
-
154
-
155
-
156
-
157
-
158
-
159
-
160
-
161
-
162
-
163
-
164
 |
 |