Panasonic AG-HMC70 Memory Card Camera Recorder - Page 63
White balance
 |
UPC - 092281893525
View all Panasonic AG-HMC70 manuals
Add to My Manuals
Save this manual to your list of manuals |
Page 63 highlights
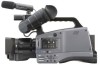
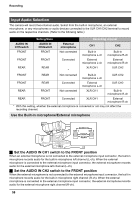
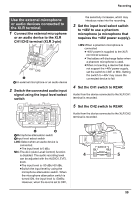
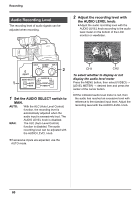
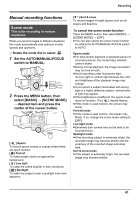
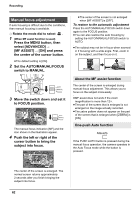
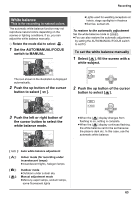
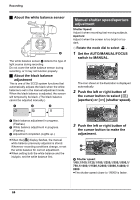
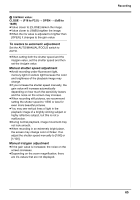
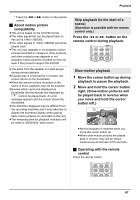
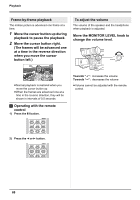
Recording White balance This is for recording in natural colors. The automatic white balance function may not reproduce natural colors depending on the scenes or lighting conditions. If so, you can adjust the white balance manually. ¬ Rotate the mode dial to select . 1 Set the AUTO/MANUAL/FOCUS switch to MANUAL. ≥Lights used for wedding receptions at hotels, stage spotlights in theatres ≥Sunrise, sunset etc. To restore to the automatic adjustment Set the white balance mode to [ AWB ]. ≥You can also restore the automatic adjustment by setting the AUTO/MANUAL/FOCUS switch to AUTO. To set the white balance manually 1 Select [ ], fill the screen with a white subject. 2/2 The icon shown in the illustration is displayed automatically. 2 Push the up button of the cursor button to select [ ]. 2 Push the up button of the cursor button to select [ ]. 2/2 3 Push the left or right button of the cursor button to select the white balance mode. ≥When the [ ] display changes from flashing to on, setting is complete. ≥When the [ ] display continues flashing, the white balance cannot be set because the place is dark etc. In this case, use the automatic white balance. [ AWB ]: Auto white balance adjustment [ ]: Indoor mode (for recording under incandescent lamps) ≥Incandescent lights, halogen lamps [ ]: Outdoor mode ≥Outdoors under a clear sky [ ]: Manual adjustment mode ≥Mercury-vapor lamps, sodium lamps, some fluorescent lights 63
-
 1
1 -
2
-
3
-
4
-
5
-
6
-
7
-
8
-
9
-
10
-
11
-
12
-
13
-
14
-
15
-
16
-
17
-
18
-
19
-
20
-
21
-
22
-
23
-
24
-
25
-
26
-
27
-
28
-
29
-
30
-
31
-
32
-
33
-
34
-
35
-
36
-
37
-
38
-
39
-
40
-
41
-
42
-
43
-
44
-
45
-
46
-
47
-
48
-
49
-
50
-
51
-
52
-
53
-
54
-
55
-
56
-
57
-
 58
58 -
 59
59 -
 60
60 -
 61
61 -
 62
62 -
 63
63 -
 64
64 -
 65
65 -
 66
66 -
 67
67 -
 68
68 -
69
-
70
-
71
-
72
-
73
-
74
-
75
-
76
-
77
-
78
-
79
-
80
-
81
-
82
-
83
-
84
-
85
-
86
-
87
-
88
-
89
-
90
-
91
-
92
-
93
-
94
-
95
-
96
-
97
-
98
-
99
-
100
-
101
-
102
-
103
-
104
-
105
-
106
-
107
-
108
-
109
-
110
-
111
-
112
-
113
-
114
-
115
-
116
-
117
-
118
-
119
-
120
-
121
-
122
-
123
-
124
 |
 |
