Panasonic AG-HMC70 Memory Card Camera Recorder - Page 86
With a printer (PictBridge), PAPER SIZE].
 |
UPC - 092281893525
View all Panasonic AG-HMC70 manuals
Add to My Manuals
Save this manual to your list of manuals |
Page 86 highlights
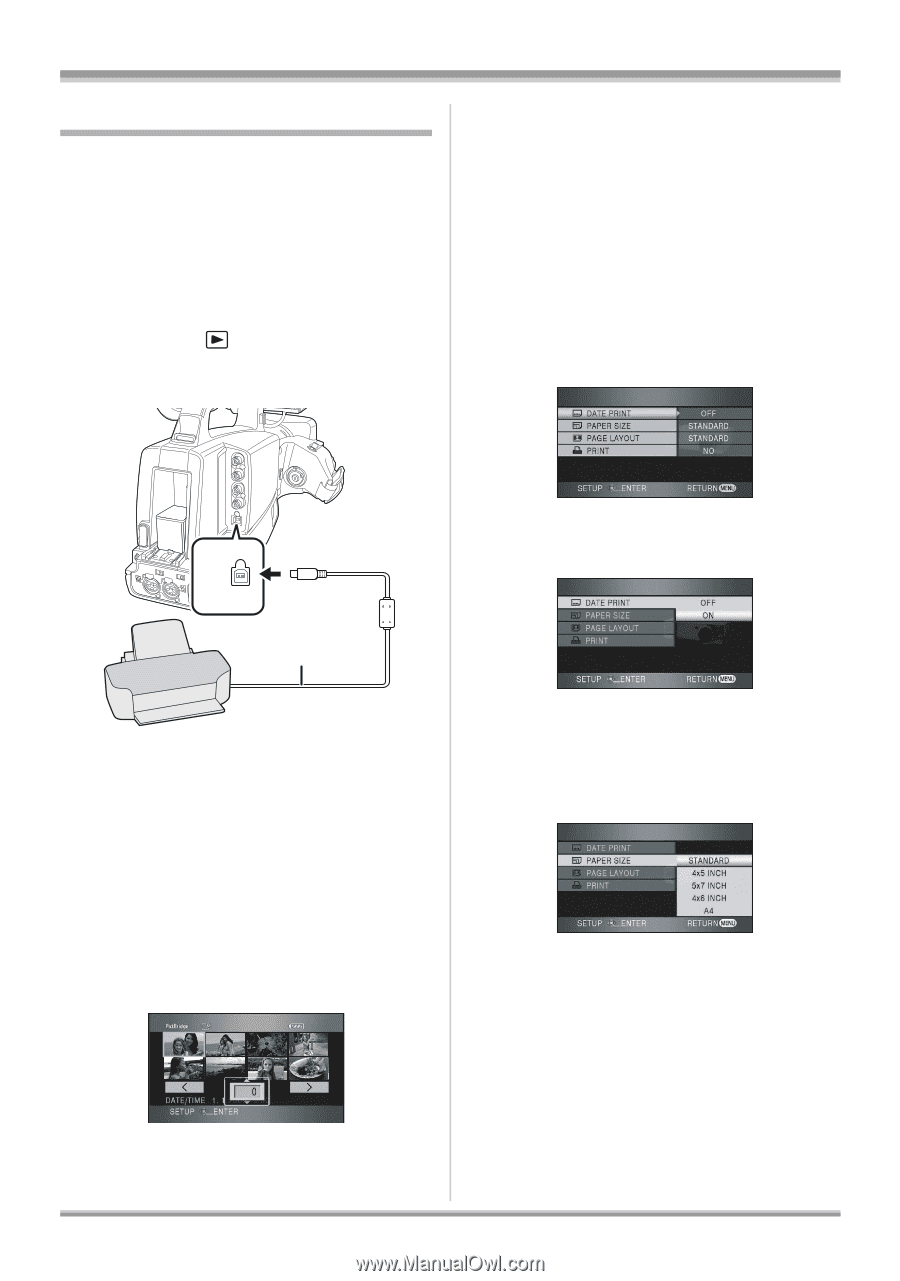
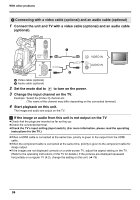
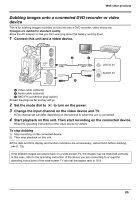
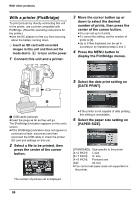
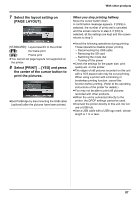
With other products With a printer (PictBridge) To print pictures by directly connecting this unit to the printer, use a printer compatible with PictBridge. (Read the operating instructions for the printer.) ≥Use the AC adaptor to free you from worrying about the battery running down. ¬ Insert an SD card with recorded images in this unit and then set the mode dial to to turn on the power. 1 Connect this unit and a printer. 3 Move the cursor button up or down to select the desired number of prints, then press the center of the cursor button. ≥You can set up to 9 prints. ≥To cancel the setting, set the number of prints to [0]. ≥Up to 8 files displayed can be set in succession by repeating steps 2 and 3. 4 Press the MENU button to display the PictBridge menus. 5 Select the date print setting on [DATE PRINT]. USB 2.0 A USB cable (optional) ≥Insert the plugs as far as they will go. The [PictBridge] indication appears on this unit's screen. ≥If the [PictBridge] indication does not appear or continues to flash, disconnect and then reconnect the USB cable or check the printer, SD card and settings on this unit. 2 Select a file to be printed, then press the center of the cursor button. ≥If the printer is not capable of date printing, this setting is unavailable. 6 Select the paper size setting on [PAPER SIZE]. [STANDARD]: Size specific to the printer [4k5 INCH]: [5k7 INCH]: [4k6 INCH]: L size 2L size Postcard size [A4]: A4 size ≥You cannot set paper sizes not supported on the printer. The number of pictures set is displayed. 86
-
 1
1 -
2
-
3
-
4
-
5
-
6
-
7
-
8
-
9
-
10
-
11
-
12
-
13
-
14
-
15
-
16
-
17
-
18
-
19
-
20
-
21
-
22
-
23
-
24
-
25
-
26
-
27
-
28
-
29
-
30
-
31
-
32
-
33
-
34
-
35
-
36
-
37
-
38
-
39
-
40
-
41
-
42
-
43
-
44
-
45
-
46
-
47
-
48
-
49
-
50
-
51
-
52
-
53
-
54
-
55
-
56
-
57
-
58
-
59
-
60
-
61
-
62
-
63
-
64
-
65
-
66
-
67
-
68
-
69
-
70
-
71
-
72
-
73
-
74
-
75
-
76
-
77
-
78
-
79
-
80
-
 81
81 -
 82
82 -
 83
83 -
 84
84 -
 85
85 -
 86
86 -
 87
87 -
 88
88 -
 89
89 -
 90
90 -
 91
91 -
92
-
93
-
94
-
95
-
96
-
97
-
98
-
99
-
100
-
101
-
102
-
103
-
104
-
105
-
106
-
107
-
108
-
109
-
110
-
111
-
112
-
113
-
114
-
115
-
116
-
117
-
118
-
119
-
120
-
121
-
122
-
123
-
124
 |
 |