Panasonic AG-HMC70 Memory Card Camera Recorder - Page 74
Protecting scenes
 |
UPC - 092281893525
View all Panasonic AG-HMC70 manuals
Add to My Manuals
Save this manual to your list of manuals |
Page 74 highlights
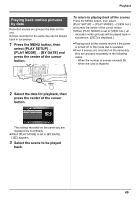
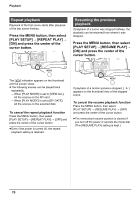
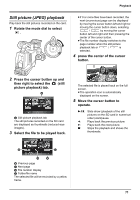
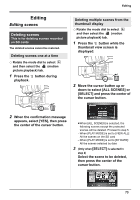
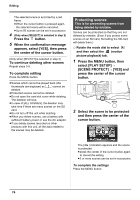
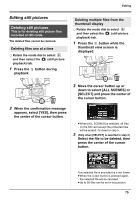
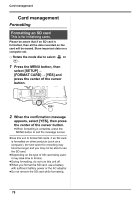
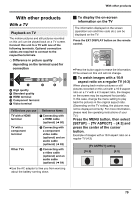
Editing The selected scene is encircled by a red frame. ≥When the cursor button is pressed again, the selected scene will be canceled. ≥Up to 50 scenes can be set in succession. 4 (Only when [SELECT] is selected in step 2) Press the button. 5 When the confirmation message appears, select [YES], then press the center of the cursor button. (Only when [SELECT] is selected in step 2) To continue deleting other scenes Repeat steps 3-5. To complete editing Press the MENU button. ≥Scenes which cannot be played back (the thumbnails are displayed as ) cannot be deleted. ≥Protected scenes cannot be deleted. ≥Do not open the card slot cover while deleting. The deletion will stop. ≥In case of [ALL SCENES], the deletion may take time if there are many scenes on the SD card. ≥Do not turn off this unit while deleting. ≥When you delete scenes, use a battery with sufficient battery power or use the AC adaptor. ≥If you delete scenes recorded on other products with this unit, all the data related to the scenes may be deleted. Protecting scenes This is for preventing scenes from being deleted by mistake. Scenes can be protected so that they are not deleted by mistake. (Even if you protect some scenes on an SD card, formatting the SD card will delete them.) ¬ Rotate the mode dial to select and then select the (motion picture playback) tab. 1 Press the MENU button, then select [PLAY SETUP] # [SCENE PROTECT] # [YES] and press the center of the cursor button. 2 Select the scene to be protected and then press the center of the cursor button. The [ ] indication appears and the scene is protected. ≥press the center of the cursor button again to cancel the setting. ≥2 or more scenes can be set in succession. To complete the settings Press the MENU button. 74
-
 1
1 -
2
-
3
-
4
-
5
-
6
-
7
-
8
-
9
-
10
-
11
-
12
-
13
-
14
-
15
-
16
-
17
-
18
-
19
-
20
-
21
-
22
-
23
-
24
-
25
-
26
-
27
-
28
-
29
-
30
-
31
-
32
-
33
-
34
-
35
-
36
-
37
-
38
-
39
-
40
-
41
-
42
-
43
-
44
-
45
-
46
-
47
-
48
-
49
-
50
-
51
-
52
-
53
-
54
-
55
-
56
-
57
-
58
-
59
-
60
-
61
-
62
-
63
-
64
-
65
-
66
-
67
-
68
-
 69
69 -
 70
70 -
 71
71 -
 72
72 -
 73
73 -
 74
74 -
 75
75 -
 76
76 -
 77
77 -
 78
78 -
 79
79 -
80
-
81
-
82
-
83
-
84
-
85
-
86
-
87
-
88
-
89
-
90
-
91
-
92
-
93
-
94
-
95
-
96
-
97
-
98
-
99
-
100
-
101
-
102
-
103
-
104
-
105
-
106
-
107
-
108
-
109
-
110
-
111
-
112
-
113
-
114
-
115
-
116
-
117
-
118
-
119
-
120
-
121
-
122
-
123
-
124
 |
 |
