Panasonic AG-HMC70 Memory Card Camera Recorder - Page 84
Change the input channel on the TV., Start playback on this unit.
 |
UPC - 092281893525
View all Panasonic AG-HMC70 manuals
Add to My Manuals
Save this manual to your list of manuals |
Page 84 highlights
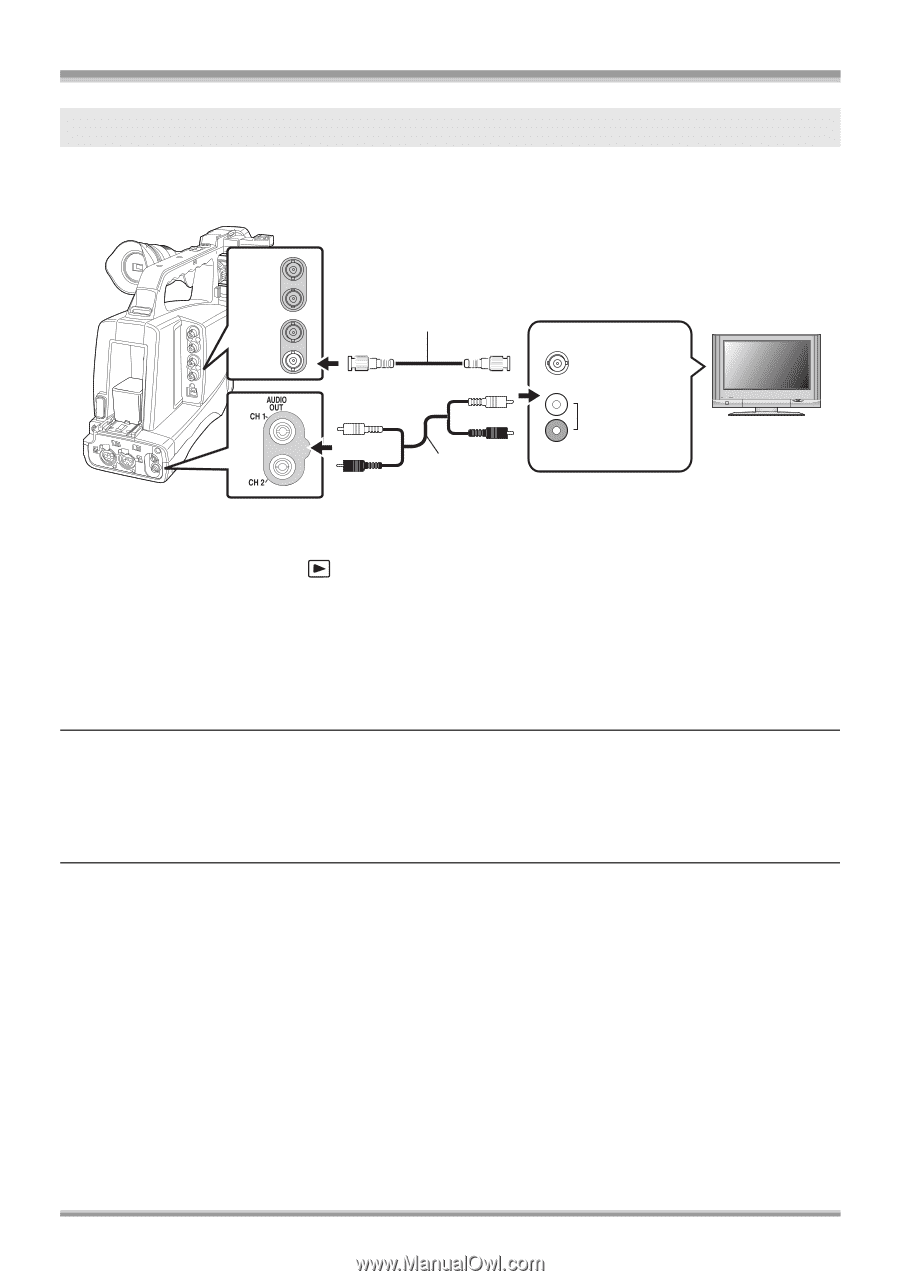
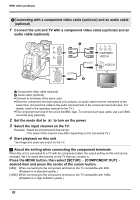
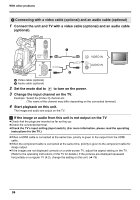
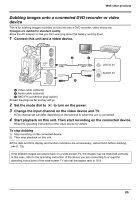
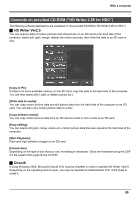
With other products 3 Connecting with a video cable (optional) and an audio cable (optional) 1 Connect the unit and TV with a video cable (optional) and an audio cable (optional). VIDEO OUT VIDEO IN AUDIO IN A Video cable (optional) B Audio cable (optional) 2 Set the mode dial to to turn on the power. 3 Change the input channel on the TV. Example: Select the [Video 2] channel etc. (The name of the channel may differ depending on the connected terminal.) 4 Start playback on this unit. The image and audio are output on the TV. ª If the image or audio from this unit is not output on the TV ≥Check that the plugs are inserted as far as they go. ≥Check the connected terminal. ≥Check the TV's input setting (input switch). (For more information, please read the operating instructions for the TV.) ≥When a HDMI cable is connected at the same time, priority is given to the output from the HDMI cable. ≥When the component cable is connected at the same time, priority is given to the component cable for image output. ≥If the images are not displayed correctly on a wide-screen TV, adjust the aspect setting on the TV. (Refer to the operating instructions of the TV for details.) If the pictures are displayed squeezed horizontally on a regular TV (4:3), change the setting on this unit. (l 79) 84
-
 1
1 -
2
-
3
-
4
-
5
-
6
-
7
-
8
-
9
-
10
-
11
-
12
-
13
-
14
-
15
-
16
-
17
-
18
-
19
-
20
-
21
-
22
-
23
-
24
-
25
-
26
-
27
-
28
-
29
-
30
-
31
-
32
-
33
-
34
-
35
-
36
-
37
-
38
-
39
-
40
-
41
-
42
-
43
-
44
-
45
-
46
-
47
-
48
-
49
-
50
-
51
-
52
-
53
-
54
-
55
-
56
-
57
-
58
-
59
-
60
-
61
-
62
-
63
-
64
-
65
-
66
-
67
-
68
-
69
-
70
-
71
-
72
-
73
-
74
-
75
-
76
-
77
-
78
-
 79
79 -
 80
80 -
 81
81 -
 82
82 -
 83
83 -
 84
84 -
 85
85 -
 86
86 -
 87
87 -
 88
88 -
 89
89 -
90
-
91
-
92
-
93
-
94
-
95
-
96
-
97
-
98
-
99
-
100
-
101
-
102
-
103
-
104
-
105
-
106
-
107
-
108
-
109
-
110
-
111
-
112
-
113
-
114
-
115
-
116
-
117
-
118
-
119
-
120
-
121
-
122
-
123
-
124
 |
 |