Panasonic AG-HMC70 Memory Card Camera Recorder - Page 85
Dubbing images onto a connected DVD recorder or video device
 |
UPC - 092281893525
View all Panasonic AG-HMC70 manuals
Add to My Manuals
Save this manual to your list of manuals |
Page 85 highlights
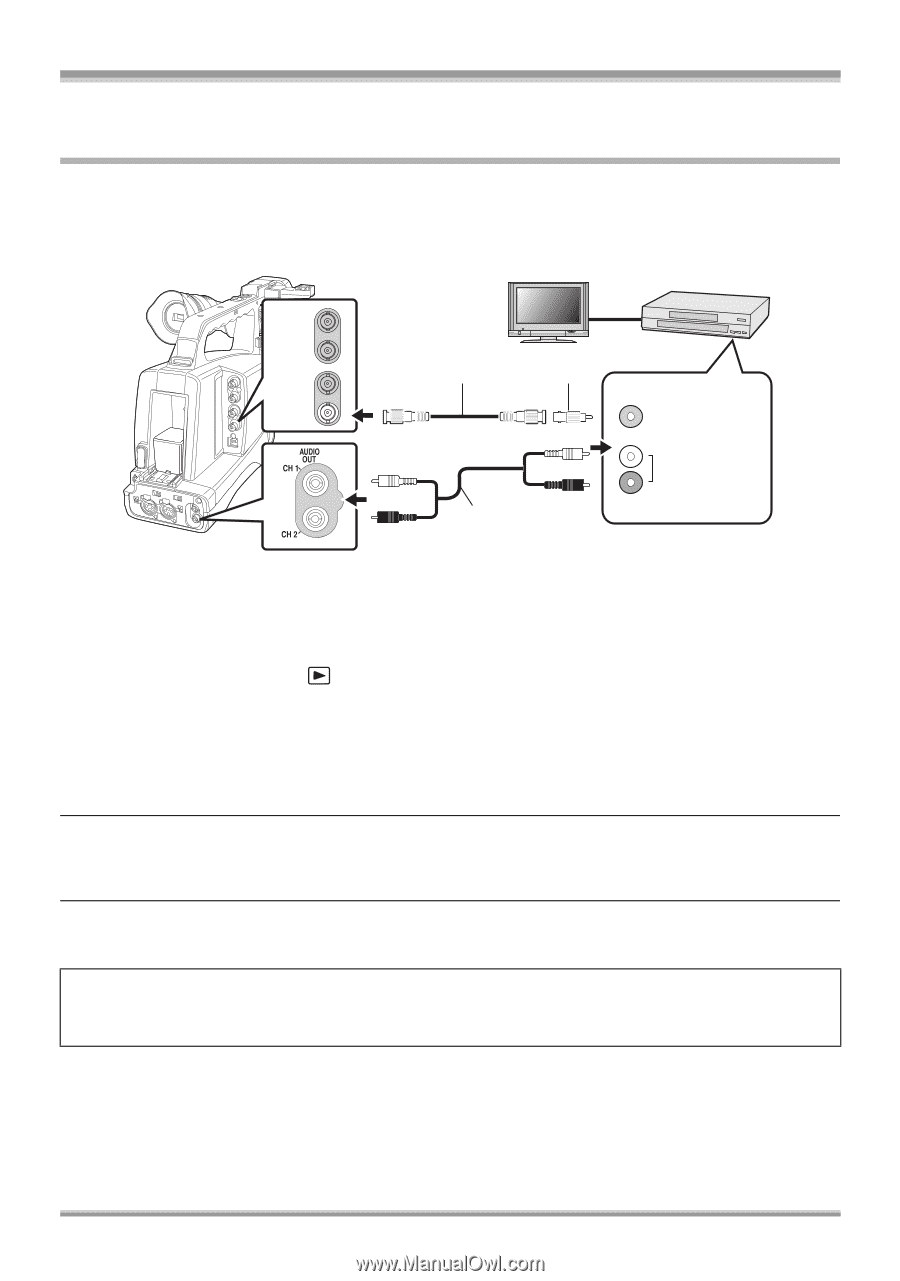
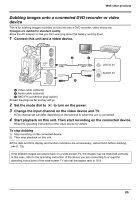
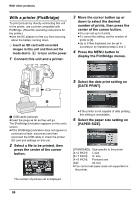
With other products Dubbing images onto a connected DVD recorder or video device This is for dubbing images recorded on this unit onto a DVD recorder, video device etc. ≥Images are dubbed in standard quality. ≥Use the AC adaptor to free you from worrying about the battery running down. 1 Connect this unit and a video device. VIDEO OUT VIDEO IN AUDIO IN A Video cable (optional) B Audio cable (optional) C BNC-Pin conversion plug (option) ≥Insert the plugs as far as they will go. 2 Set the mode dial to to turn on the power. 3 Change the input channel on the video device and TV. ≥The channel set will differ depending on the terminal to which the unit is connected. 4 Start playback on this unit. Then start recording on the connected device. ≥See the operating instructions of the video device for details. To stop dubbing 1) Stop recording on the connected device. 2) Then stop playback on this unit. ≥If the date and time display and function indication are unnecessary, cancel them before dubbing. (l 41, 79) If the dubbed images are played back on a wide-screen TV, the images may be stretched vertically. In this case, refer to the operating instruction of the device you are connecting to or read the operating instructions of the wide-screen TV and set the aspect ratio to 16:9. 85
-
 1
1 -
2
-
3
-
4
-
5
-
6
-
7
-
8
-
9
-
10
-
11
-
12
-
13
-
14
-
15
-
16
-
17
-
18
-
19
-
20
-
21
-
22
-
23
-
24
-
25
-
26
-
27
-
28
-
29
-
30
-
31
-
32
-
33
-
34
-
35
-
36
-
37
-
38
-
39
-
40
-
41
-
42
-
43
-
44
-
45
-
46
-
47
-
48
-
49
-
50
-
51
-
52
-
53
-
54
-
55
-
56
-
57
-
58
-
59
-
60
-
61
-
62
-
63
-
64
-
65
-
66
-
67
-
68
-
69
-
70
-
71
-
72
-
73
-
74
-
75
-
76
-
77
-
78
-
79
-
 80
80 -
 81
81 -
 82
82 -
 83
83 -
 84
84 -
 85
85 -
 86
86 -
 87
87 -
 88
88 -
 89
89 -
 90
90 -
91
-
92
-
93
-
94
-
95
-
96
-
97
-
98
-
99
-
100
-
101
-
102
-
103
-
104
-
105
-
106
-
107
-
108
-
109
-
110
-
111
-
112
-
113
-
114
-
115
-
116
-
117
-
118
-
119
-
120
-
121
-
122
-
123
-
124
 |
 |