Panasonic AG-HMC70 Memory Card Camera Recorder - Page 82
COMPONENT OUT], About the setting when connecting the component terminals
 |
UPC - 092281893525
View all Panasonic AG-HMC70 manuals
Add to My Manuals
Save this manual to your list of manuals |
Page 82 highlights
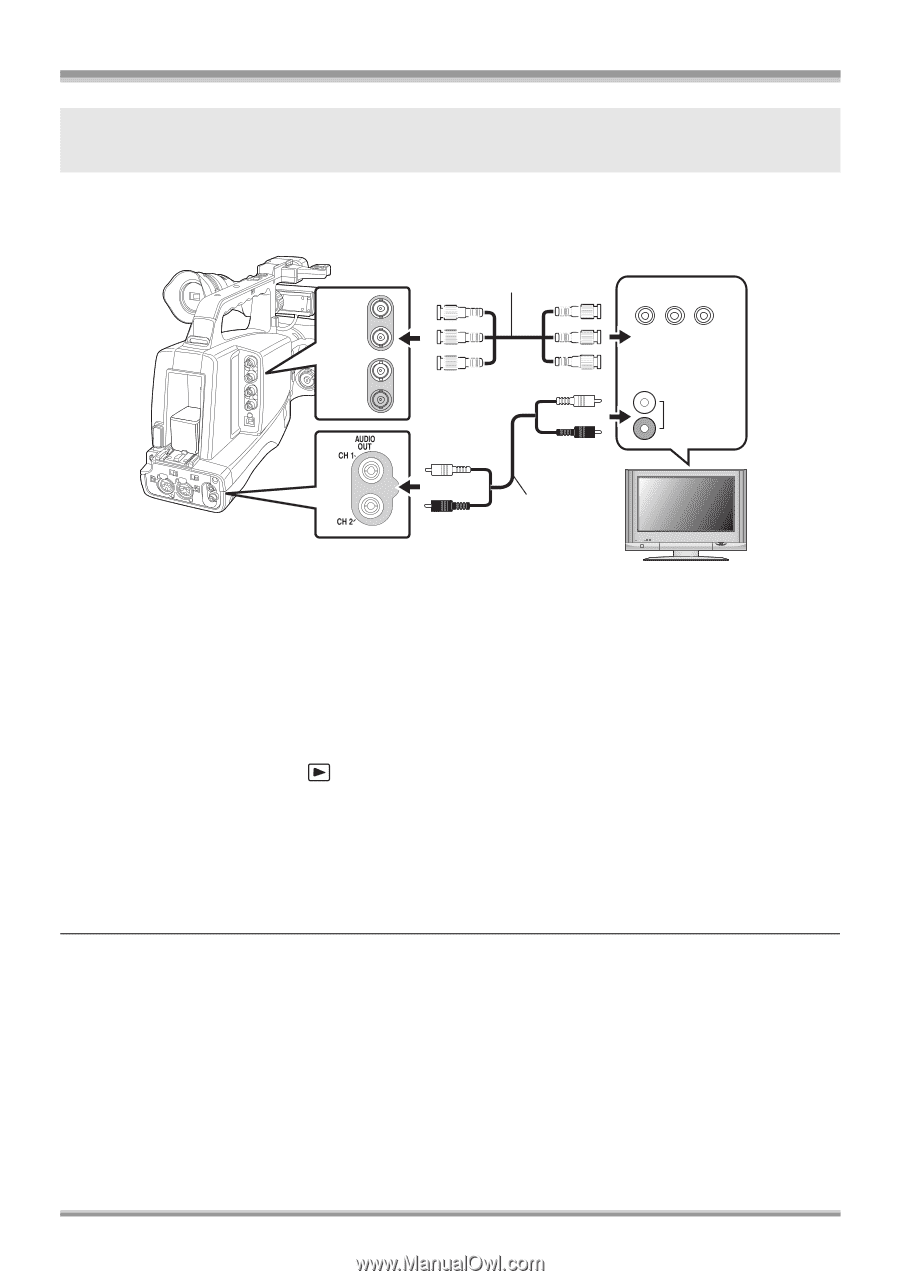
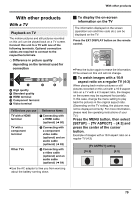
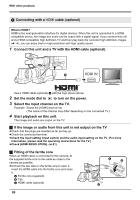
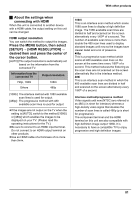
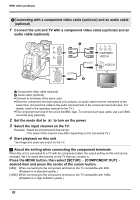
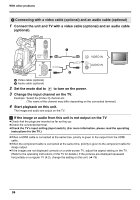
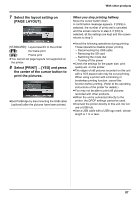
With other products 2Connecting with a component video cable (optional) and an audio cable (optional) 1 Connect the unit and TV with a component video cable (optional) and an audio cable (optional). Y Y PB PR PB COMPONENT PR VIDEO IN AUDIO IN A Component video cable (optional) B Audio cable (optional) ≥Connect to terminals of the same color. ≥Since the component terminal outputs only pictures, an audio cable must be connected at the same time. (Connect the cable to the audio input terminal of the component terminal input. For details, refer to the operation manual for the TV.) ≥The component terminal of the unit is the BNC type. To connect a pin-type cable, use a pin-BNC converter plug (optional). 2 Set the mode dial to to turn on the power. 3 Select the input channel on the TV. Example: Select the [Component] channel etc. (The name of the channel may differ depending on the connected TV.) 4 Start playback on this unit. The image and audio are output on the TV. ª About the setting when connecting the component terminals When this unit is connected to a TV with the component cable, the output setting on this unit can be changed. Set it to match the terminal on the TV that you connect to. Press the MENU button, then select [SETUP] # [COMPONENT OUT] # desired item and press the center of the cursor button. [480i]: When connecting to the component terminal on the TV compatible with 480i. (Playback is in standard quality.) [1080i]: When connecting to the component terminal on the TV compatible with 1080i. (Playback is in high definition quality.) 82
-
 1
1 -
2
-
3
-
4
-
5
-
6
-
7
-
8
-
9
-
10
-
11
-
12
-
13
-
14
-
15
-
16
-
17
-
18
-
19
-
20
-
21
-
22
-
23
-
24
-
25
-
26
-
27
-
28
-
29
-
30
-
31
-
32
-
33
-
34
-
35
-
36
-
37
-
38
-
39
-
40
-
41
-
42
-
43
-
44
-
45
-
46
-
47
-
48
-
49
-
50
-
51
-
52
-
53
-
54
-
55
-
56
-
57
-
58
-
59
-
60
-
61
-
62
-
63
-
64
-
65
-
66
-
67
-
68
-
69
-
70
-
71
-
72
-
73
-
74
-
75
-
76
-
 77
77 -
 78
78 -
 79
79 -
 80
80 -
 81
81 -
 82
82 -
 83
83 -
 84
84 -
 85
85 -
 86
86 -
 87
87 -
88
-
89
-
90
-
91
-
92
-
93
-
94
-
95
-
96
-
97
-
98
-
99
-
100
-
101
-
102
-
103
-
104
-
105
-
106
-
107
-
108
-
109
-
110
-
111
-
112
-
113
-
114
-
115
-
116
-
117
-
118
-
119
-
120
-
121
-
122
-
123
-
124
 |
 |