Panasonic WJRT416 WJRT416 User Guide - Page 13
Screenshot 5, Step 5
 |
View all Panasonic WJRT416 manuals
Add to My Manuals
Save this manual to your list of manuals |
Page 13 highlights
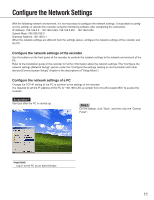
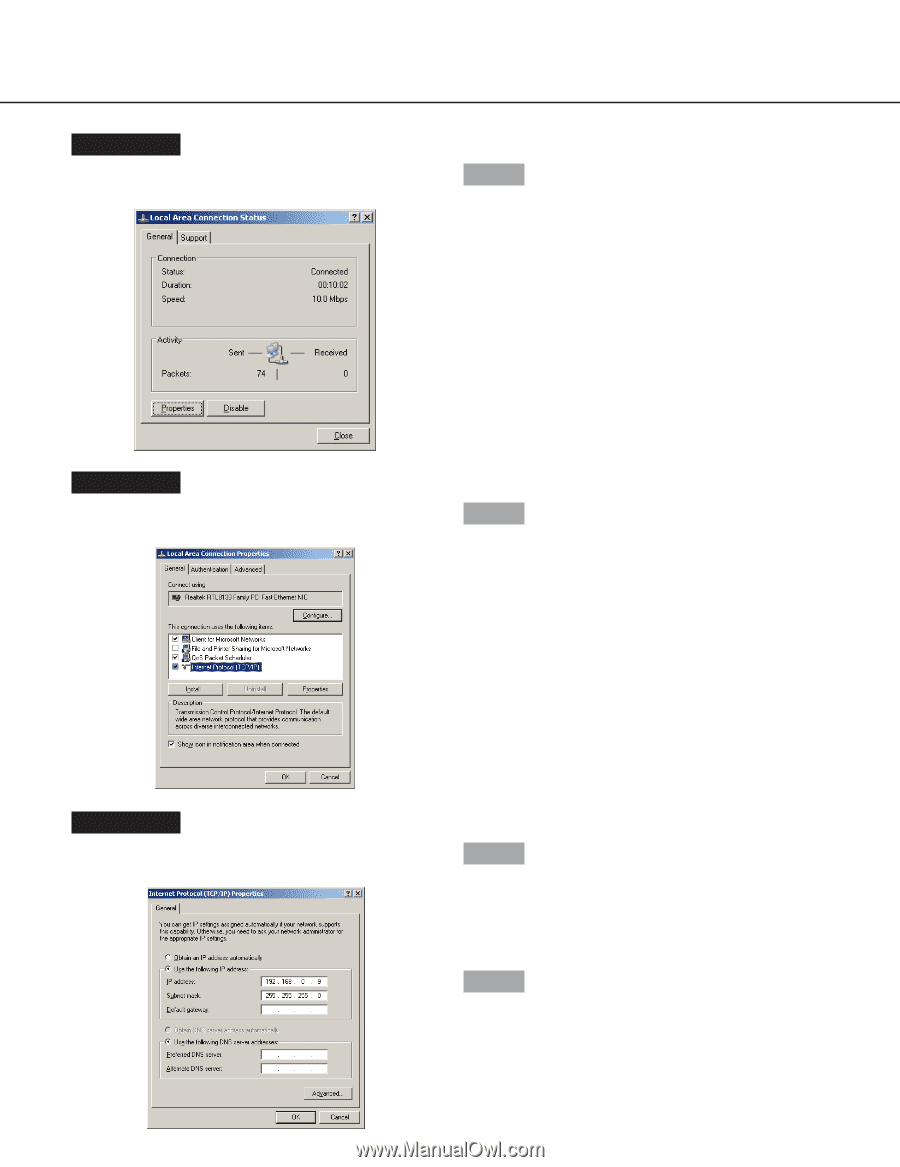
Screenshot 5 The "Local Area Connection Status" window will be displayed. Step 5 Click "Properties". Screenshot 6 The "Local Area Connection Properties" window will be displayed. Step 6 Click "Internet Protocol (TCP/IP)", and then click "Properties". Screenshot 7 The "Properties" window of "Internet Protocol (TCP/IP)" will be displayed. Step 7 Click "Use the following IP address" and enter the IP address and the subnet mask as follows; • IP Address: 192.168.0.9 • Subnet Mask: 255.255.255.0 Step 8 Click the "OK" button and close the window. 13
-
 1
1 -
2
-
3
-
4
-
5
-
6
-
7
-
 8
8 -
 9
9 -
 10
10 -
 11
11 -
 12
12 -
 13
13 -
 14
14 -
 15
15 -
 16
16 -
 17
17 -
 18
18 -
19
-
20
-
21
-
22
-
23
-
24
-
25
-
26
-
27
-
28
-
29
-
30
-
31
-
32
-
33
-
34
-
35
-
36
-
37
-
38
-
39
-
40
-
41
-
42
-
43
-
44
-
45
-
46
-
47
-
48
-
49
-
50
-
51
-
52
-
53
-
54
-
55
-
56
-
57
-
58
-
59
 |
 |
13
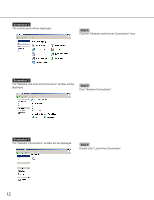
Screenshot 5
The "Local Area Connection Status" window will be dis-
played.
Step 5
Click "Properties".
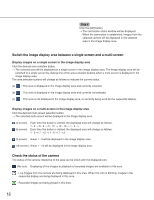
Screenshot 6
The "Local Area Connection Properties" window will be
displayed.
Step 6
Click "Internet Protocol (TCP/IP)", and then click
"Properties".
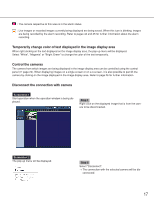
Screenshot 7
The "Properties" window of "Internet Protocol (TCP/IP)"
will be displayed.
Step 7
Click "Use the following IP address" and enter the IP
address and the subnet mask as follows;
•
IP Address: 192.168.0.9
•
Subnet Mask: 255.255.255.0
Step 8
Click the "OK" button and close the window.